Thanks for visiting our June product updates blog. Take a look at what eformsign has been up to this month.
1. [New] Share documents with other members
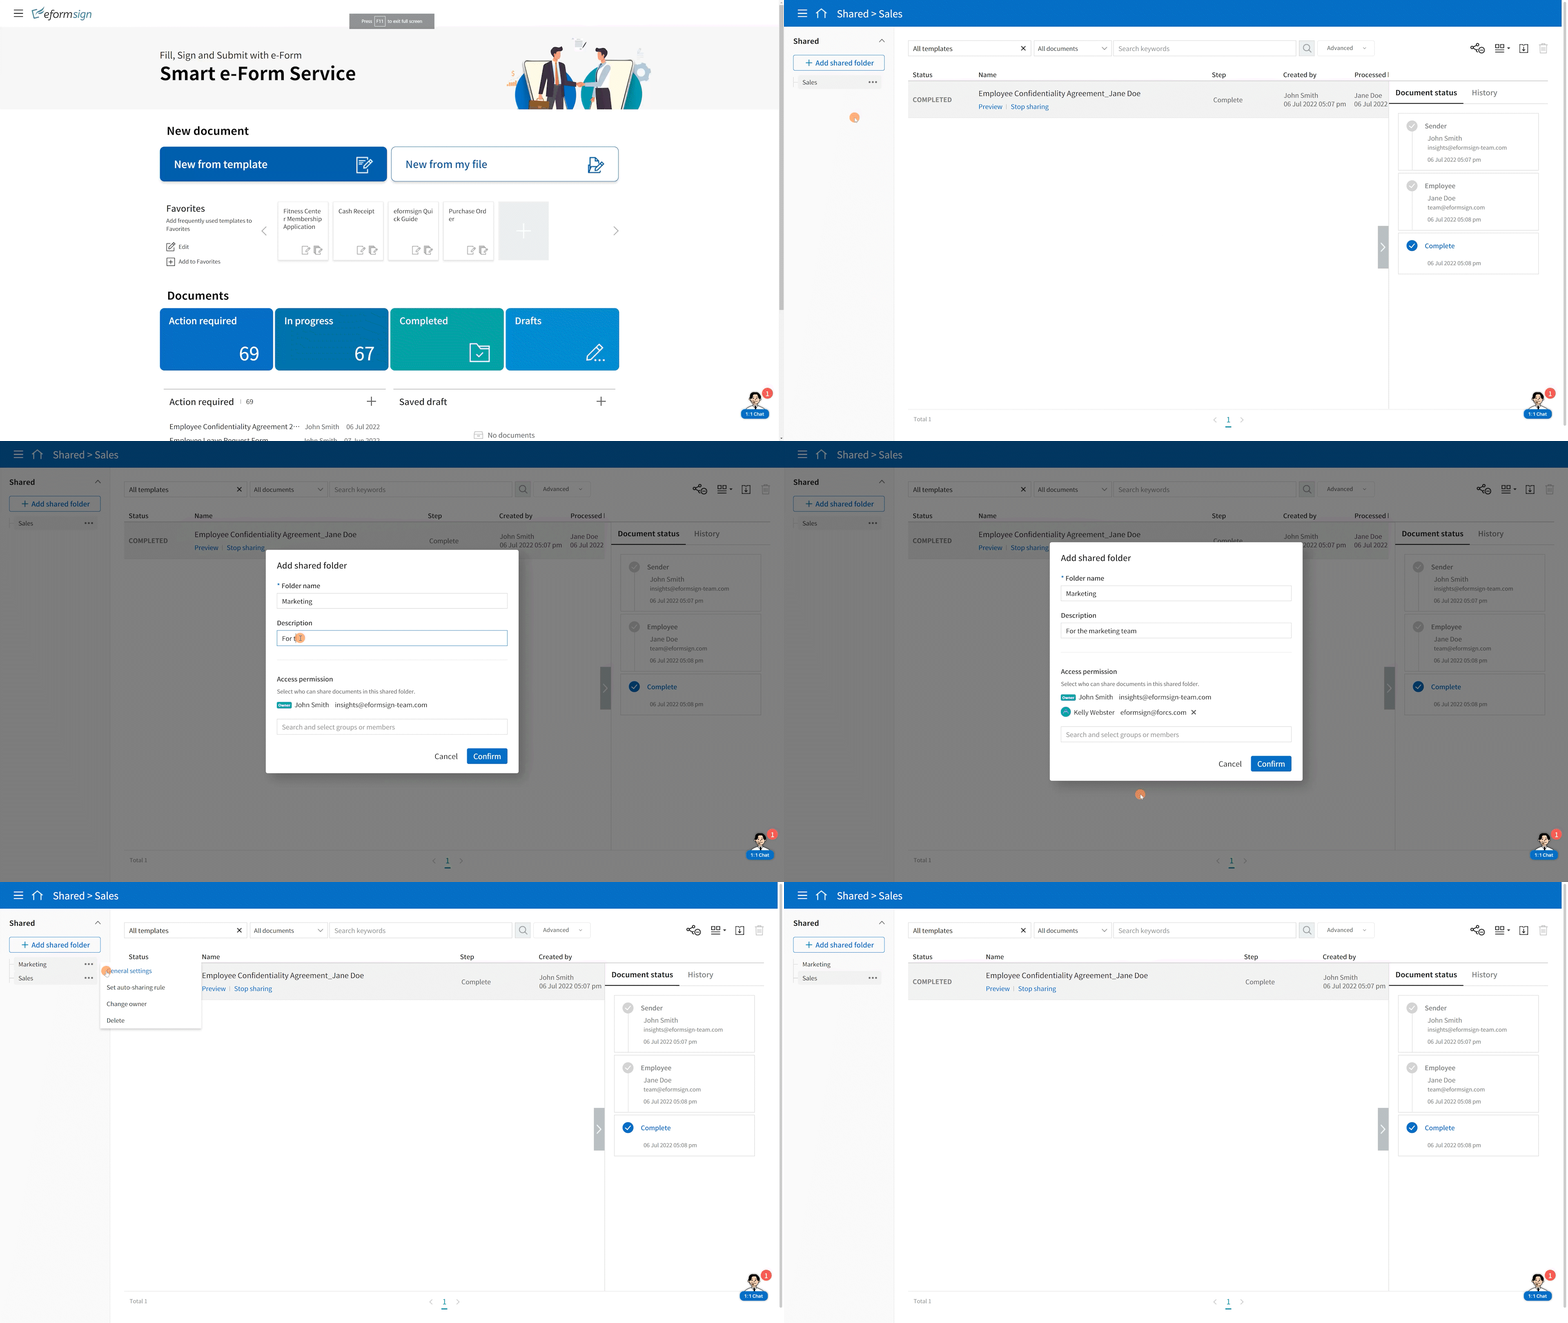
We’ve added the shared folder feature for sharing documents with other members. Members can use the shared folder feature in the newly created Shared menu to create and manage shared folders.
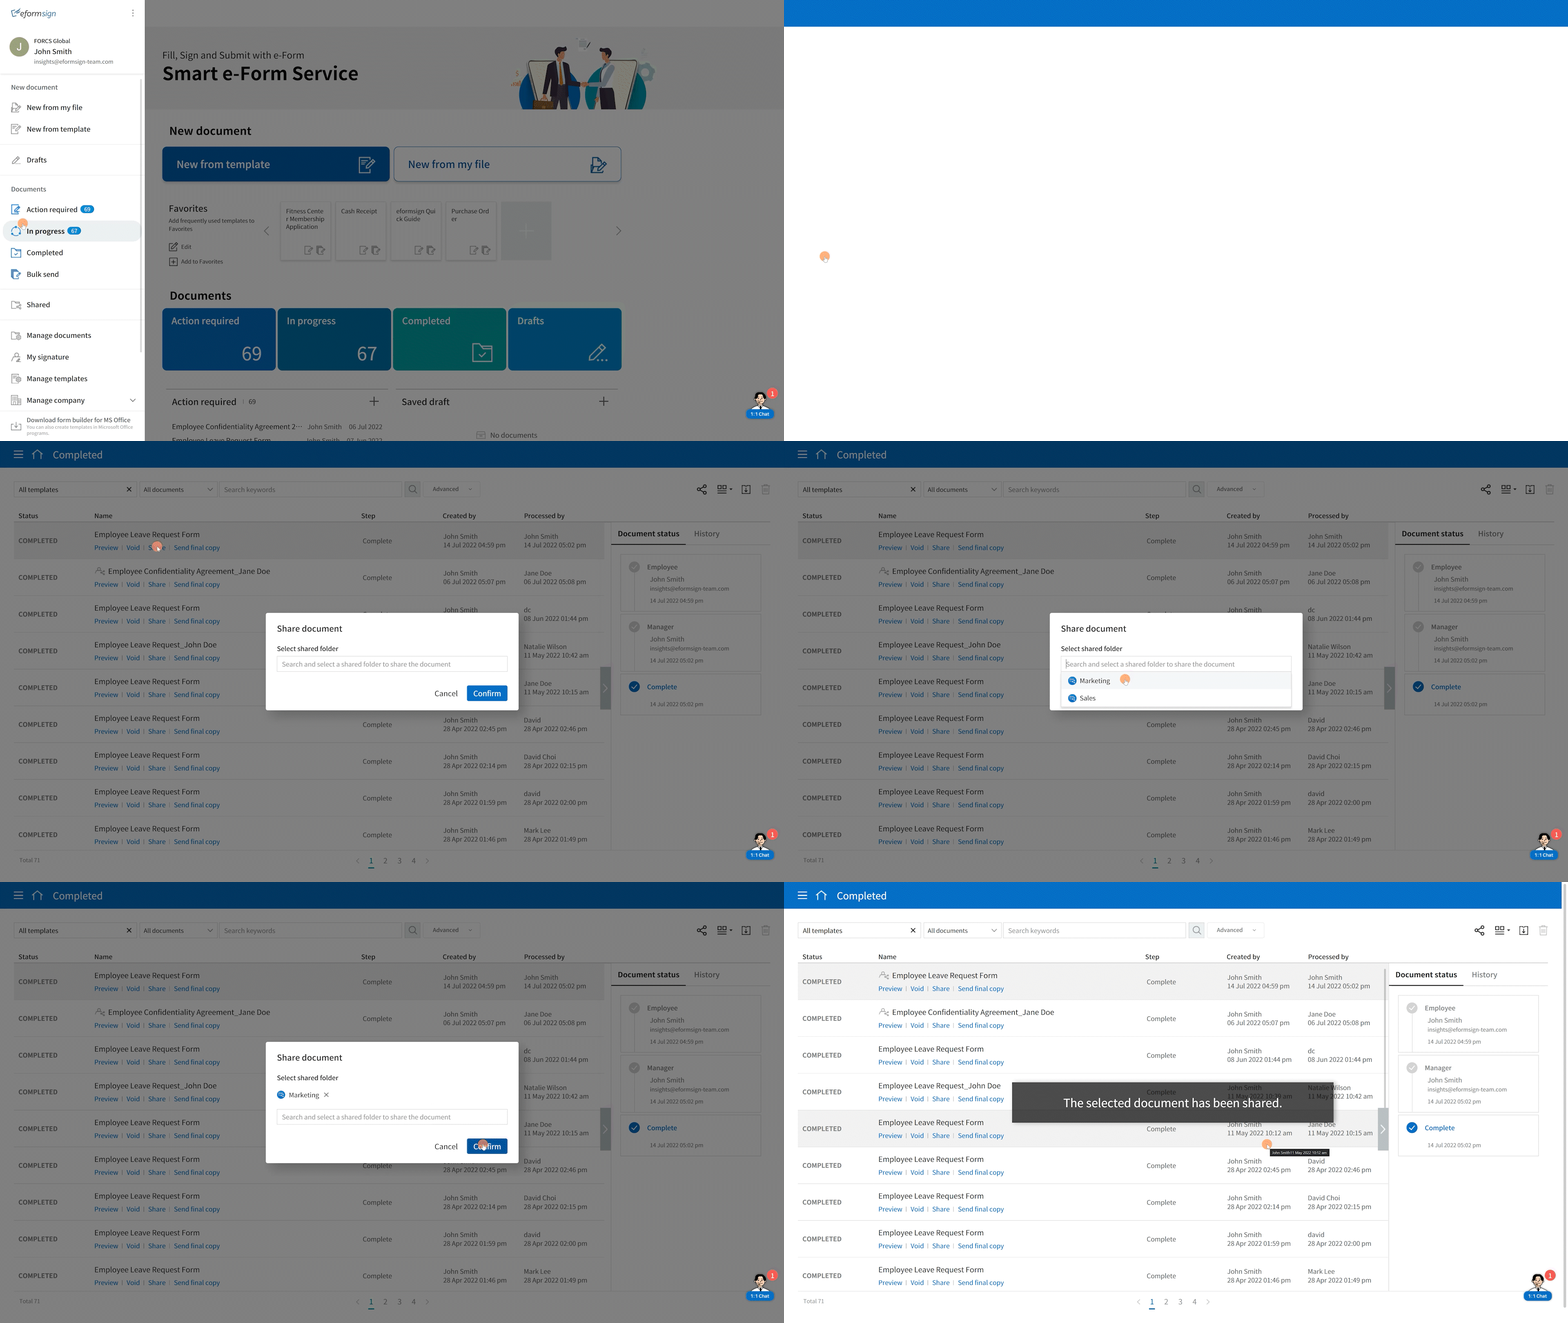
Members can also add documents to a shared folder of their choice by selecting a document in the Action required, In progress, or Completed inbox.
How to create a shared folder:
- First, open the sidebar and click the Shared menu.
- Click the Add shared folder button to create a shared folder. You can name the folder, add a description to it, and select members or groups who can access the folder. The member who creates a shared folder automatically become its owner.
How to add a document to a shared folder:
- Go to a document inbox (Action required, In progress, or Completed) and click ‘Shared’ under a document name to add a document to a shared folder of your choice.
How to set the auto-sharing rule:
1. Click the see more (⋯) button next to the desired shared folder and click the Set auto-sharing rule option.
2. Set the rule for auto-sharing documents in the pop-up displayed. Adding words under Words included in the document title automatically adds the documents containing the words in the document title. Selecting a template under Document type automatically adds the documents created from the template in the shared folder.
| ❗ Note that you can configure the settings of each shared folder by clicking the see more (⋯) button next to a shared folder and selecting an option such as changing the owner of a shared folder, deleting a shared folder, and setting an auto-sharing rule for a shared folder. |
|---|
2. [New] Manage all permissions in a single page
You can now manage company, template, and document permissions all in a single page called Manage permissions.
This new page replaces the existing Document manager settings page and is accessible only by the company administrator.
The following are the permissions the company administrator can set by manager type.
Company manager
- View, add, and remove company managers.
Template manager
- View, add, and delete template managers.
- Transfer ownership of templates owned by a template manager to another template manager.
Document manager
- Access to the same permissions available in the existing Document Manager settings page.
| ❗ Note that you still will be able to activate and deactivate company managers and template managers in the Manage company > Manage members menu. |
|---|
3. [New] Upload multiple files for your document and hide files from recipients
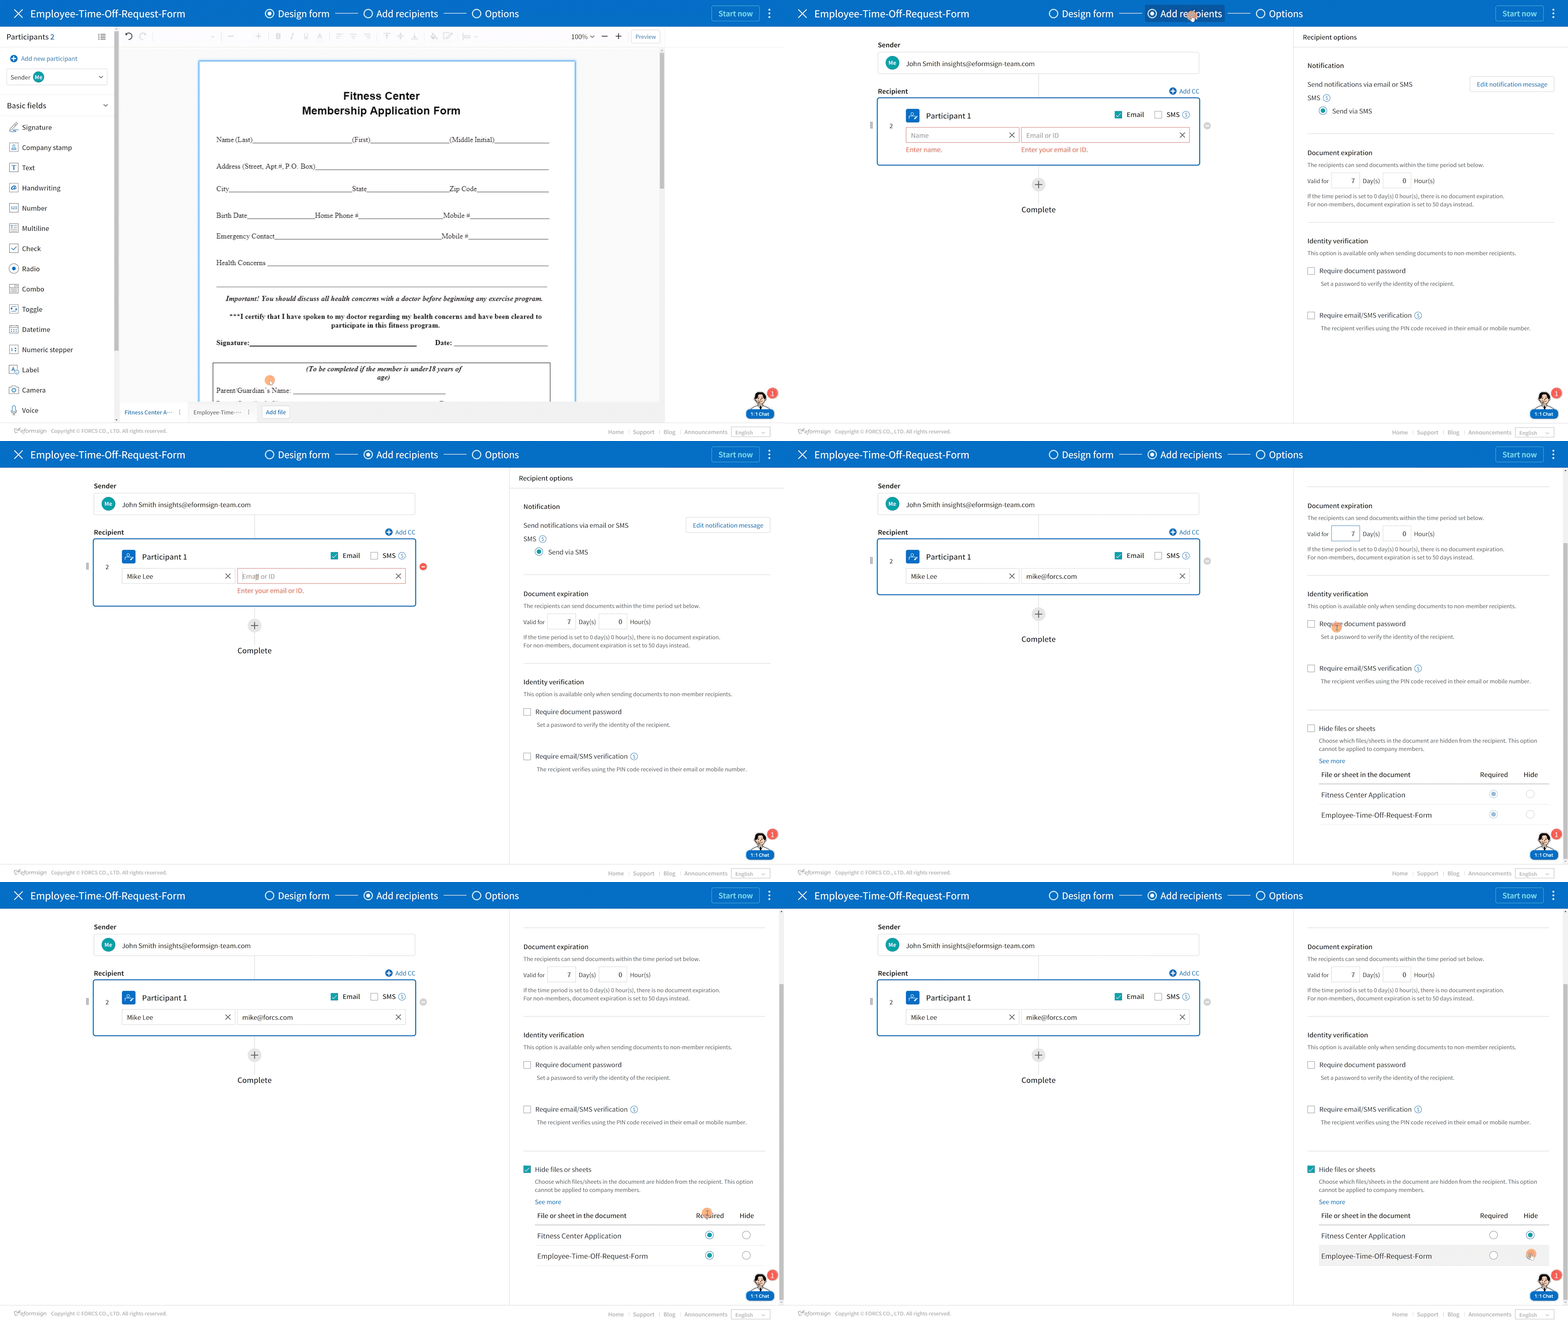
You can now upload multiple files to a document and hide certain files from recipients in a workflow step. These features are available in both the New from my file page and the Template settings page.
How to upload multiple files for your document:
- When designing a form, click the Add file button at the bottom of the screen to add another file.
- Once a file is uploaded, a tab will appear at the bottom of the screen. You can click on the see more (⋮) button on the tab to change its name, move the tab forward, replace the file, and delete the file.
How to hide files from recipients
- When setting a workflow, click on a participant or reviewer step and then check the Hide files or sheets check box in the Properties section on the right. Then, select which document files or Excel sheets in the document you want to hide from the recipient.
| ❗ Note that the combined size of all the document files uploaded must not exceed 9MB. |
|---|
4. [New] Number field
A new field, Number, is available in Web Form Designer. You can use this field when you want users to enter numbers only. It also provides additional options such as Minimum Value, Maximum Value, and Number of decimal places.

