

Thanks for visiting our January product updates blog. Take a look at what eformsign has been up to this month.
[New] Check out our document authenticity checker🔎
The document authenticity checker has been added to the homepage. It allows eformsign members and non-members to check the authenticity of documents created with eformsign.
You can upload a PDF file of a completed document or audit trail certificate generated by eformsign to verify that the document matches the original.
Go to document authenticity checker >
Instructions:
- In the eformsign homepage, go to the Features menu at the top menu bar and click the Security and Compliance menu.
- Click the Digital Forgery Prevention tab in the center.
- Scroll down to the eformsign document authenticity checker section and click Go to the eformsign document authenticity checker.
- Upload a completed document or audit trail certificate you want to check for authenticity, verify that you are human by checking the “I’m not a robot” check box, and click the Check document authenticity button. The document authenticity checker will check for authenticity and provide you with the result.
- If the document was not generated by eformsign or was generated before Jan 16, 2024, then the page will display Unable to check authenticity. In this case, if the document was generated by eformsign, you can click check for authenticity on this page instead to check. Note that to use this service, you need to be logged in to eformsign.
- Upload the file again and enter the document ID of the PDF file. The document authenticity checker will check for authenticity and provide you with the result.
Note that the authenticity cannot be verified in the following cases:
- Documents created using other services
- Documents that have exceeded their storage retention period
- Incomplete documents
* Files can be uploaded up to 30 MB in size.
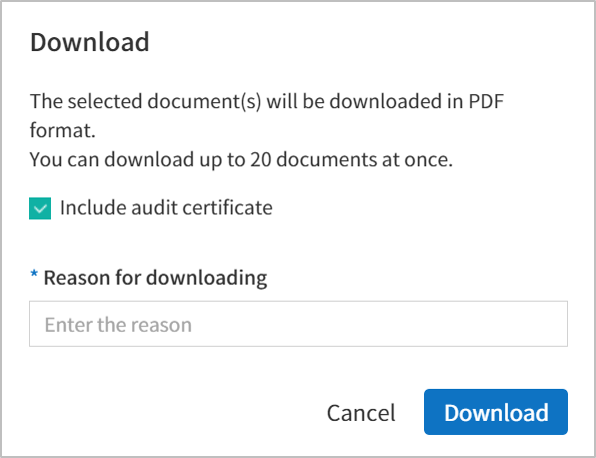
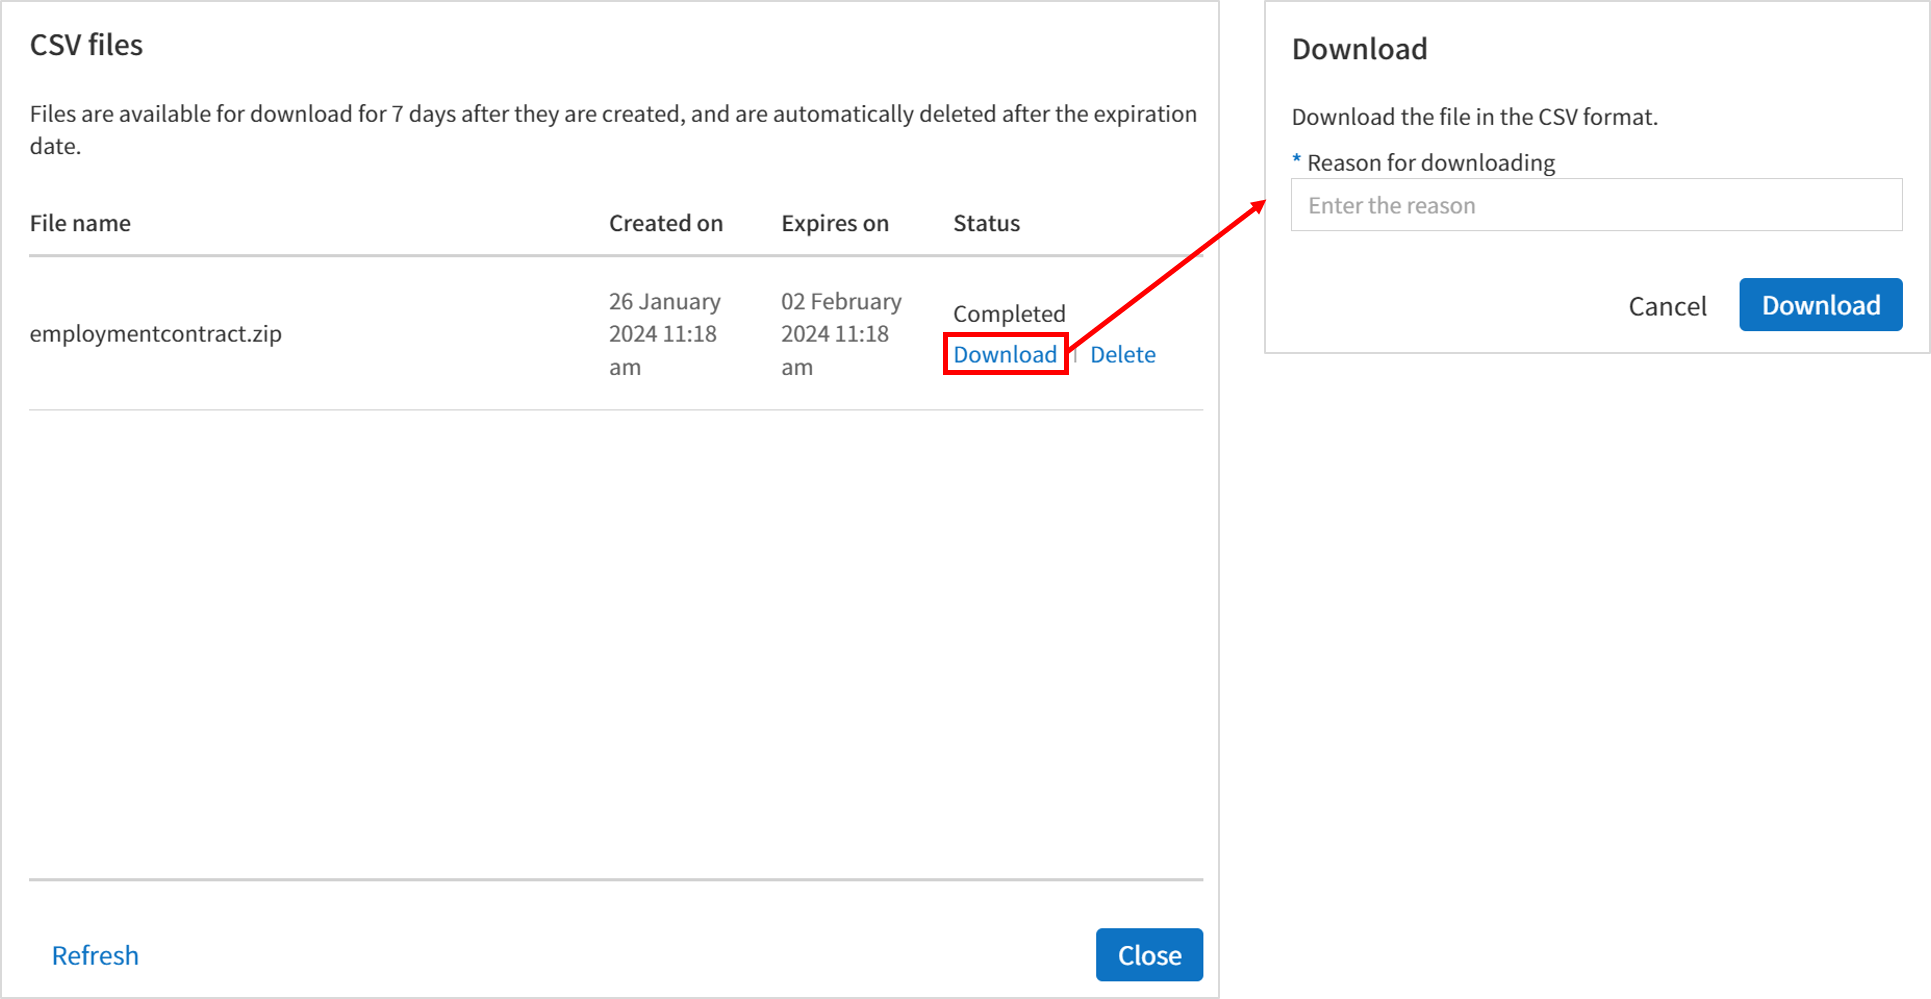
[Enhancement] Try our new improved download feature
To comply with security requirements, the download feature has been improved so that now you need to enter a reason before downloading documents and CSV files.
✅When downloading a PDF file:
- Go to a document inbox or the Manage documents page.
- Click the PDF icon at the top right corner of the screen and select a document you want and then click the Download button.
- On the Download pop-up, check whether you want to include an audit certificate (for completed documents only).
- Enter the reason for downloading and click the Download button.
✅When downloading a CSV file
- Go to a document inbox or the Manage documents page.
- Click the CSV+ icon at the top right corner of the the screen and select a document you want and then click the Export to CSV file button.
- Select the columns and range and then click the Export button.
- Name your file and then click the Confirm button.
- Click the Download button for the file on the CSV files pop-up.
- Enter the reason for downloading and then click the Download button.
*The number of characters for entering the reason is limited to 50 characters.
*You need to enter a reason for all downloads including for downloading the stamp history, downloading the list of members, and downloading the usage status by member.
[Other] We made the following usability enhancements
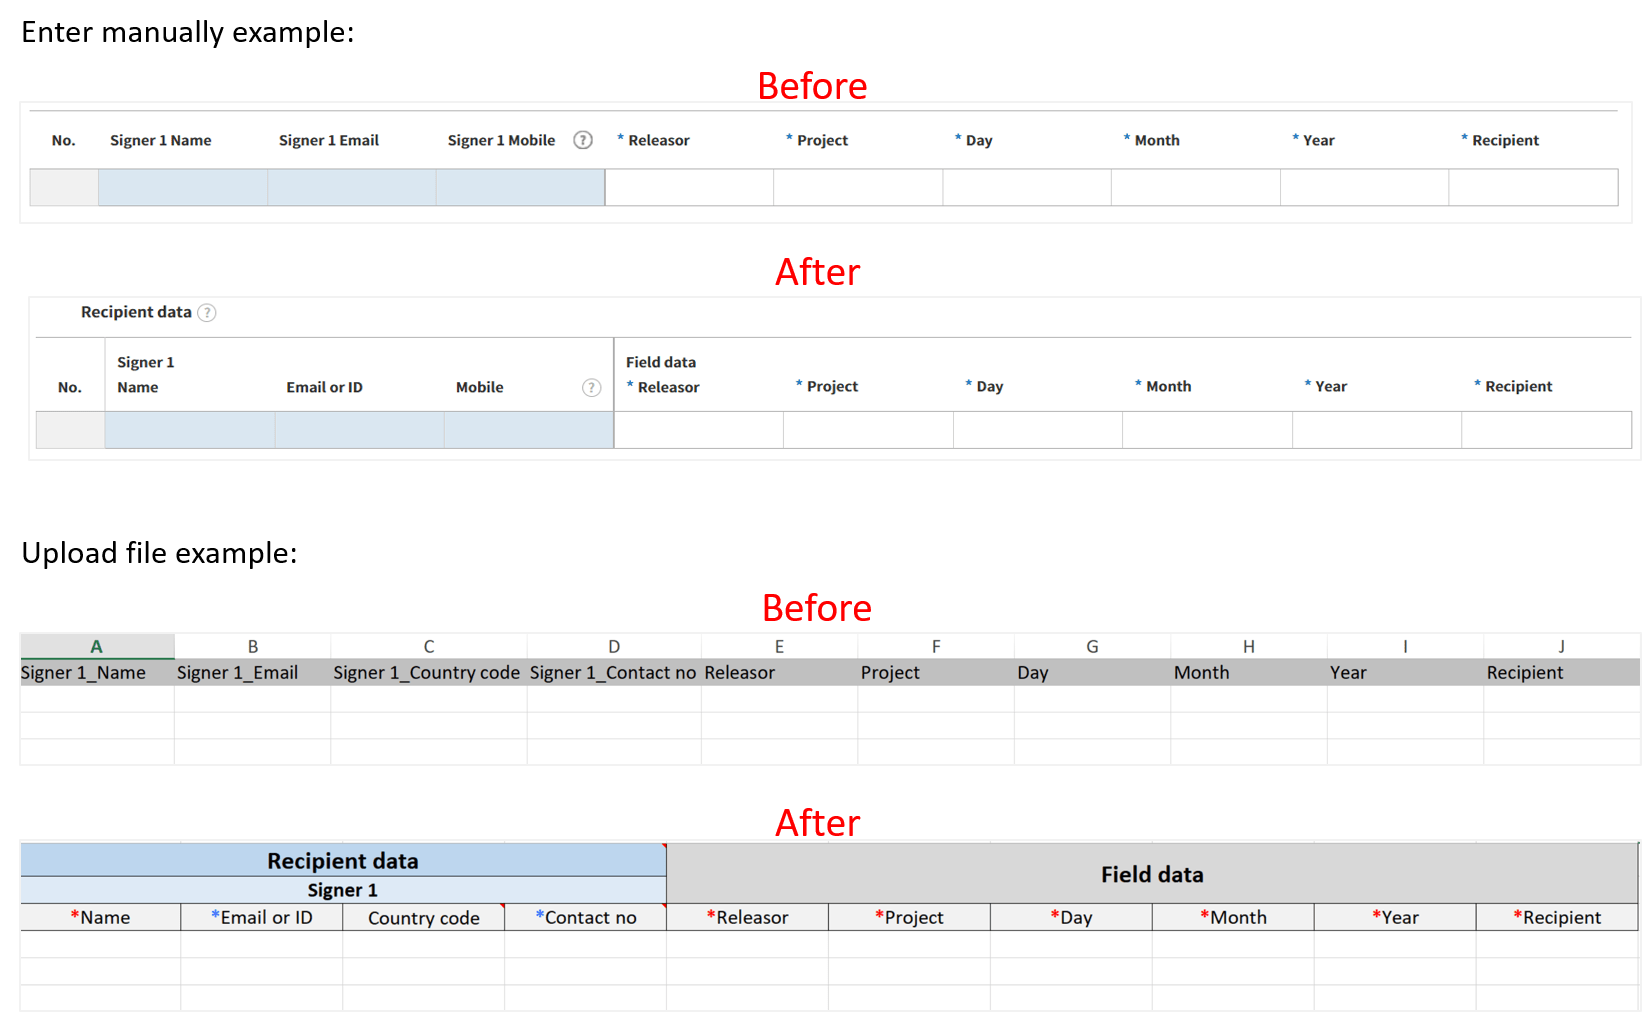
- Enhancement to the data input table UI and Excel file entry for bulk send.
- Enhancement to the usability of the navigator button when using the handwriting field.

- Enhancement to eliminate the display of reCAPTCHA when a verification number is sent for a lost password.