

[New] Bulk sign
We’ve added the bulk sign feature that allows recipients to sign and fill in multiple documents at once. Now you can bulk sign documents by selecting documents from the In progress inbox and then sign once to bulk sign them all.
How to use the bulk sign feature:
1. Go to the Action required inbox and click the bulk sign icon at the top right corner of the screen. The Bulk sign pop-up will be displayed.
2. Select the document you want to bulk sign in the Bulk sign pop-up and click the OK button. Based on the document you selected, you will be directed to the Bulk sign page which will display the list of documents that can be bulk signed.
*The bulk sign feature is only available to documents created from a template.
3. Select the documents you want to bulk sign and then click the Bulk sign button and click OK to proceed with bulk signing.
4. Fill in and sign the document and then click the Bulk send button to bulk sign the documents and send them to the next step.

*You can only view the first of the selected documents.
*If you fill in a field in the document, it will be applied to all selected documents. Note that this will overwrite any fields already filled in.
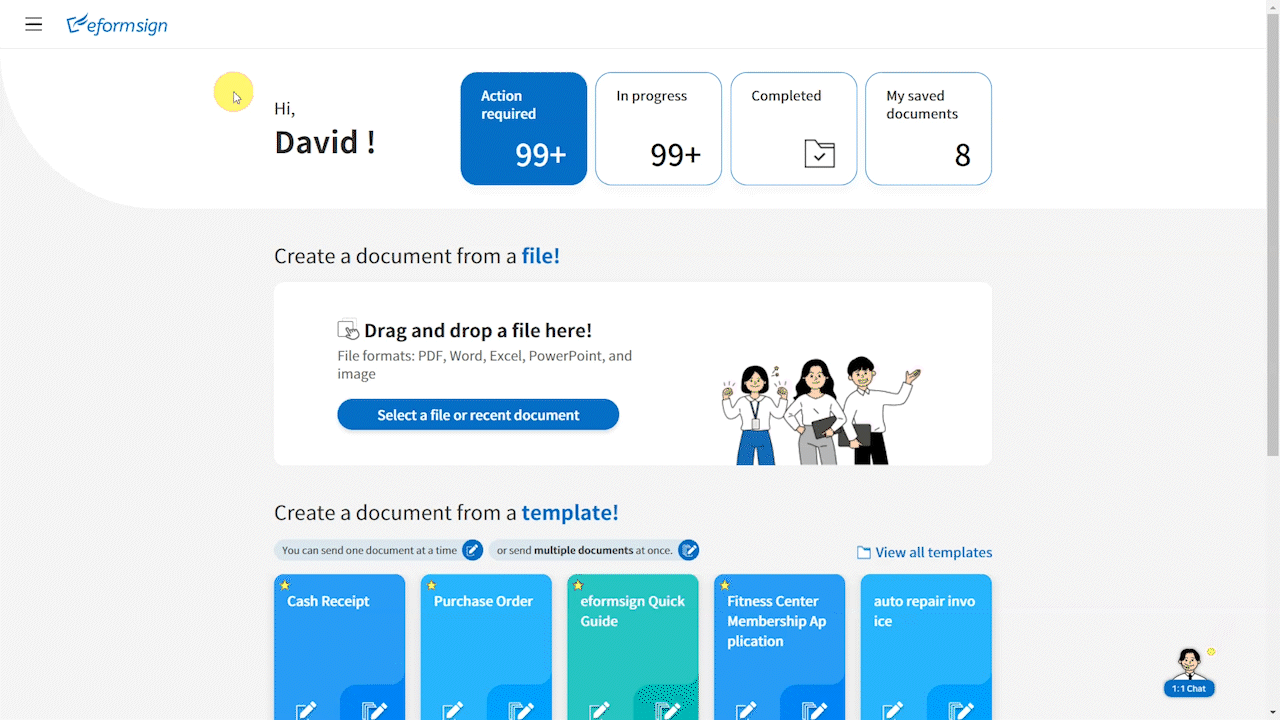
[New] My saved documents inbox
We’ve added a feature for saving documents to the My saved documents inbox while creating documents via New from my file. Documents saved in the My saved documents inbox can be reused anytime and when you open a document, you can continue where you left off so that you don’t have to start from scratch again.
How to save documents to My saved documents:
1. Use the New from my file feature to upload and design a form, select recipients, and configure options.
2. Click the Save button at the top right corner of the screen and name the document in the pop-up displayed. Then, click the Save button to save the document to My saved documents.

*When you click the Start now button before creating a document, eformsign will ask you whether you want to save the document to the My saved documents inbox. If you click Yes, the document will be saved.
How to use documents in My saved documents:
A) When you upload a form using the New from my file feature, on the left side, you can create a document by selecting a document from the list of recent documents.
B) Click My saved documents in the sidebar or click My saved documents in the dashboard to navigate to the My saved documents inbox and then select a document from the list of documents to create a document.
[New] My Contacts
We’ve added a feature for efficiently managing non-members’ contacts. When you specify a non-member before sending a document, the non-member’s contact is automatically added to Contacts. You can also manually add and update contacts in the Contacts menu.
Furthermore, when selecting a recipient, you can click the Contacts icon to select a non-member or a member in your company.
How to manually add a non-member to your contacts:
- Click Contacts from the sidebar to navigate to the Contacts page.
- Click the Add contact button on the top right corner of the screen and enter the name and contact information on the pop-up displayed. Then, click the Register button to finish adding the non-member.

How to select a non-member or member using your Contacts when selecting a recipient:
A) New from template: Click the contacts icon when selecting a recipient before sending a document to display the Contacts pop-up. Then, either select a non-member in the My contacts tab or a member in the Company contacts tab.
B) New from my file: Click the contacts icon when adding a recipient to display the Contacts pop-up. Then, either select a non-member in the My contacts tab or a member in the Company contacts tab.
[New] Document Reminder
We’ve added a feature that allows the document creator to select a completed document in the Completed inbox and select and send notifications to members and groups a reminder related to the document.
How to use the document reminder feature:
- Navigate to the Completed inbox and click the Set reminder button for any completed documents you own that you’d like to set a reminder for.
- On the Reminder settings pop-up displayed, set the reminder message, reminder date and time, and recipient, then click Save to set the reminder.
- Once the reminder is set, notifications are sent by email at the set time and date. Currently, notifications are sent by email only, with SMS support coming in the future.
*Only groups and members can be selected as recipients of reminder notifications.

[New] Creator identification for documents created from URL
We’ve added a feature that require users to enter their information (name, email, mobile number) and verify their identity before they submit documents created from URL.
How to enable the document creator information and identity verification options:
1. Navigate to Manage templates > Template settings > Workflow and then click the Start step of the workflow.
2. Check the Create documents from URL option in the Properties tab to the right and then check the Document creator information option. Then, check the options under Identity verification.
3. Click the Save button on the top right corner of the screen to save the settings.
*Now when document creators create a document from this template, they need to enter their information and verifiy their identity to create documents. As well, the document creator’s information and identify verification will be displayed in document inboxes and on the audit trail certificate.
[New] Fortified security
To help make eformsign even more secure, we’ve added the Email notification at login feature which sends members a notification to their email when they log in to their account.
This feature can be enabled by navigating to the sidebar > the see more icon > My profile > Personal > Security, and contains the following information.
– Member name and email
– Logged in date and time
– Accessed from
– IP address
*Notifications are sent only if the member’s email is registered with the company. If the member belongs to multiple companies and has different emails registered with each company, then notifications are sent to all emails.
[Other] Usability enhancements
In addition to the above updates, we’ve added the following usabiilty additions and enhancements.
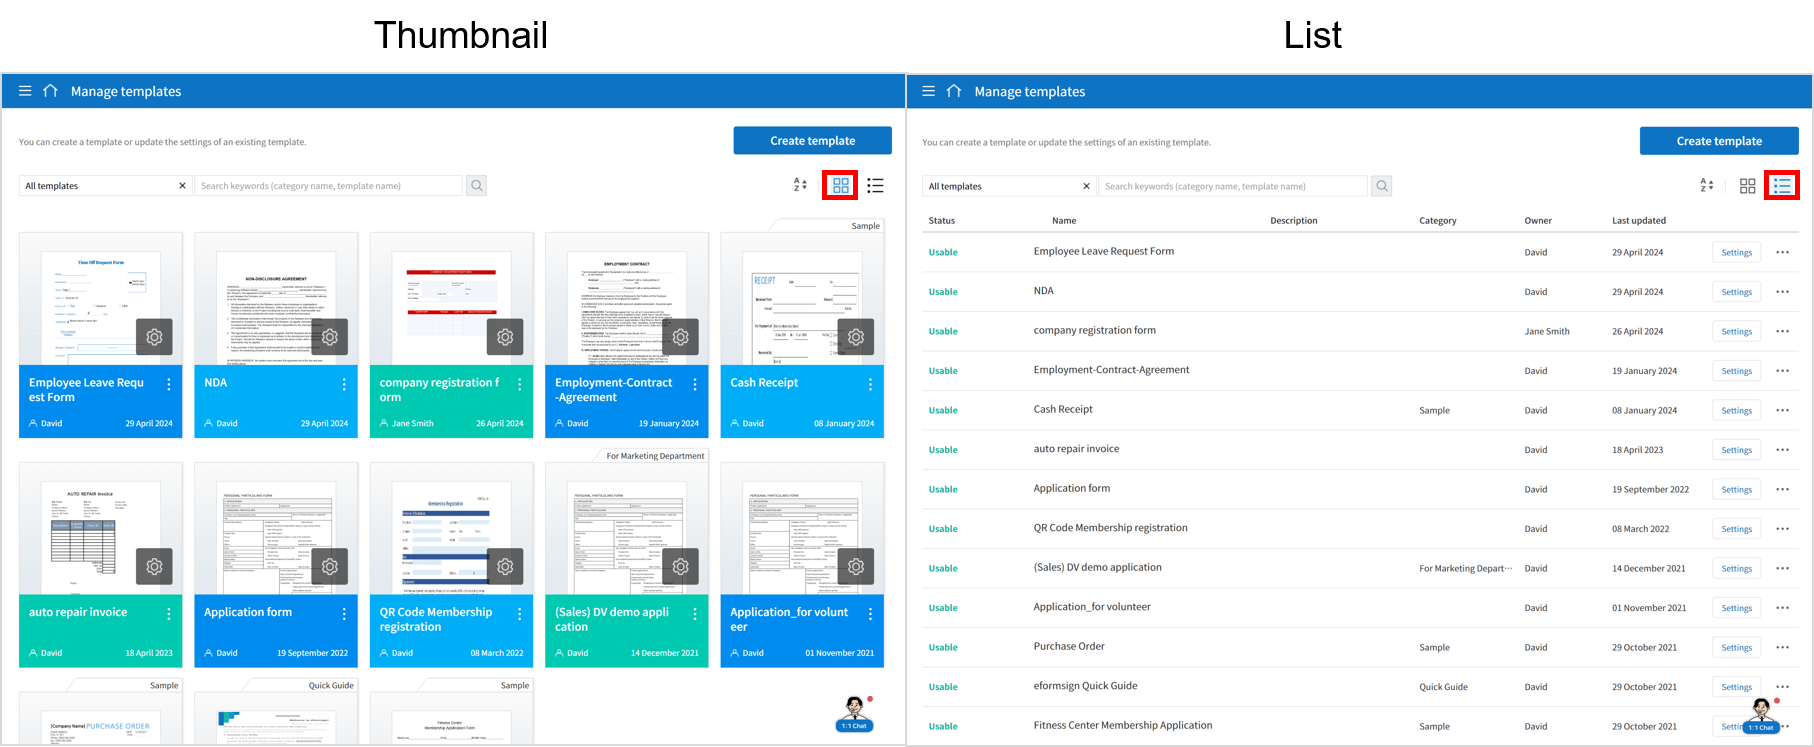
- Added the template listview mode which displays templates in a list view.
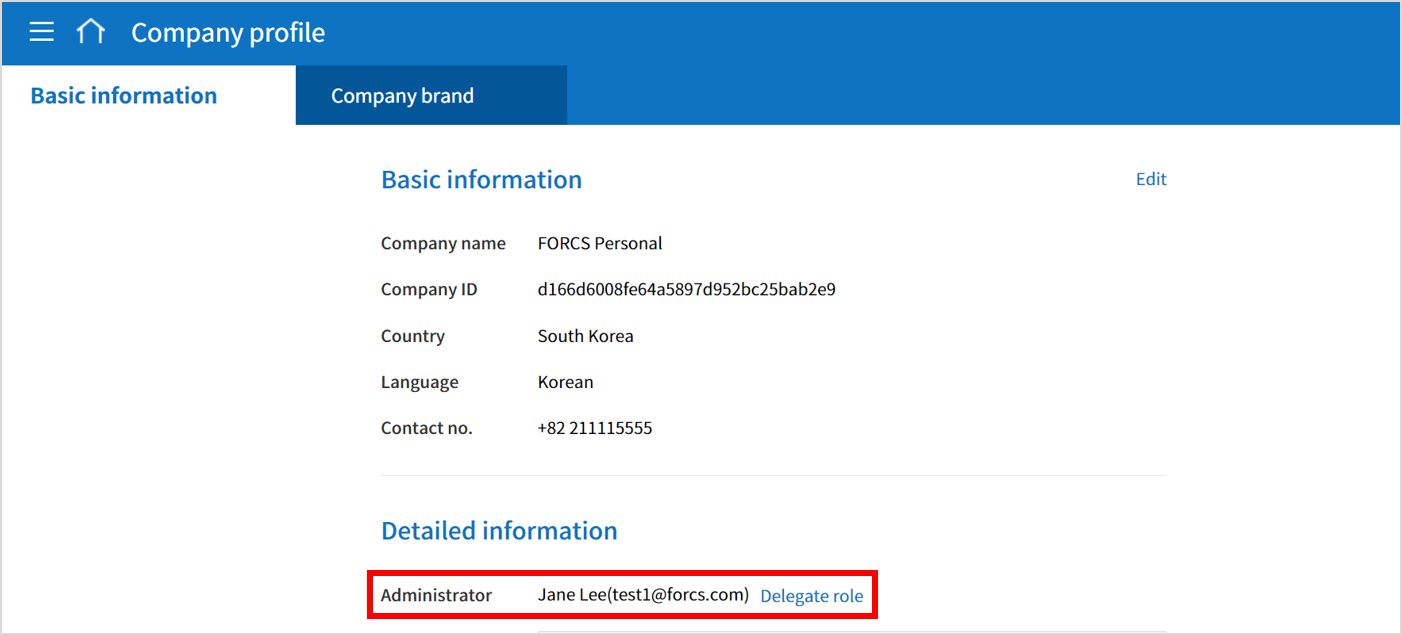
- Added a feature for delegating the company administrator role for Personal account holders.
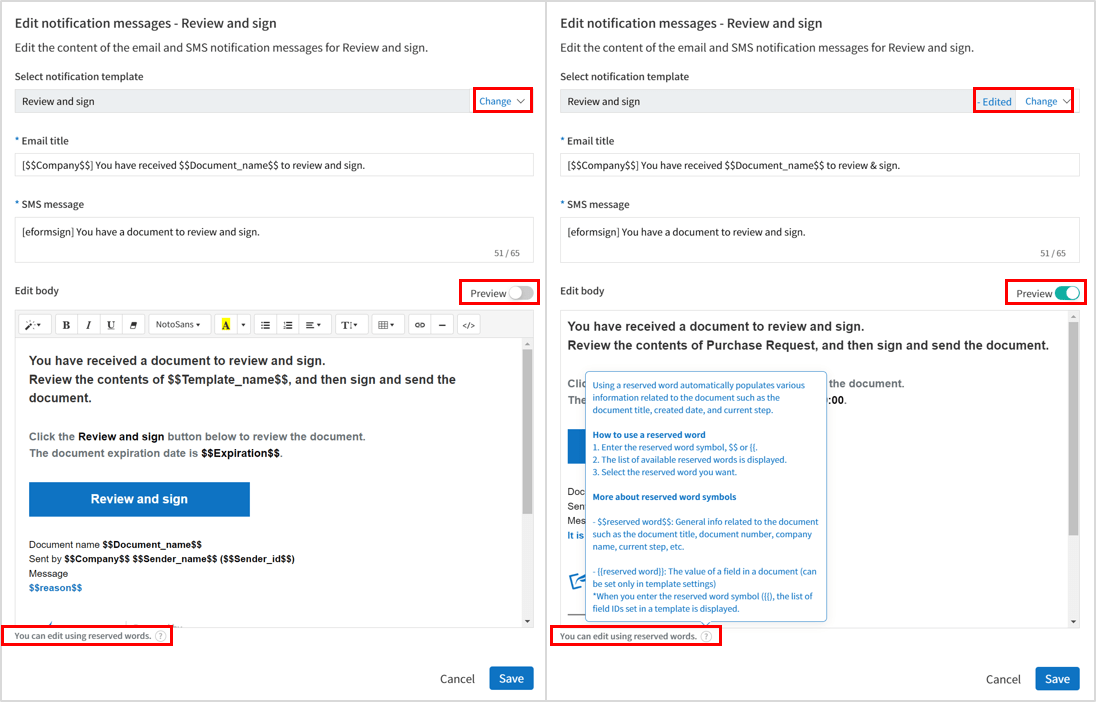
- Improved the UI of the Edit notification messages pop-up window
- Added a feature for viewing, adding, deleting, and editing documents scheduled to be sent in bulk
- Improved the UI, design, and help message to make it easier to use the image upload and life-sized scan features for adding stamps and company stamps.