When numerous end-users fill in fields and submit documents created from a specific template such as an employee time off request template, viewing the input data of each submitted document one-by-one by is a tedious and time-consuming task.
Wouldn’t it be great if you could view all the input data from all the documents at a glance in a nice spreadsheet format?
Well, with eformsign you can!
This blog describes how you can use eformsign’s data organization feature to view at a glance all the data inputted to all documents generated from a template.
Step 1: Add fields and rename their ID
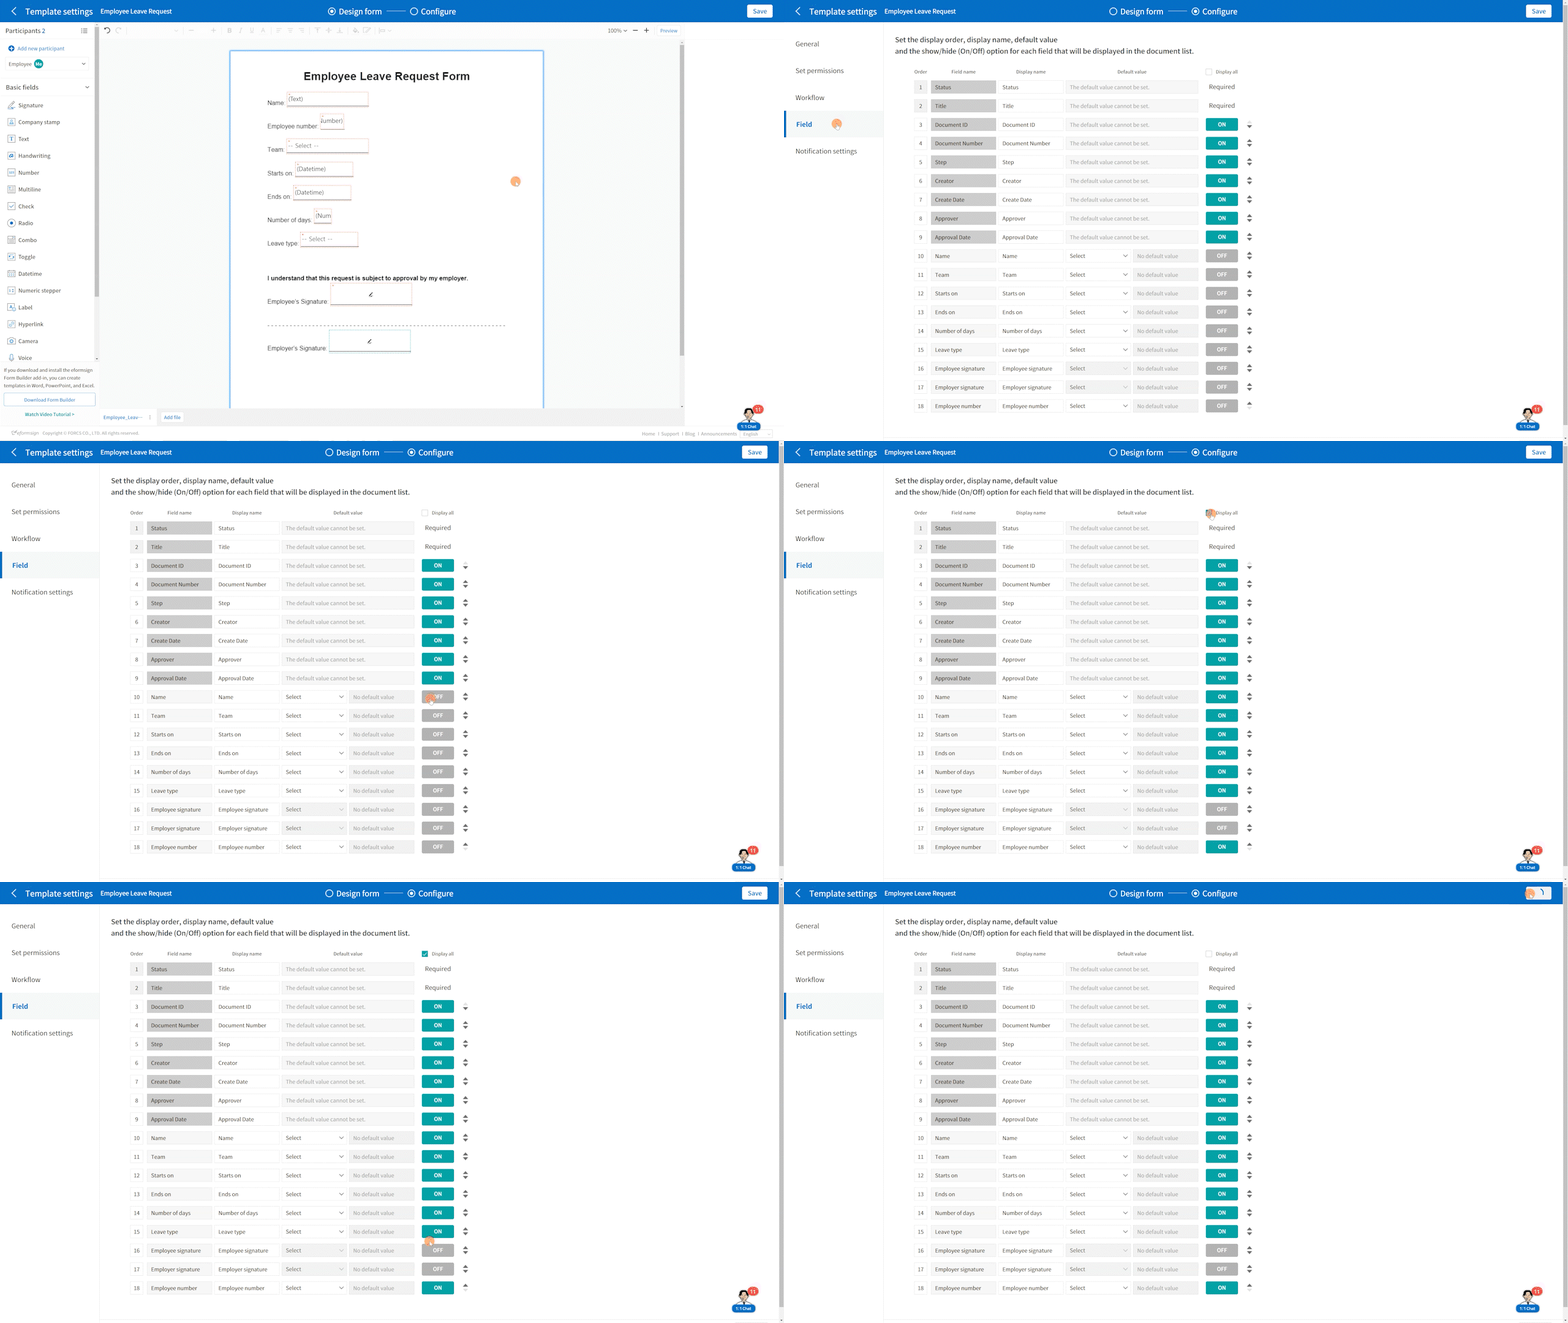
- Add fields and rename their ID that reflects the data that is entered into the field. For example, when you add a field for entering the employee number, you should rename the ID to something like ‘Employee number’. This is important because when you are later viewing data entered into documents, you can see what data they are.

Step 2: Configure field settings
2. Once you have added fields and renamed their ID, you need to configure field settings. To do that, click on Configure and then click on Field.
3. You will see all the IDs of the fields you added under in the Field name column. Field IDs from 1 to 9 are default fields that are present in all documents and the rest are the ones you added. You can choose which field to be available to be viewed and download in the three document inboxes (Action required, In progress, and Completed ) and the Manage document page. You can turn each of them on or off by clicking the ON/OFF button next to each field, or click Display all to turn them all on. In this exercise, we’ll turn the all on.
4. You can see that the signature fields cannot be turned on. It’s because these fields do not contain any text or numeric value. There are some other fields that cannot be turned on such as the Attachment field, Camera field, and the Voice field.
5. Once you all done, click Save to save and deploy the template.

Step 3: Filter documents to show all fields
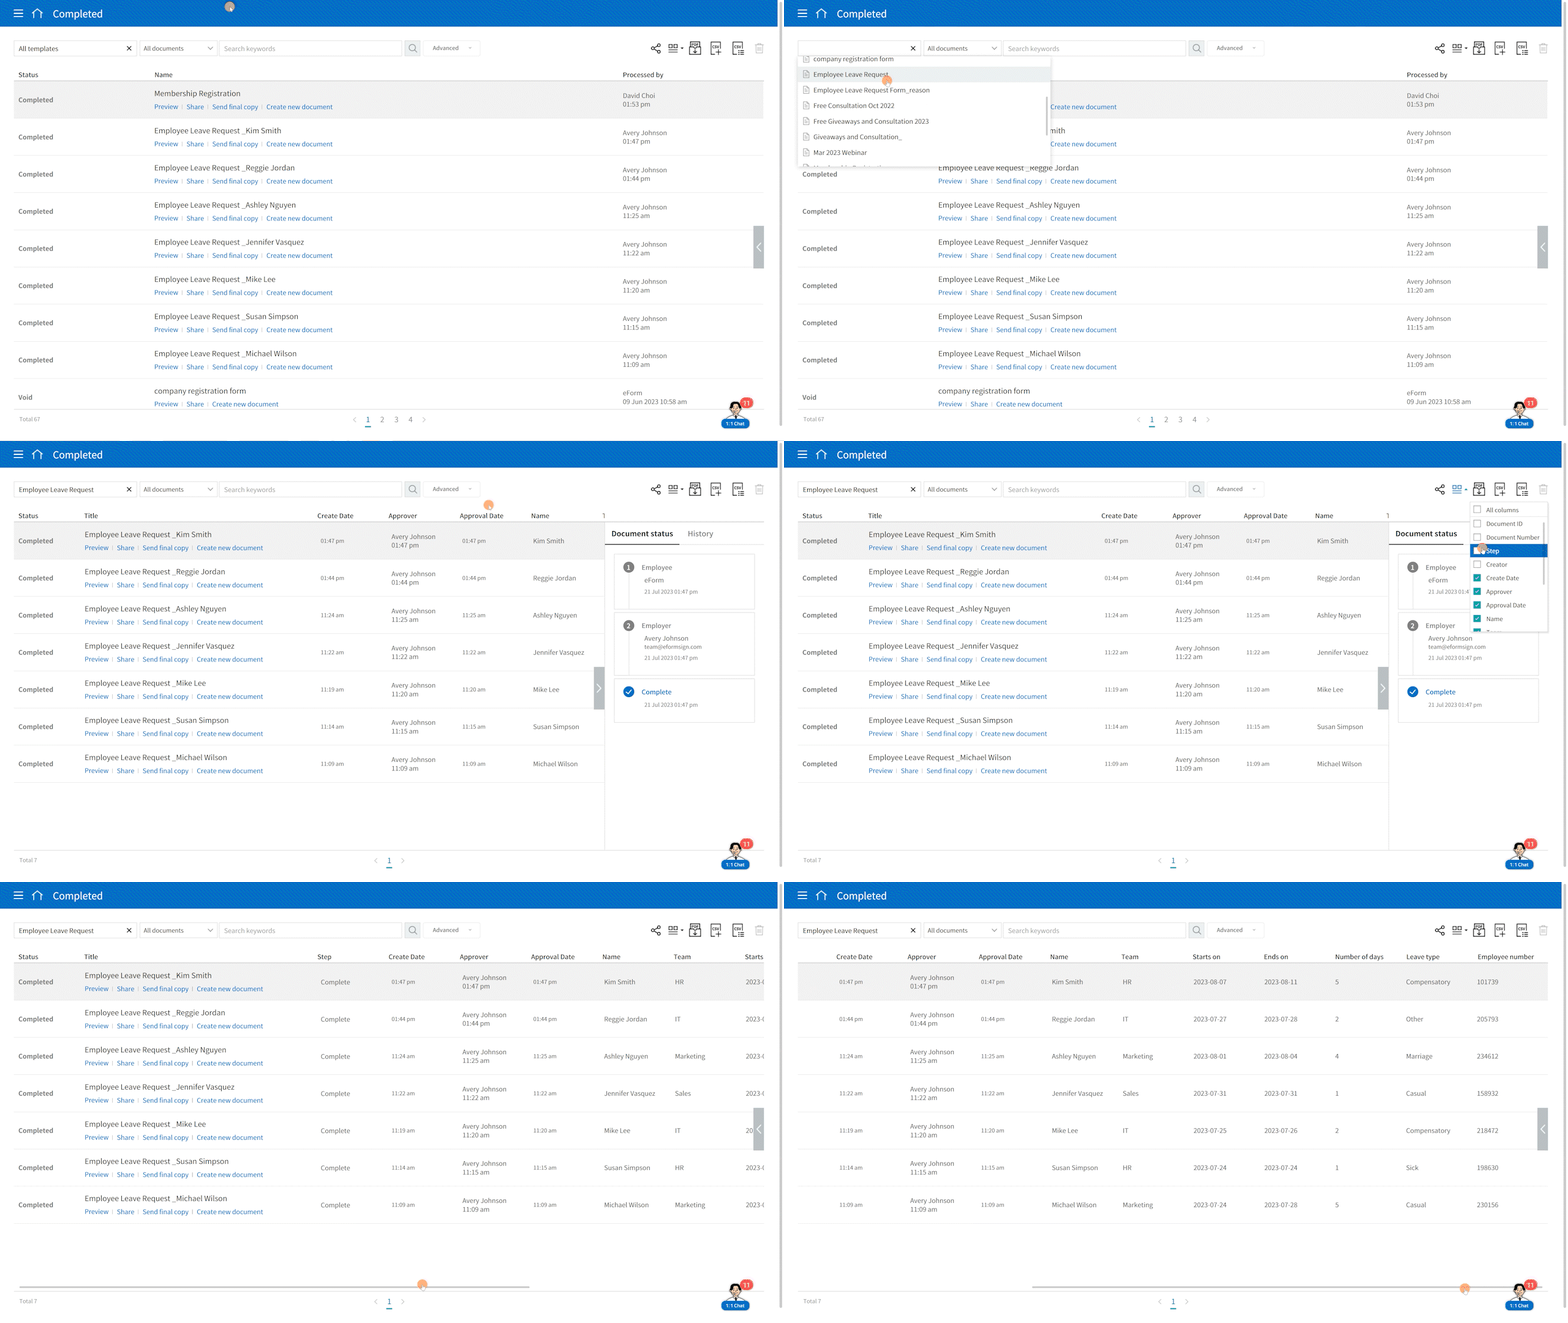
6. When documents generated from the template you set are filled in and submitted, they will be available in the Action required, In progress, and Completed inboxes, as well as the Manage documents page. To view all the fields you turned on in Step 2, go to the dropdown menu at the top left corner and select the template you configured. You will be able view all the values entered into the fields you turned on and the default fields. You can also click the Select columns icon and manually turn on/off the fields that can be displayed.

Step 4: Download documents in CSV format
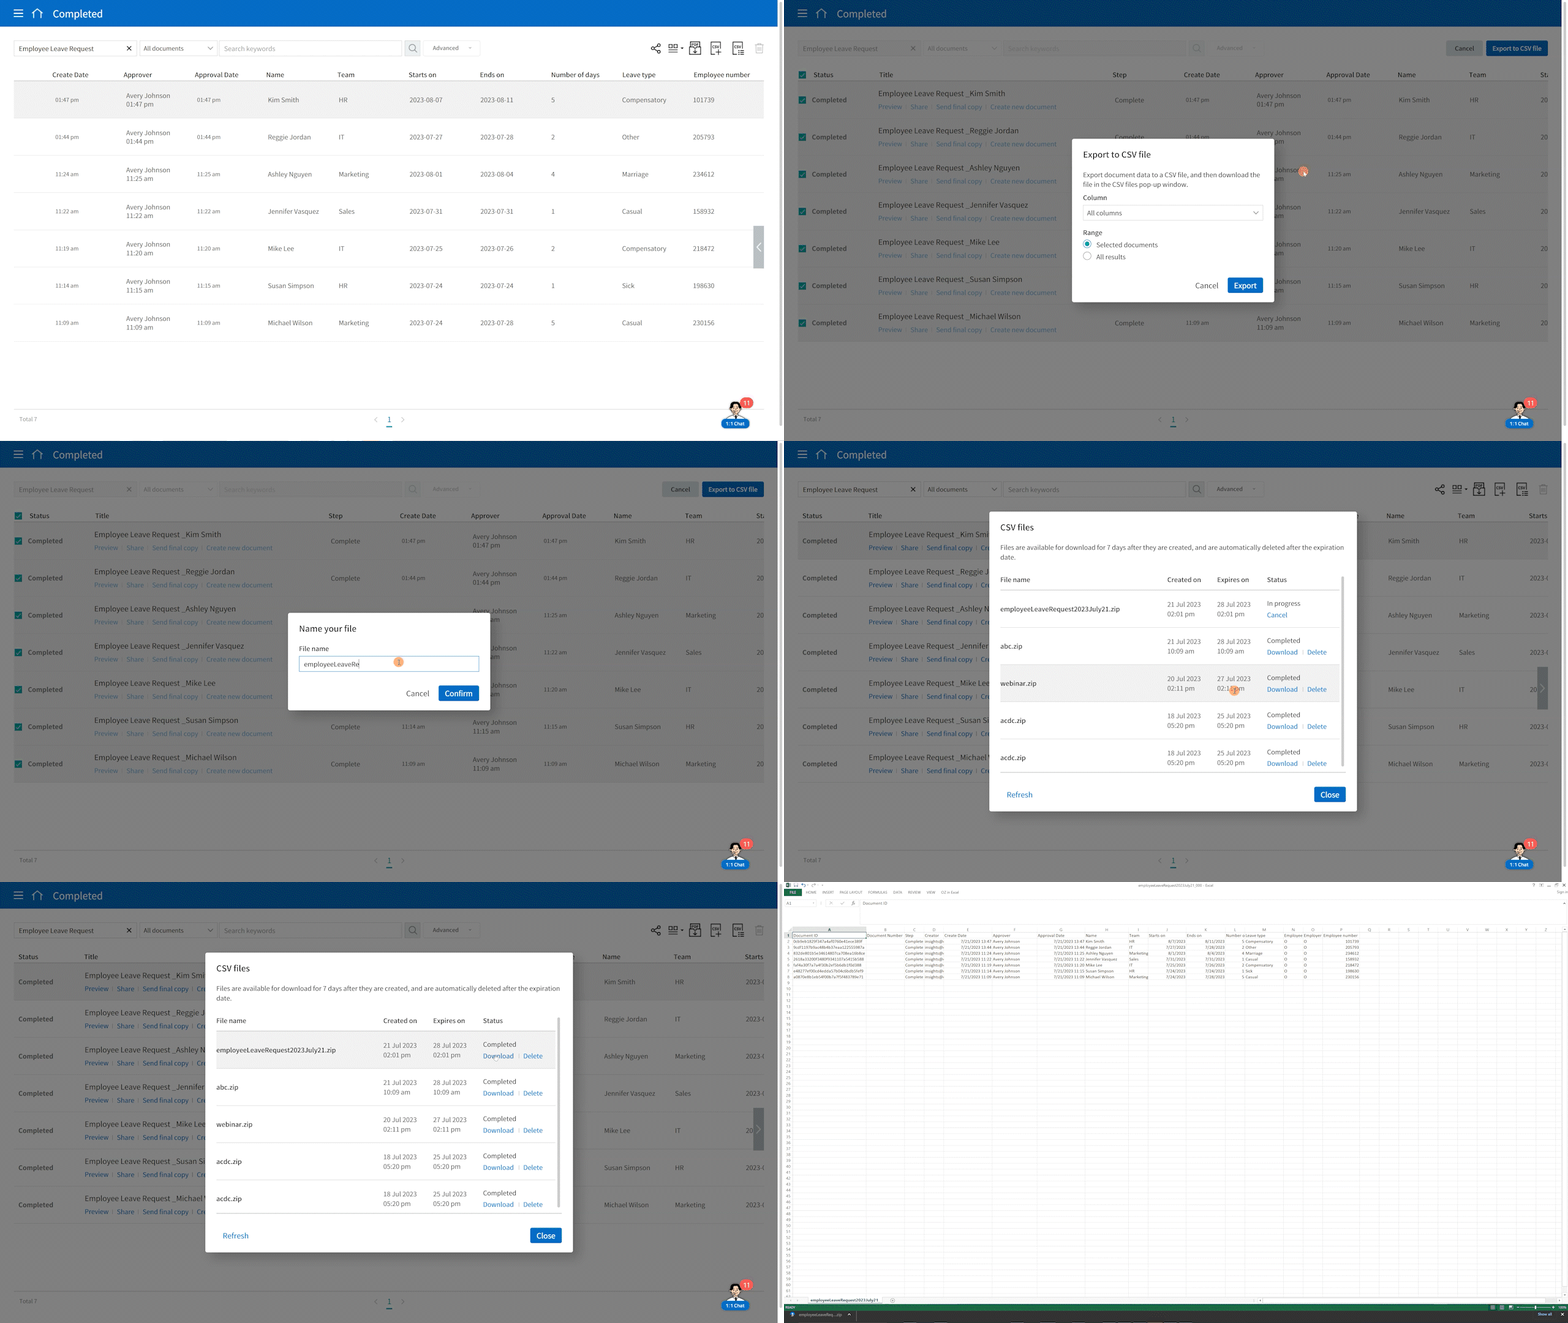
8. If you want to not only view the field values online in eformsign, but also download them in the CSV format, click the Export to CSV icon on the top right corner of the screen, select all the documents you want to download, and click the Export to CSV file button. The Export to CSV file pop-up will be displayed.
9. You can choose to download the values of all columns or only the ones you want. As well, you can choose to download only the selected documents or all documents of the template. In the exercise, we will select All columns and All results.
10. Click the Export button, name the file, and click the Confirm button.
11. A CSV file will be generated. Click Refresh and then click Download to download the file.
12. You can see that all the field values are downloaded in CSV for you.


