

Excel formulas and functions play a vital role in data management and analysis in any department/team of any organization for they can simplify complex calculations, get work done faster, and automate repetitive tasks.
Wouldn’t it be great if you could apply Excel formulas and functions to your e-documents?
Well, with eformsign you can! It is the only e-document solution in the industry that supports Excel functions and formulas.
All you need to do is use the eformsign Microsoft Add-in to create an e-document, apply Excel formulas/functions, and then upload the form.
In this blog, we’ll go over a simple example on how to apply a Excel formula to an e-document. In this example, we’ll apply a simple formula where you get the sum (Total Fee) of two values (Member Fee, Card Fee).
Instructions:
1. Download and install the eformsign Microsoft Office Add-in.
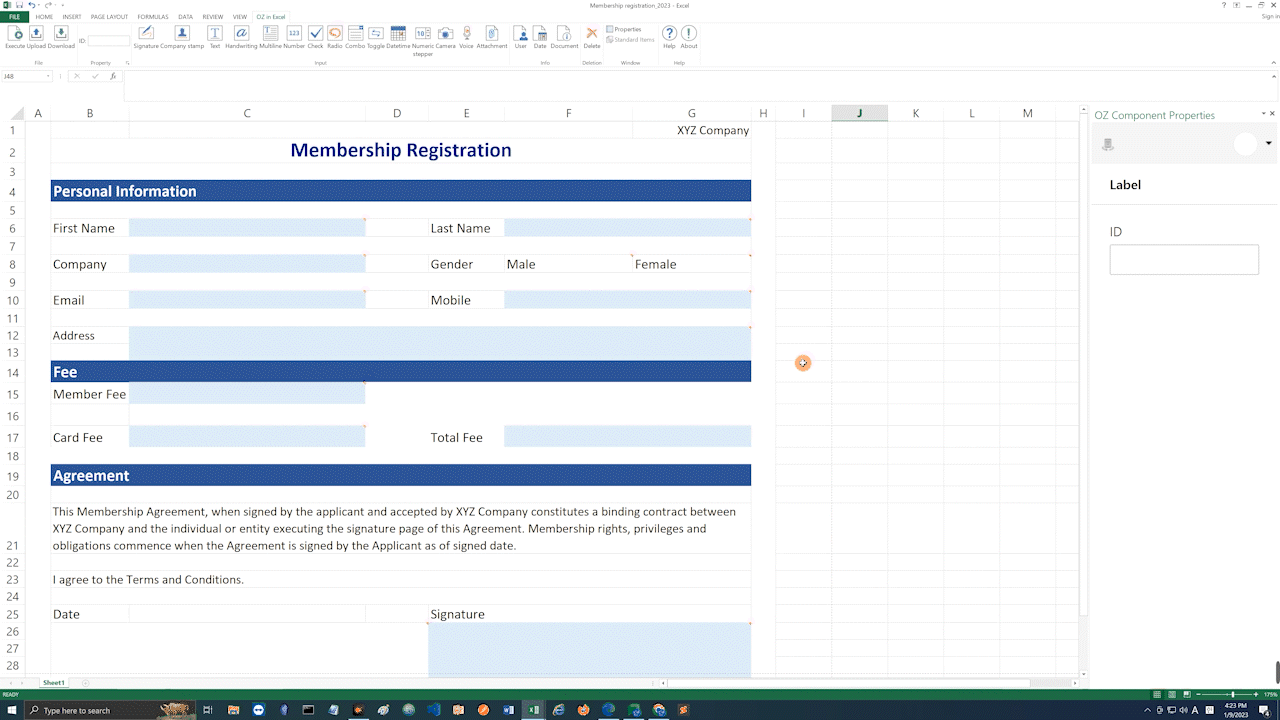
2. Create a form and add fields.
3. Click on a cell where you want the formula to go and assign it an ID (Total Fee).
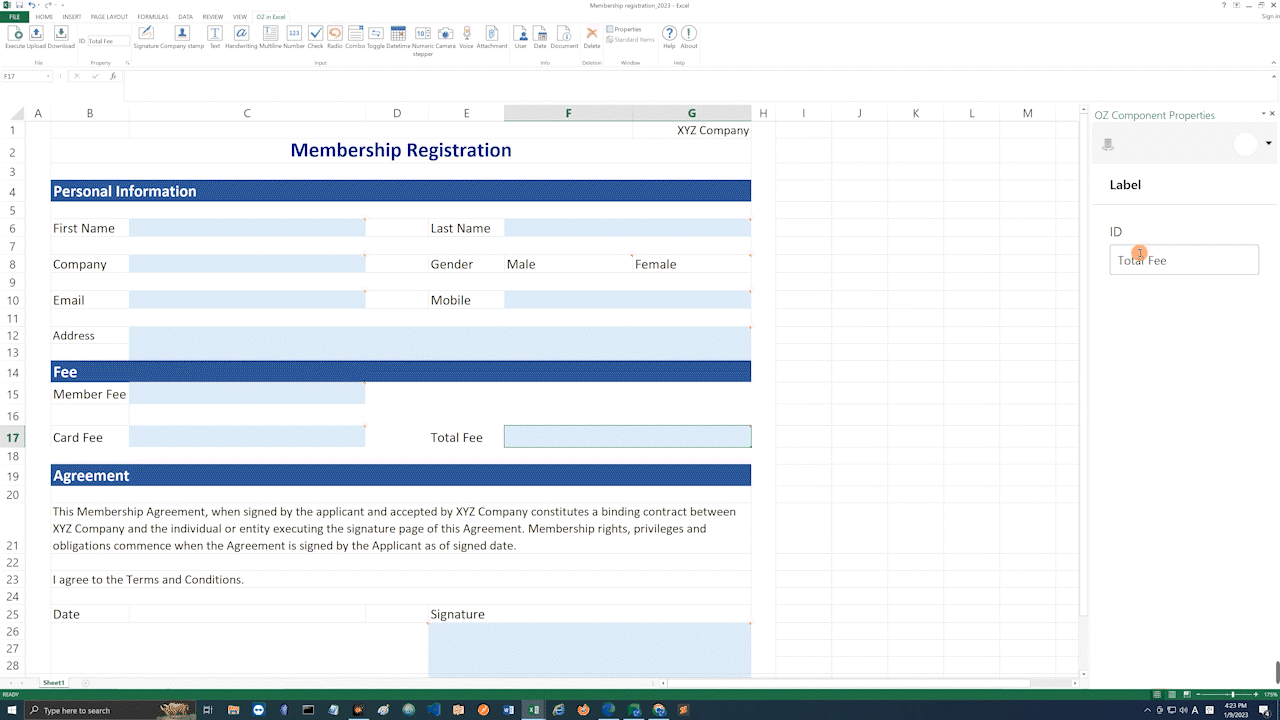
4. Click on the formula box and then type in the formula. In this example, we will add cell C15 (Member Fee) and C17 (Card Fee) by entering “=C15+C17”.
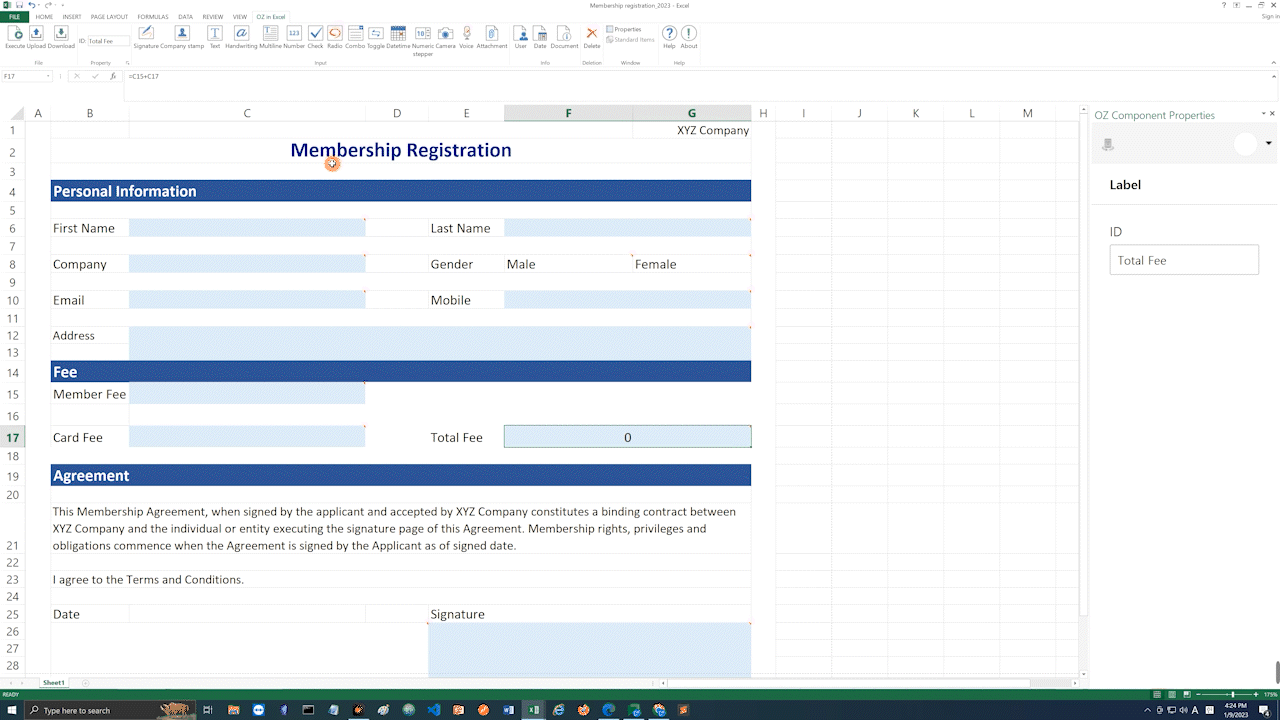
5. Click Execute to preview. You can see that the the sum of the values entered in Member Fee and Card Fee is shown in Total Fee.
6. Upload the form to eformsign by clicking the Upload button.
*Note that you can apply the same principle to all the Excel formulas and functions supported in eformsign as listed below.
- Arithmetic
- Operator precedence
- Sign
- Cell reference
- Logical functions: IF, AND, OR, IFS
- Math/trigonometric functions: ABS, MOD, PI, RADIANS, ROUND, ROUNDDOWN, ROUNDUP, SUM, TRUNC, SIN, COS, TAN
- Statistical functions: AVERAGE, COUNT, COUNTA, MAX, MIN
- String manipulation functions: LEFT, MID, RIGHT, LEN, LOWER, UPPER, SEARCH
- Search/Matrix Functions:: MATCH, HLOOKUP, VLOOKUP