

You can use eformsign webhooks to get notifications whenever a document or a PDF file of a document is generated.
In this blog, you’ll learn how to test eformsign webhooks using webhook.site, which is an open-source, free service that provides a unique URL for you to receive webhooks for testing purposes.
Step 1: Get your own unique URL for receiving webhooks
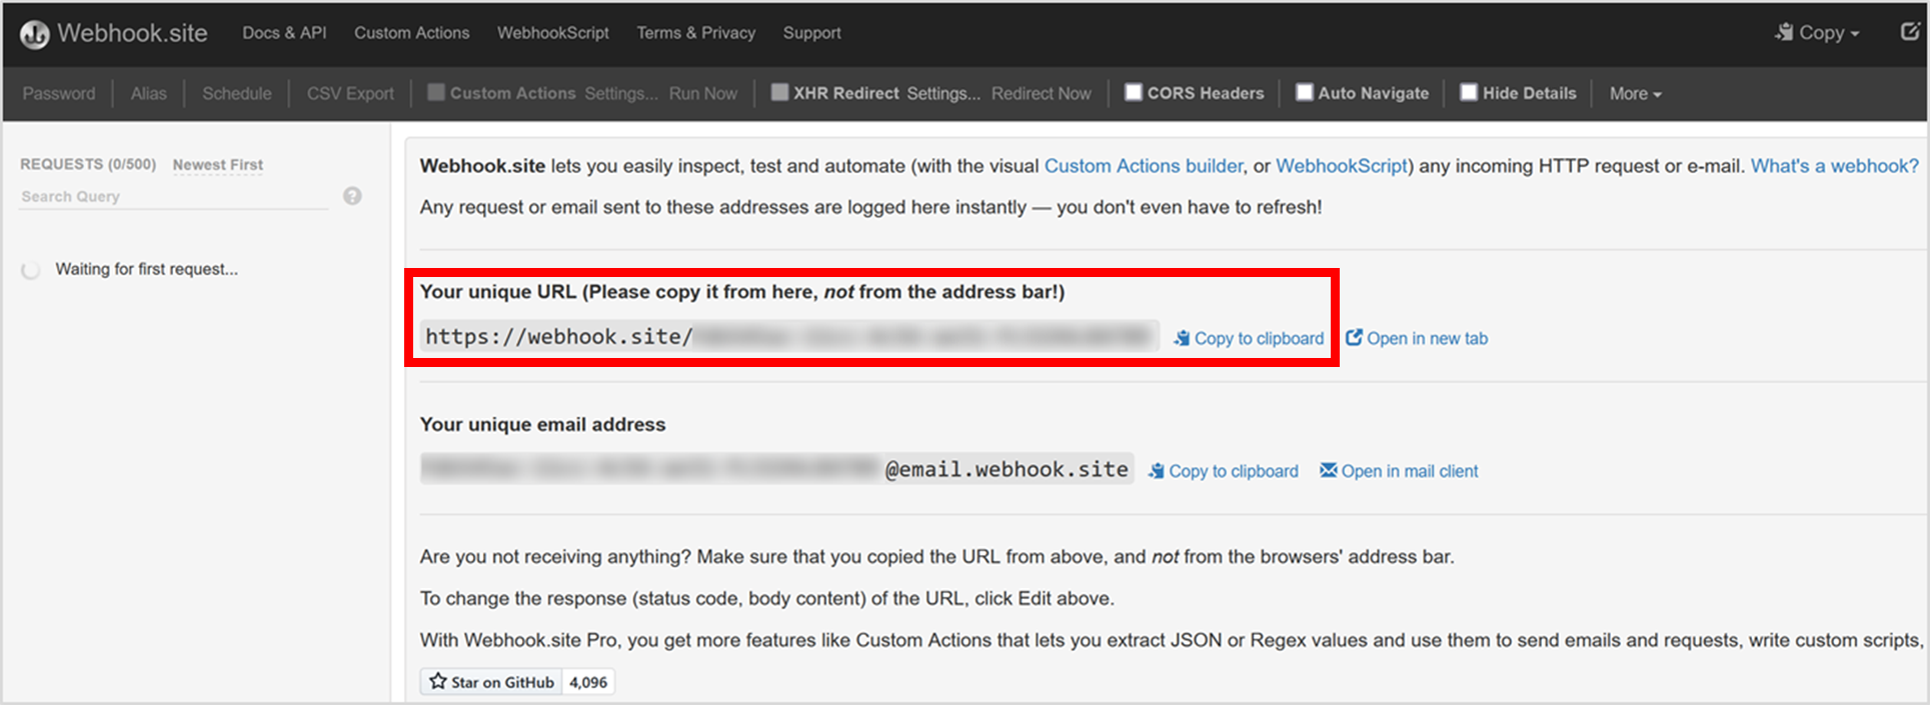
- First you need to get a unique URL for you to receive eformsign webhooks. To do that, go to webhook.site and copy the unique URL generated for you. You will be using this URL to receive real-time data from eformsign when events are generated.
Step 2: Add a new webhook in eformsign
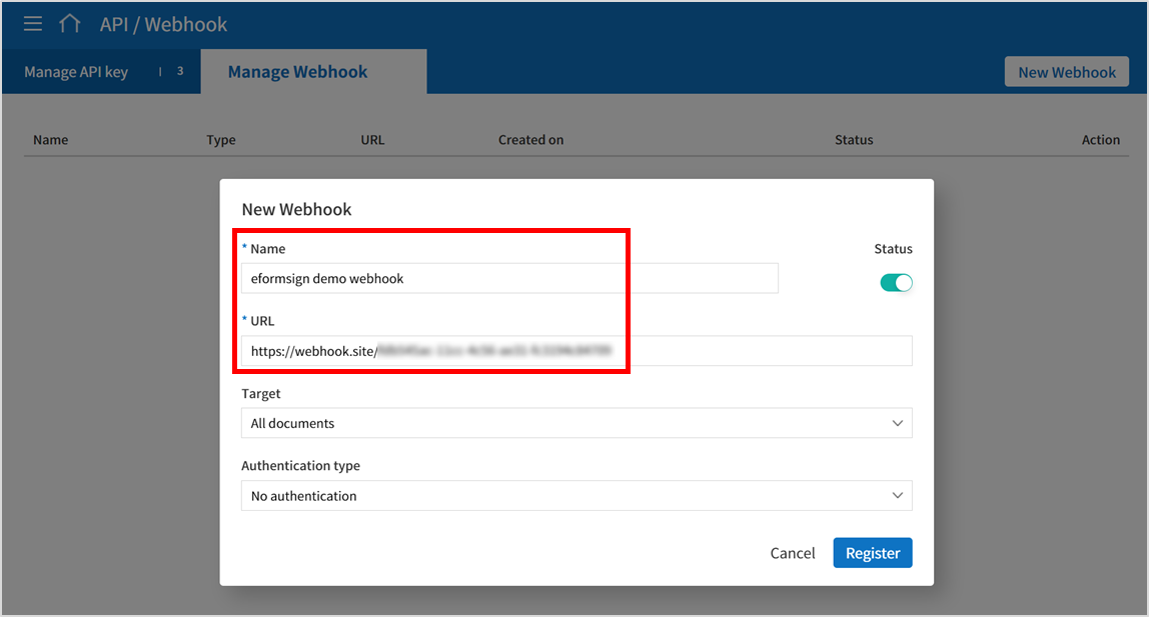
2. Now you need to add an eformsign webhook. To do that, simply go to Integration > API/Webhook in the sidebar and click the New Webhook button.
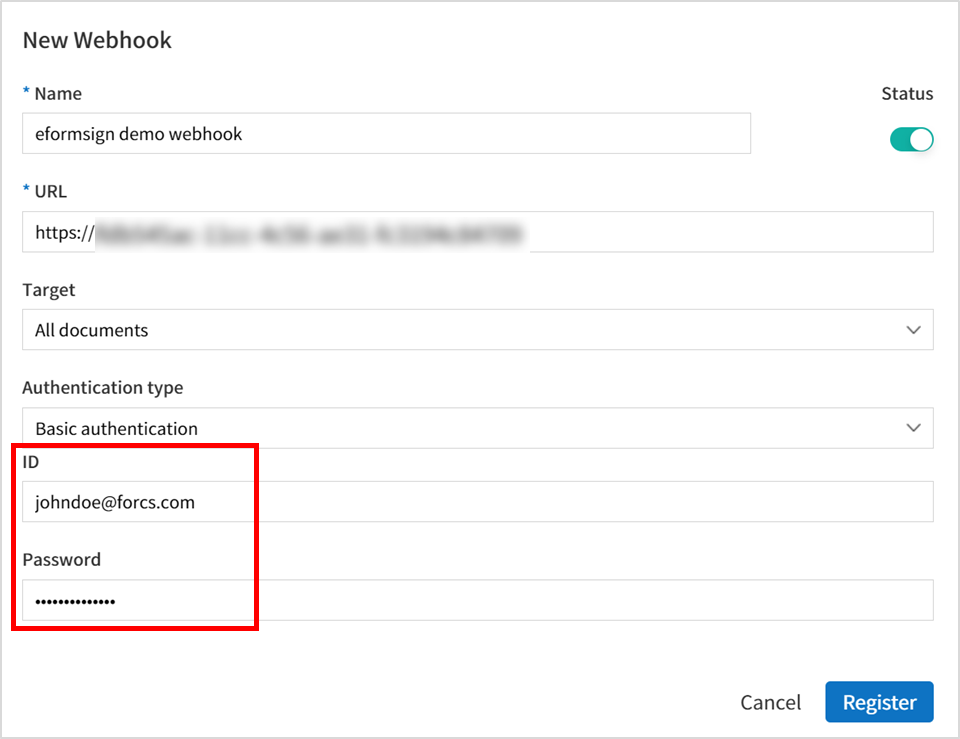
3. Then, name the webhook and paste your unique URL from webhook.site.
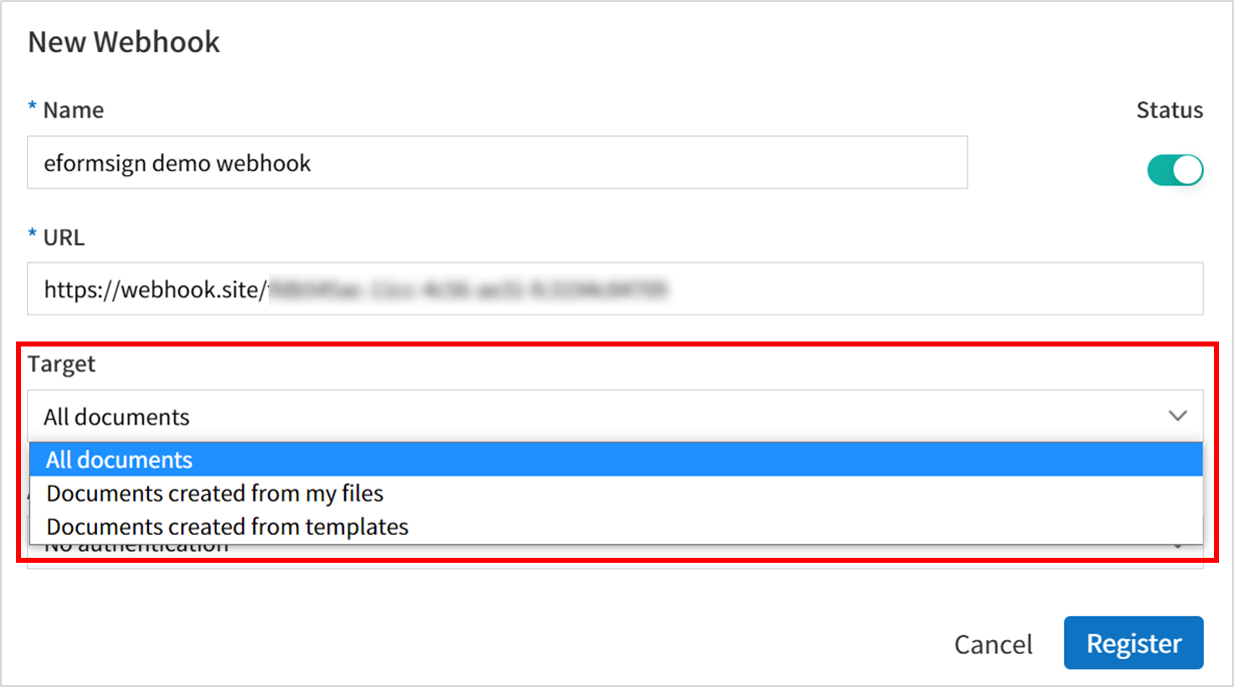
4. Select the Target documents in which webhooks will be sent whenever an event (document generation) occurs. You can choose from All documents, Documents created from my files, and Documents created from templates. Note that if you choose Documents created from templates, you need to choose specific templates (you can choose more than one).
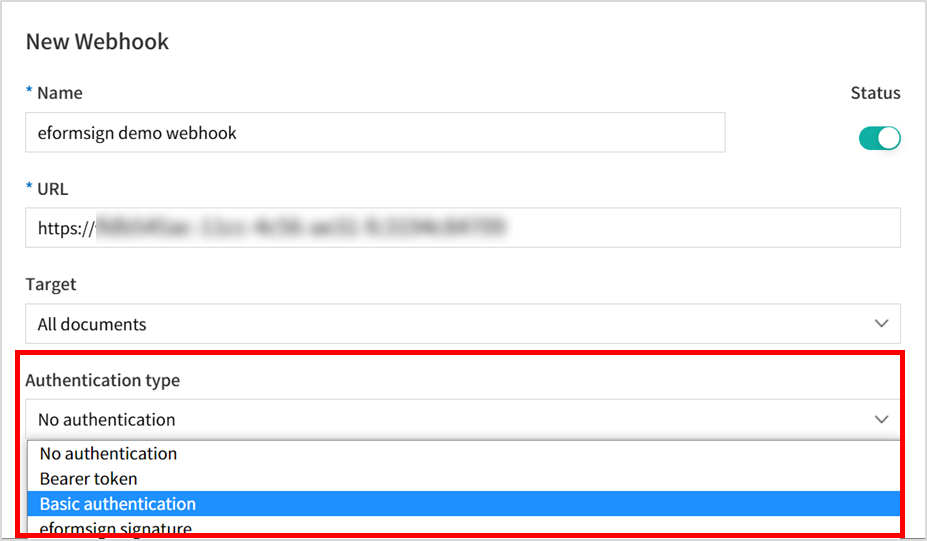
5. Choose the Authentication type (No authentication, Bearer token, Basic authentication, or eformsign signature). This is a feature that allows you to authenticate that the incoming webhook is a legitimate webhook from eformsign. In this exercise, we’ll choose Basic Authentication. For information on other authentication types, refer to the eformsign API guide.
6. Enter your ID and password. It will be Base64-encoded in the form of ID:password and will be included in the Authorization field of the request header of the incoming webhook, which allows you check whether it is a legitimate one from eformsign.
Step 3: Send a test request
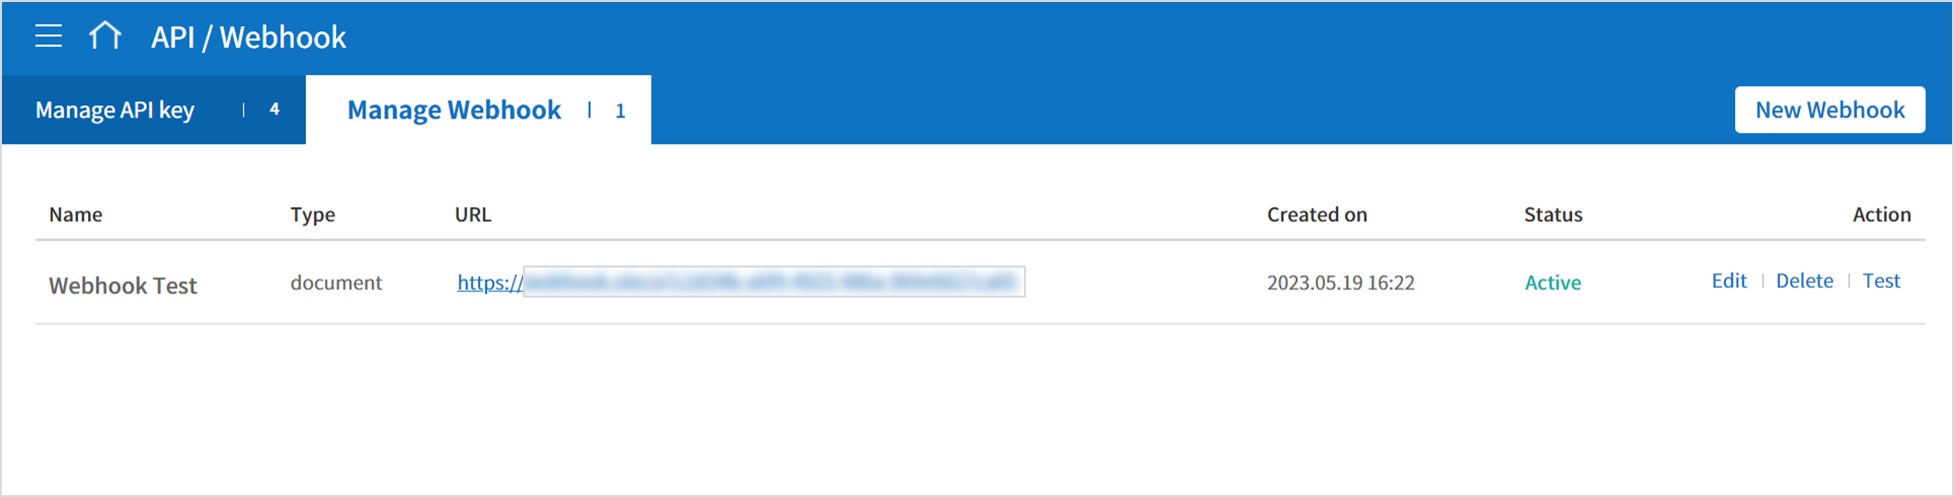
7. When you’re done, click Register to register the webhook. You can see that the webhook has been registered. You now send a test webhook by clicking Test under Action.
Step 4: Check the response on webhook.site
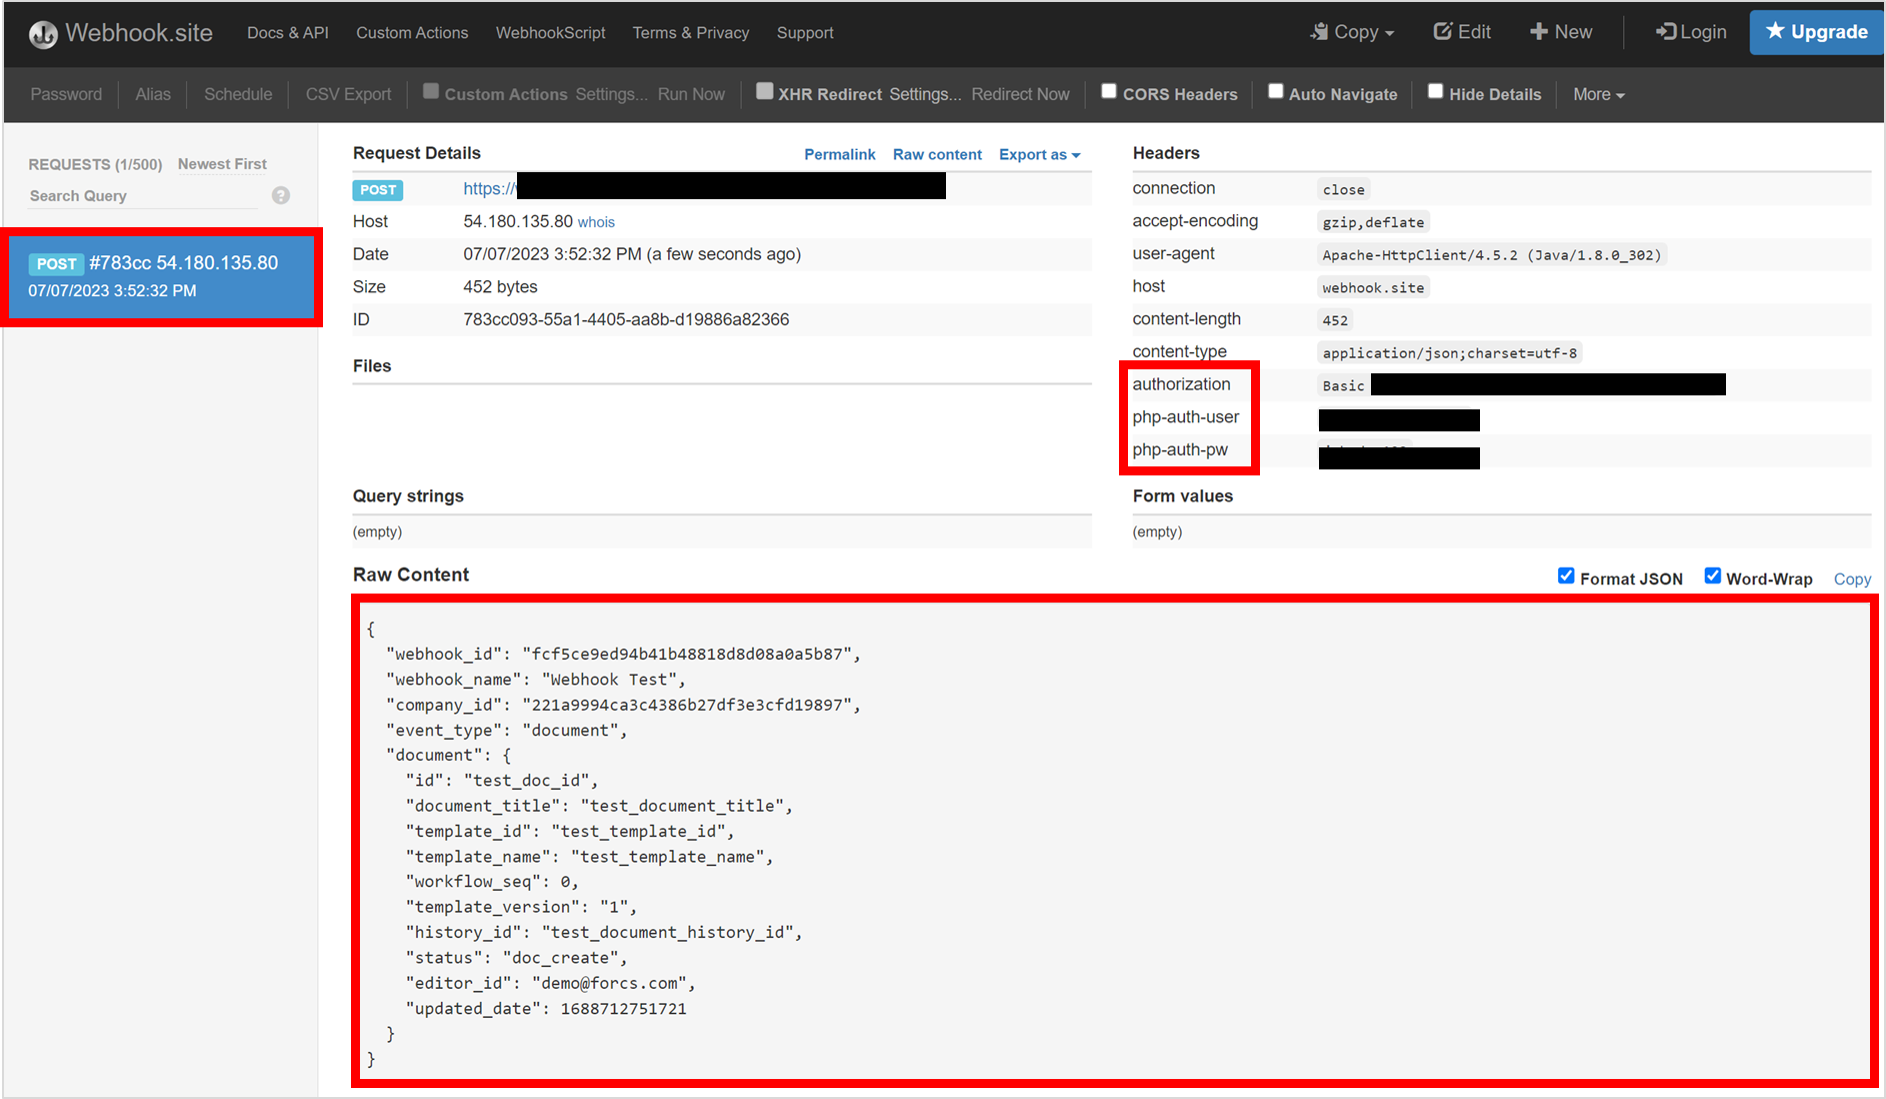
8. Go back to webhook.site. You can see that a POST request and its results are shown there. Other data such as request details, headers, files, query string, and form values are also shown. You can also validate whether the incoming webhook is from eformsign by checking the ID in the php-auth-user field, and the PW in the php-auth-pw field, as well as Base-64 decoding the value in the authorization field. If these values match the ones you set when adding the webhook, then it means the webhook is from eformsign.
Step 5. Create a document
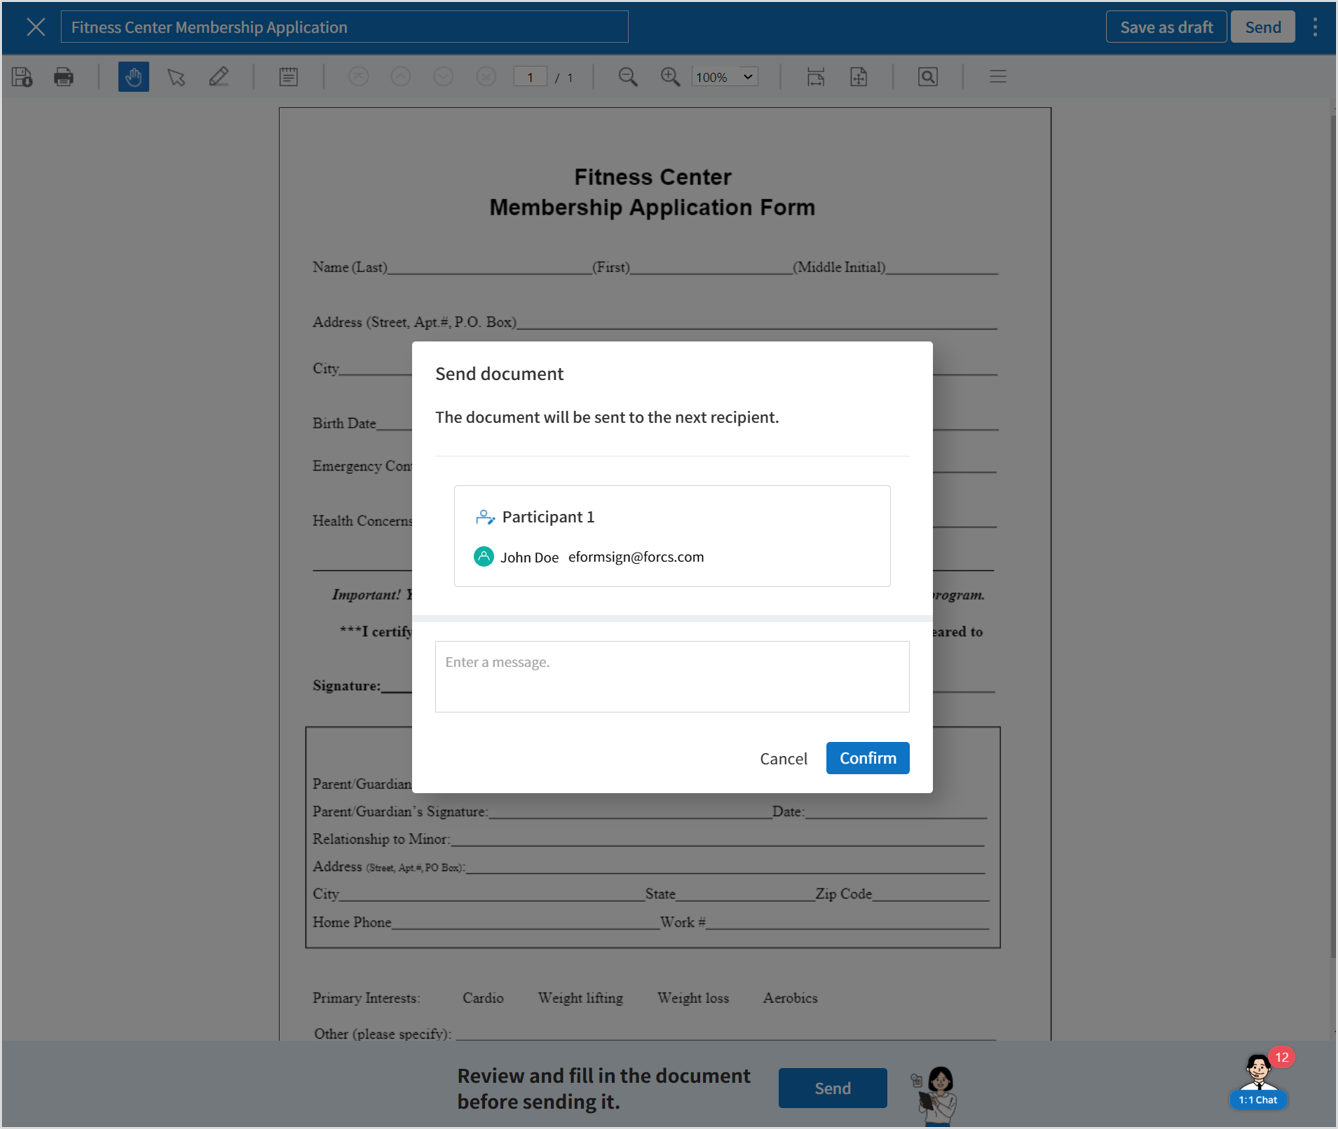
9. Now let’s try sending a production webhook. Since we’ve set the trigger event to ‘All documents’, when a document is generated, a webhook will be sent to the target URL. In this example, we’ll create and send a document to a recipient using the New from my file feature.
Step 6. Check the response on webhook.site for document generation
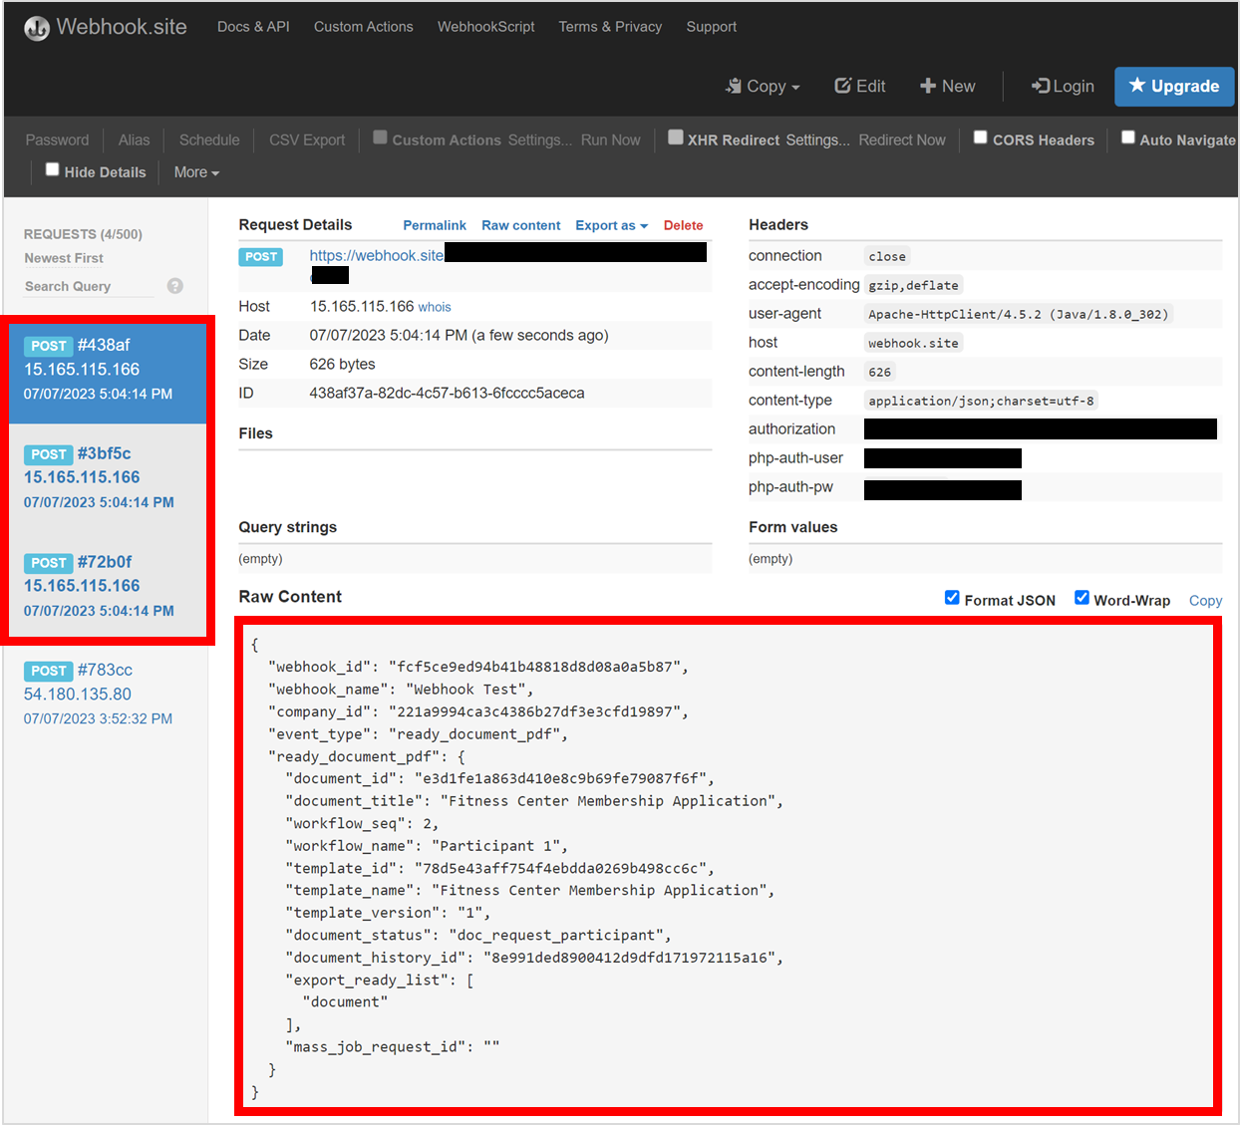
10. If you go back to the webhook.site, you can see that three POST requests have been sent to the URL
If we go back to webhook.site, you can see that three POST requests were sent and if we check the request body of the requests, we can see that two document events (document) and one PDF creation event (ready_document_pdf) were generated.
Conclusion
That’s how you can use webhook.site to easily and quickly test eformsign webhooks. For detailed information on eformsign webhooks, you check out the following guides, Using eformsign Webhook and eformsign Webhook Guide.