Are you looking to simplify your document signing process in eformsign? Sometimes, sending a document to multiple recipients for signature can be cumbersome. Traditionally, you’d have to add each recipient individually to the signer step, which is time-consuming.
Enhance your workflow with signing groups
With eformsign, you can streamline your document signing process by creating signing groups. Here’s how it works:
- Create a signing group: Begin by creating a signing group consisting of multiple members. This eliminates the need to add members individually to your signing workflow.
- Add the signing group to the signing workflow: When sending a document for a signature, simply add the signing group in a signer step of the signing workflow. This allows you to send the document to all group members simultaneously.
- Efficient document handling: Once the document reaches the signing group, any member can fill and sign the document, advancing it to the next step in the signing workflow.
By leveraging signing groups, you streamline your document process and boost productivity. Let’s walk through the steps of setting up and utilizing signing groups in eformsign.
Step 1: Create a signing group
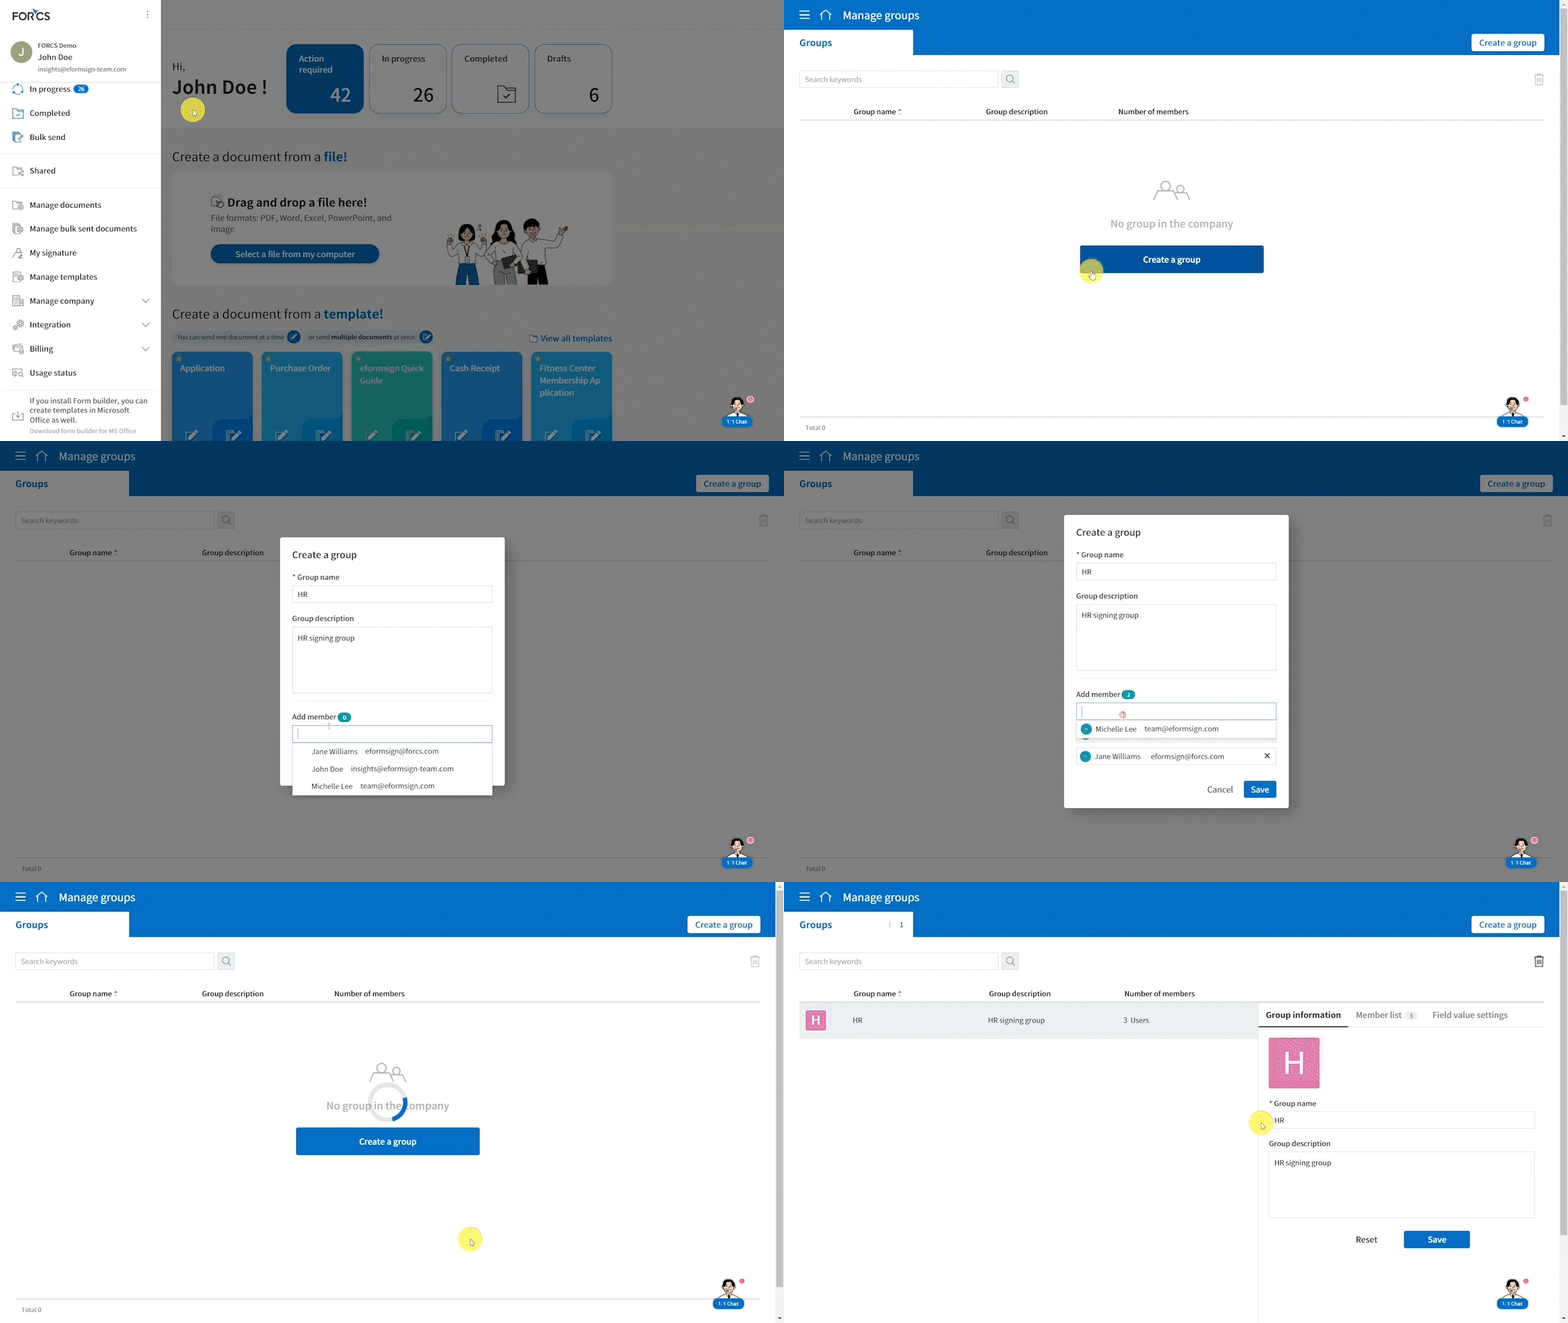
- Navigate to the Manage company > Manage groups menu in the sidebar.
- Click on the Create a group button and enter the group name and description, as well as adding the members who will be part of this signing group.
- Once the group details are filled, click Save to create the signing group.
*Note that signing groups can be created only by your company administrator and company managers.

*Note that only company members can be added to a signing group.
Step 2: Add a signing group to the workflow of a template
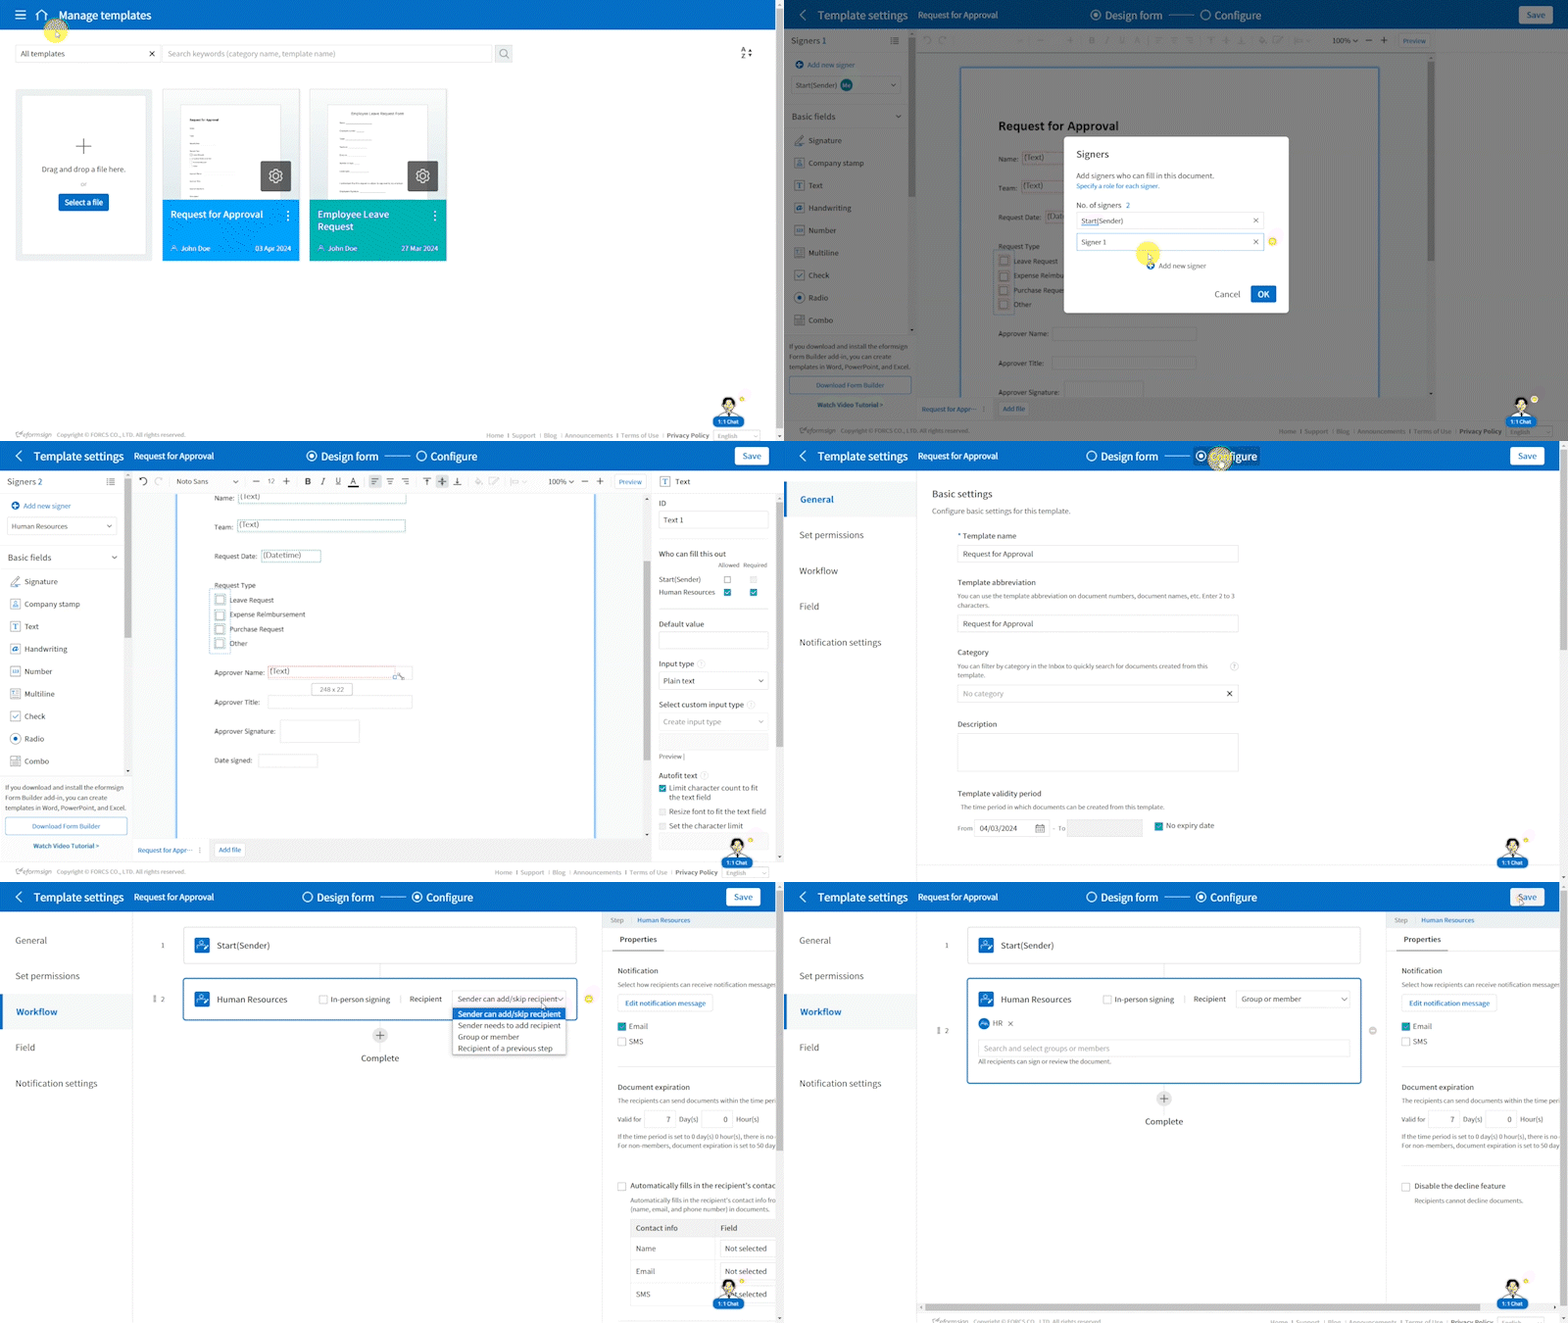
- Navigate to Manage templates and select the desired template. Then, click Add new signer and add a new signer.
- Click the drop-down menu under Add new signer and select the signer you just added.
- Add fields for the signer.
- Navigate to Configure > Workflow and click the workflow step you want to add the signing group to.
- Choose Group or member in the Recipient drop-down box.
- Assign the signing group you want for that signer recipient.
- Save and deploy the template. Now, when you send a document created from this template, it will be sent to all the members of the signing group assigned to the signer recipient.

Step 3: Create and send a document to a signing group
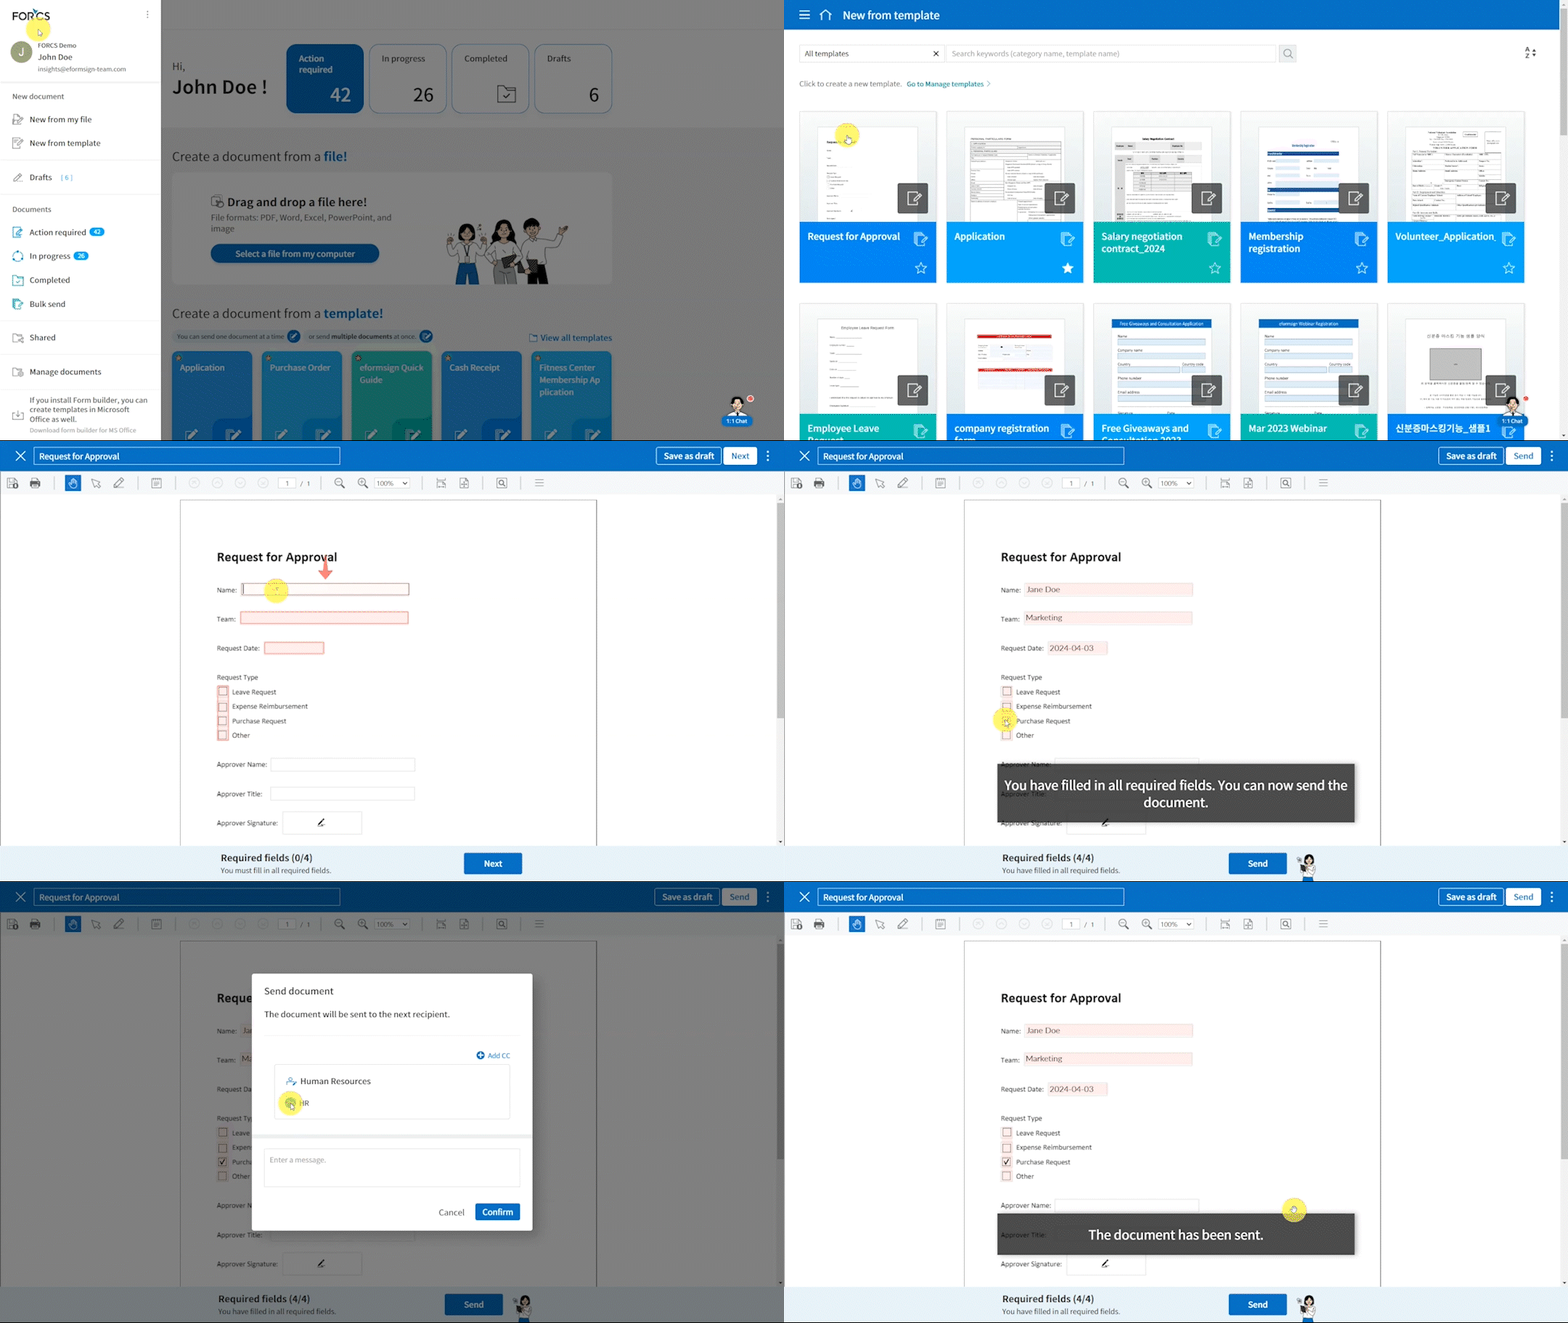
- Navigate to New from template and select the template containing a signing group in the workflow.
- Fill in the document and send it to the signing group.

*Note that when sending a document to a signing group, all members of that group can sign and review the document.
*Note that if any one of the members of the signing group signs and sends the document, the document is sent to the next step.

