Only the company administrator or members with the Manage templates permission can perform this action.
You can set the signature date to be automatically populated in a signed document such as an e-contract or e-agreement.
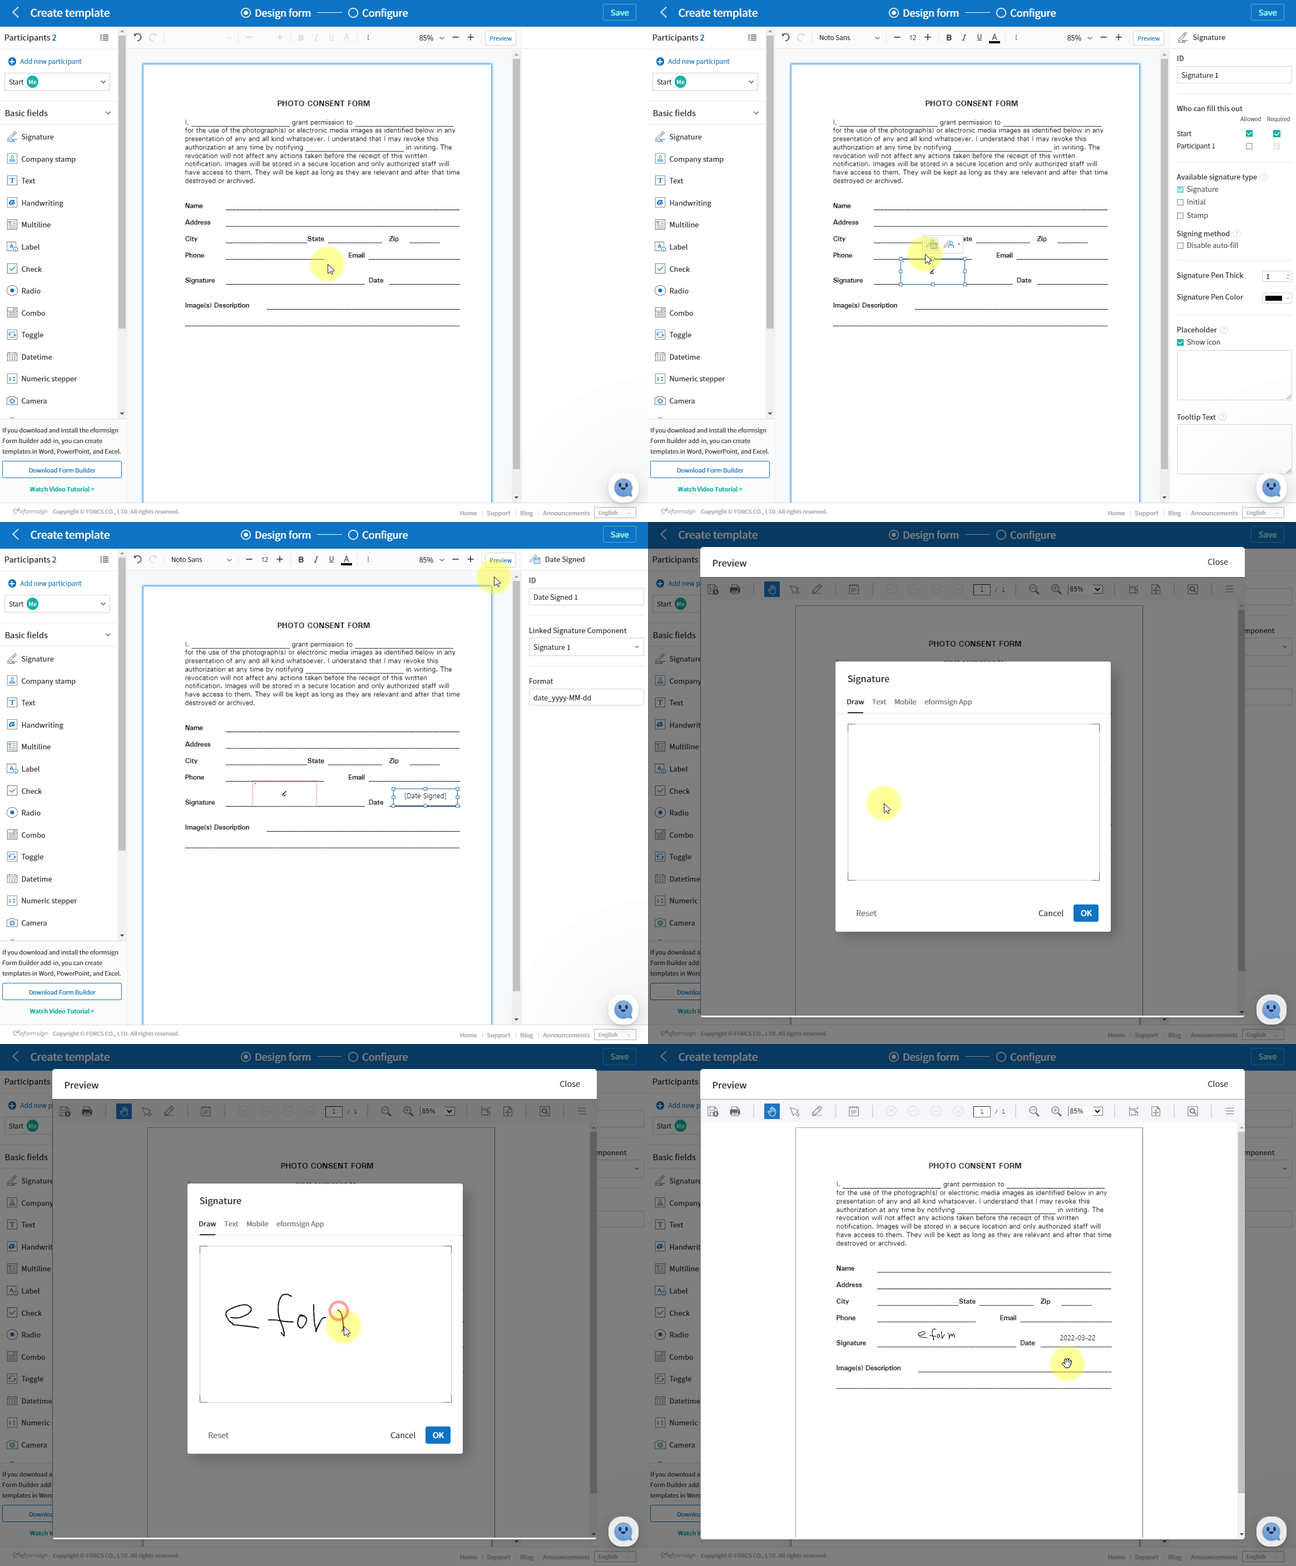
Using the eformsign Web Form Designer

- Upload a file (PDF, Word, Excel, PowerPoint, image) you want to convert to an e-form.
- Add a signature field.
- Click on the signature field and click on the Add date signed button displayed above the field. The “Date Signed” field will be automatically generated. Now, place the field in the area of the document you want.
- When the recipient signs the signature, the “Date Signed” field will be automatically populated.
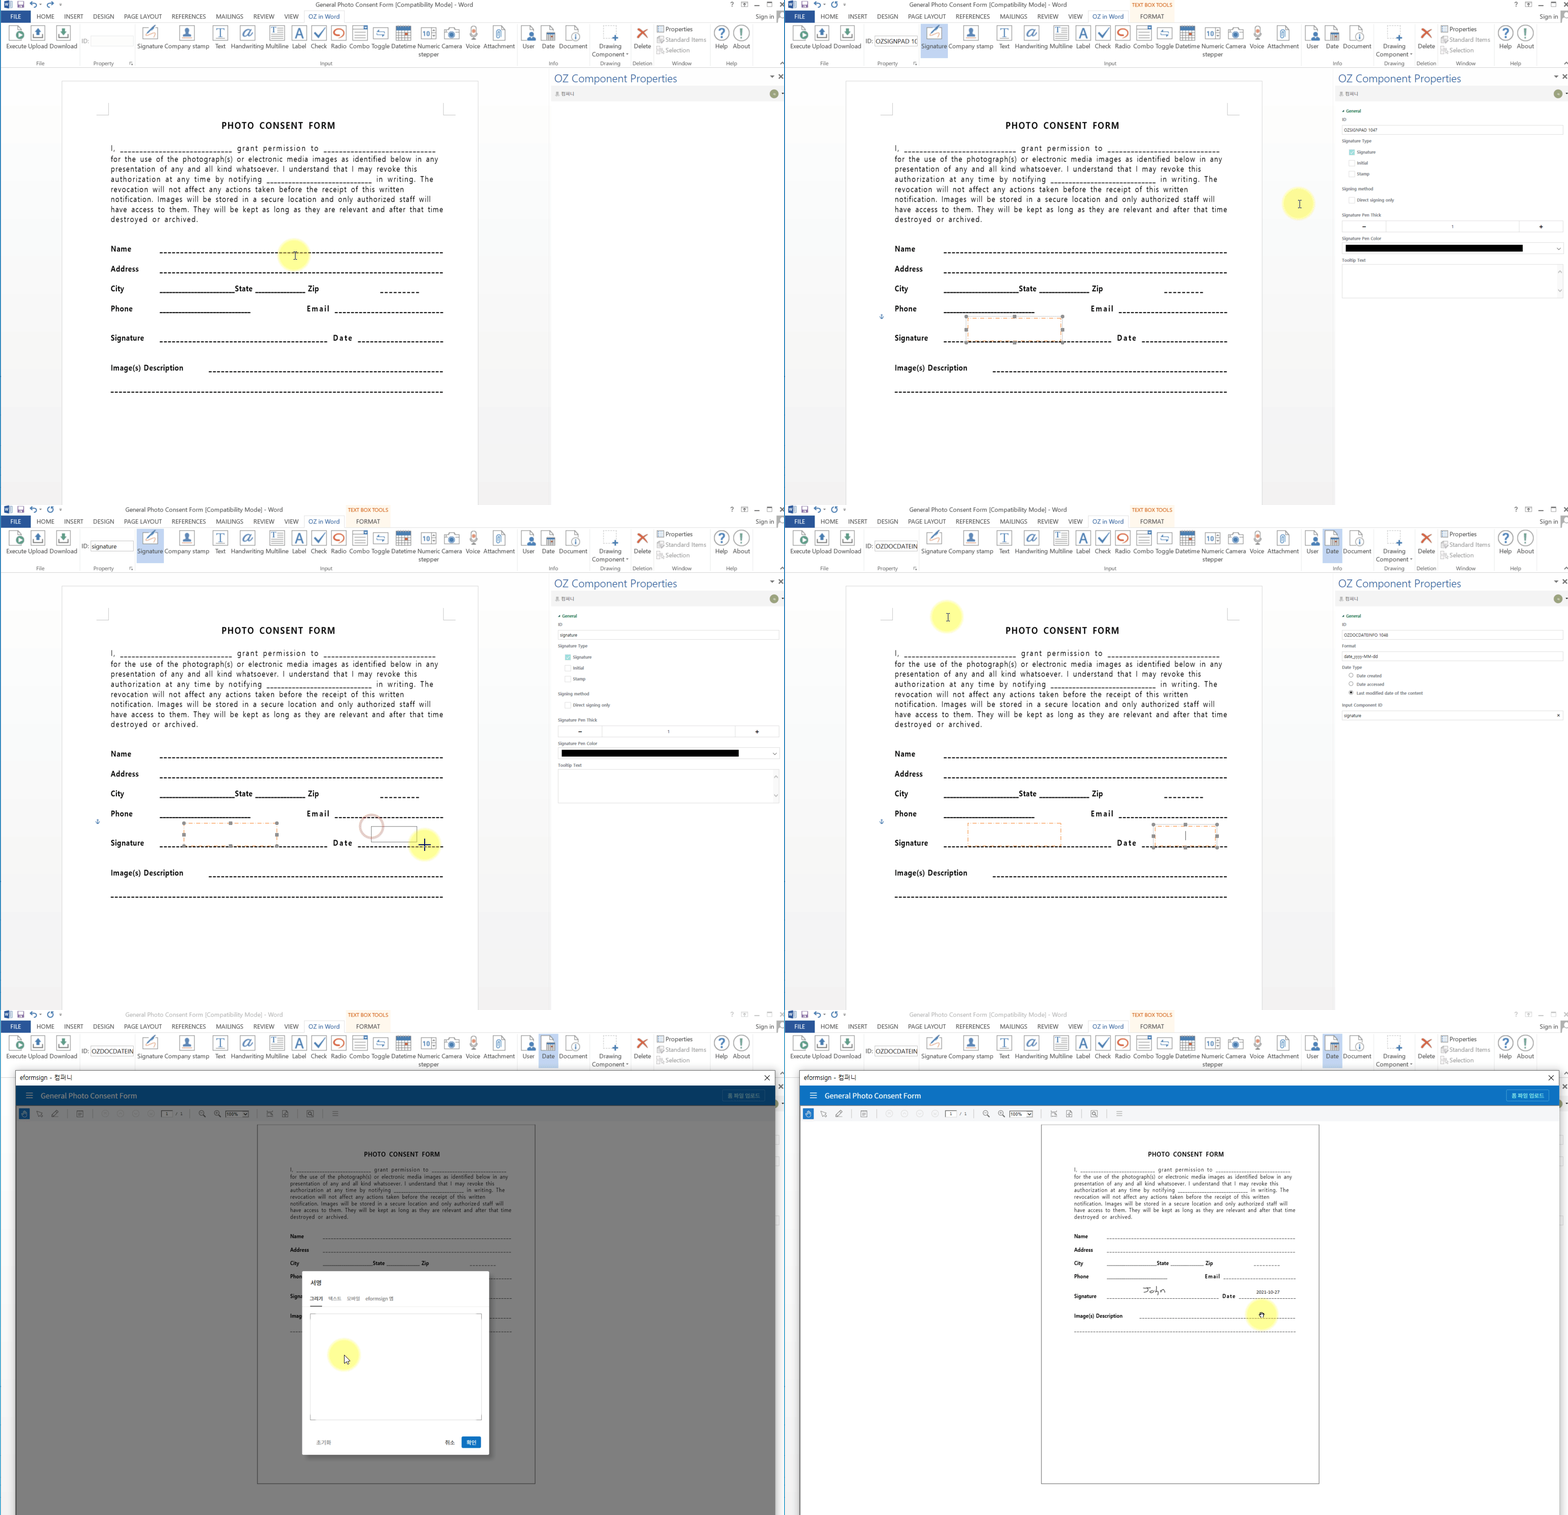
Using the Form Builder Microsoft Add-in
- Open a document file (Word, Excel, PowerPoint) you want to convert to an e-form or create a new document from scratch.
- Add a signature field.
- Name the component (field) ID in the component properties window. For example, RecipientSignature.
- Add a date field in which the signed date will be automatically populated.
- Open the component properties window of the component.
- Select the “Last modified date of the content” option.
- In the input component ID field below, enter the ID of the signature component (field), RecipientSignature.
- When the recipient signs the signature, the “Date Signed” field will be automatically populated.


