

Introducing New eformsign Features – November Update. Now you can auto-save the document’s input data in real-time. In addition, Box has been added as external cloud storage following Google Drive and Dropbox.
Automatic Data Export to Excel
If you don’t like downloading a CSV file every time a new document is added, then this new feature is for you! Now, you can configure settings so that data entered in documents can be automatically stored in Google Spreadsheet and Office 365 Excel files.
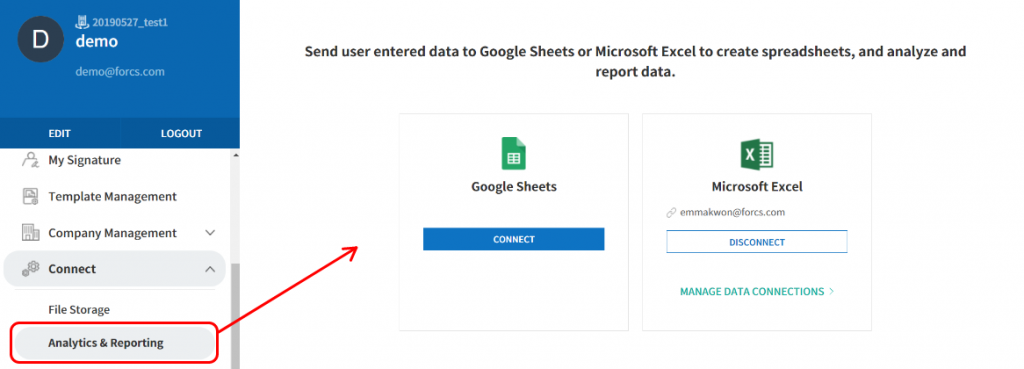
[Using the Analytics & Reporting Menu]
* Accessible only to admins.
- Login to eformsign.
- Go to Connect > Analytics & Reporting in the side menu on the left.
- Select the desired service and connect to your account.
- Click “MANAGE DATA CONNECTIONS”.
- Click “ADD DATA CONNECTION”.
- Set the Connection Name, Data Connection Sheet, When to Send Data, and Template options, and then click “SAVE”.
Our Latest Cloud Storage Integration – Box
We’ve added “box” to our list of external cloud storage that we support. In addition to Dropbox and Google Drive, you can now automatically store documents on the cloud to “box”.
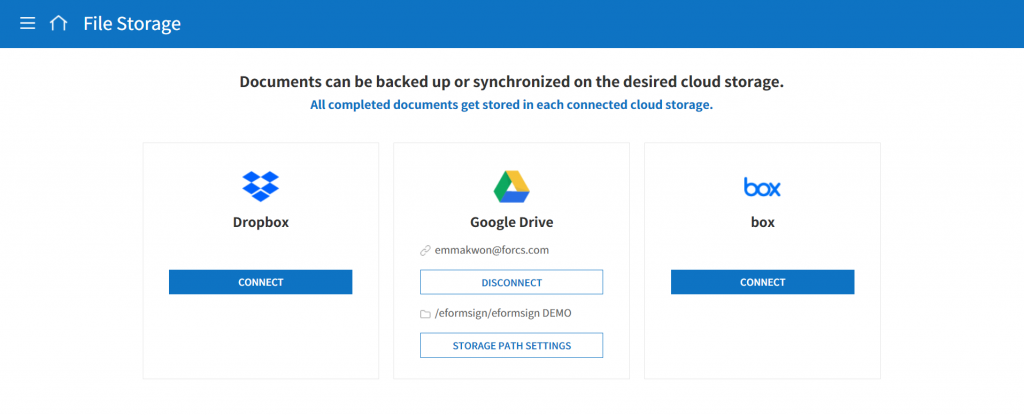
[Connecting Your Account to a File Storage]
* Accessible only to admins.
- Login to eformsign.
- Go to Connect > File Storage in the side menu on the left.
- Connect your account to the desired file storage.
- Set the storage path by clicking “STORAGE PATH SETTINGS”.
[Automatically Storing Documents in a File Storage]
* Accessible only to admins and template managers.
- Login to eformsign.
- Go to Template Management in the side menu on the left.
- Go to Template Settings by clicking the desired template.
- Click the “Workflow” tab on the left.
- Tick the “Backup in cloud storage” box in the PROPERTIES tab of the “Complete” step.
※ Please note that you can store documents in file storage only in the “Complete” step of the workflow.
Transferring Document Ownership
If a member no longer uses eformsign, then you may have to transfer the documents previously handled by her/him to another member. In this case, you can take care of it by using the Transfer Documents function.

[Using the Transfer Documents Function]
* Accessible only to admins and company managers.
- Login to eformsign.
- Go to Company Management > Member Management in the side menu on the left.
- Click the “Transfer documents” button at the top right corner of the screen.
- Select the member you want to transfer document ownership from.
- Select the member you want to transfer document ownership to.
- Click the “CONFIRM” button.
Other Updates
- Now you can use the “Document Mass Creation” function even during the free trial period(limited to five documents at a time).
- You can now login to eformsign with your Google and Facebook accounts.