Bulk sending eSignature documents to multiple recipients at once can significantly streamline your document management process and enhance collaboration in a fast-paced business environment. To achieve this time-saving and efficient approach, you can leverage eformsign’s bulk send feature to remove the cumbersome and time-consuming practice of send paper documents to each individual one by one to collect signatures.
In this blog, we walk you through a step-by-step guide on how to effectively bulk send documents using two different methods: entering data manually and uploading an Excel file.
Note: You need either the company administrator or template usage permission to use this feature.
Note: In free trial, you can only bulk send up to 5 documents.
Method A: Bulk send by entering data manually
In eformsign, you can send multiple documents at once from a template by entering data manually.
Instructions:
- Go to New document > New from template and click the Send in bulk icon of the template you want to create a document from. Alternatively, you can click the bulk send icon in one of the templates displayed in the dashboard.
- Select the Enter manually option in Data. This option is set as default.
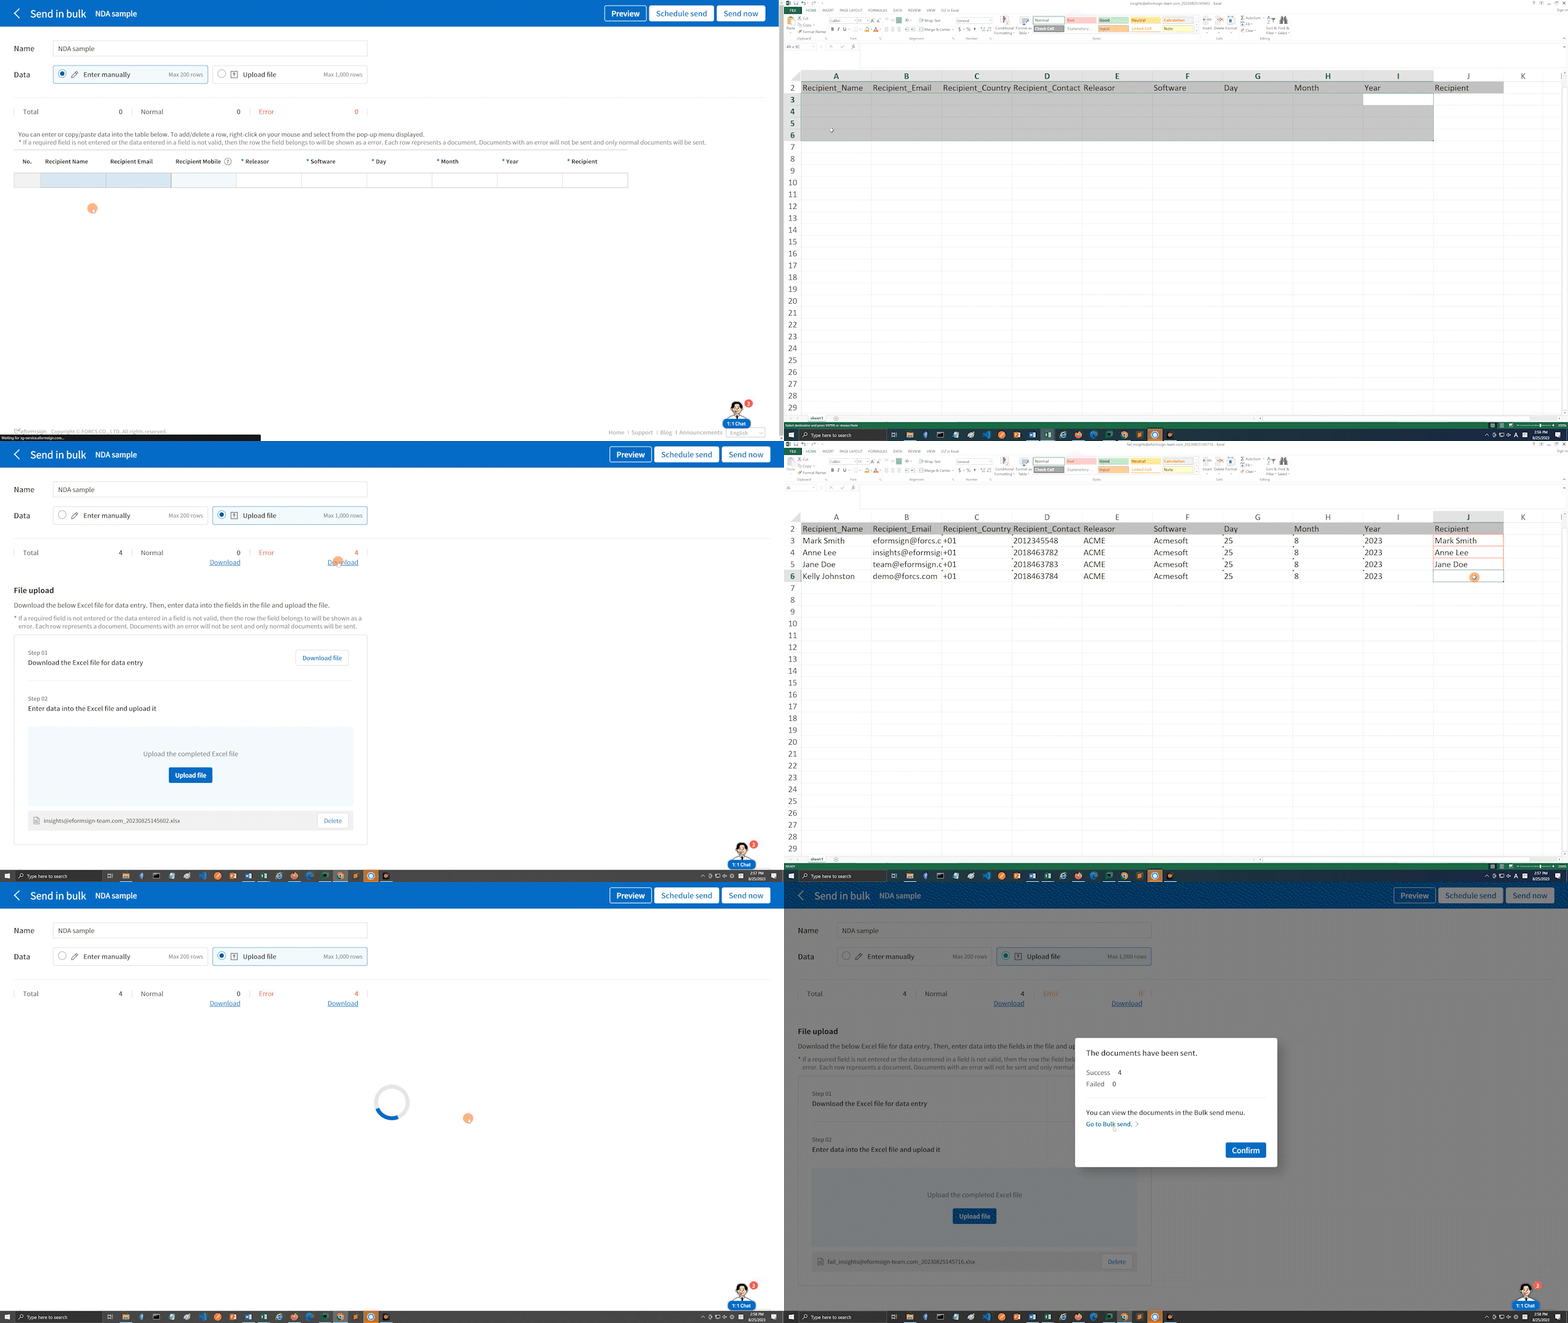
- Selecting the Enter manually option displays a spreadsheet where you can enter data directly. Each column of the table contains all the fields of a document. The IDs of fields (which are fields in a template) are shown as the name of each column. The last row of the first column (No.) indicates the number of documents to be created.
- Enter data in by double-clicking on each cell to enter data or copying and pasting data from a spreadsheet. Note that the columns with an asterisk (*) are fields that are required for the sender to fill in.
- Once you are done entering data, click the Preview button at the top right corner of the screen to see how each document is filled out and to check for any error with the entered data. If there is any errors with the data entered in the fields, the corresponding cell will be highlighted in red. Fix the error if there is any and then click the Preview button again to preview the documents and check for any error.
- When you are ready to send to bulk send the documents, click the Send now button at the top right corner of the screen to send them immediately, or click the Schedule send button to send at a later time/date.
Note: Just like in Excel, you can right-click on the mouse to add or delete columns and the data entered in a cell can be copied and pasted, and dragged to another cell.
Note: By entering data manually, you can bulk send up to 200 documents at a time.
Method B: Bulk send by uploading an Excel file
In eformsign, you can also send multiple documents at once from the same template by uploading an Excel file.
Instructions:
- Go to New document > New from template and click the Send in bulk icon of the template you want to create a document from. Alternatively, you can click the bulk send icon in one of the templates displayed in the dashboard.
- Select the Upload file option in Data and click the Download file button. This will download the Excel file where you’ll be entering data.
- Open the file and enter data just like as when selecting the Enter manually option.
- When you are done entering data, save the Excel file and then upload it to eformsign by clicking the Upload file button.
- When the file is uploaded, you’ll see the total number of rows (Total), the number of rows with no error (Normal), and the number of rows with an error (Error). If there’s any error, you can click the Download button under Error to download, view, and fix the rows with an error. You can then re-upload the now error-free file.
- Once you see that there is no error, click the Preview button at the top right corner of the screen to see how each document is filled out.
- When you are ready to send to bulk send the documents, click the Send now button at the top right corner of the screen to send them immediately, or click the Schedule send button to send at a later time/date.

Note: By uploading an Excel file, you can bulk send up to 1,000 documents at a time.
View the Progress of the Documents
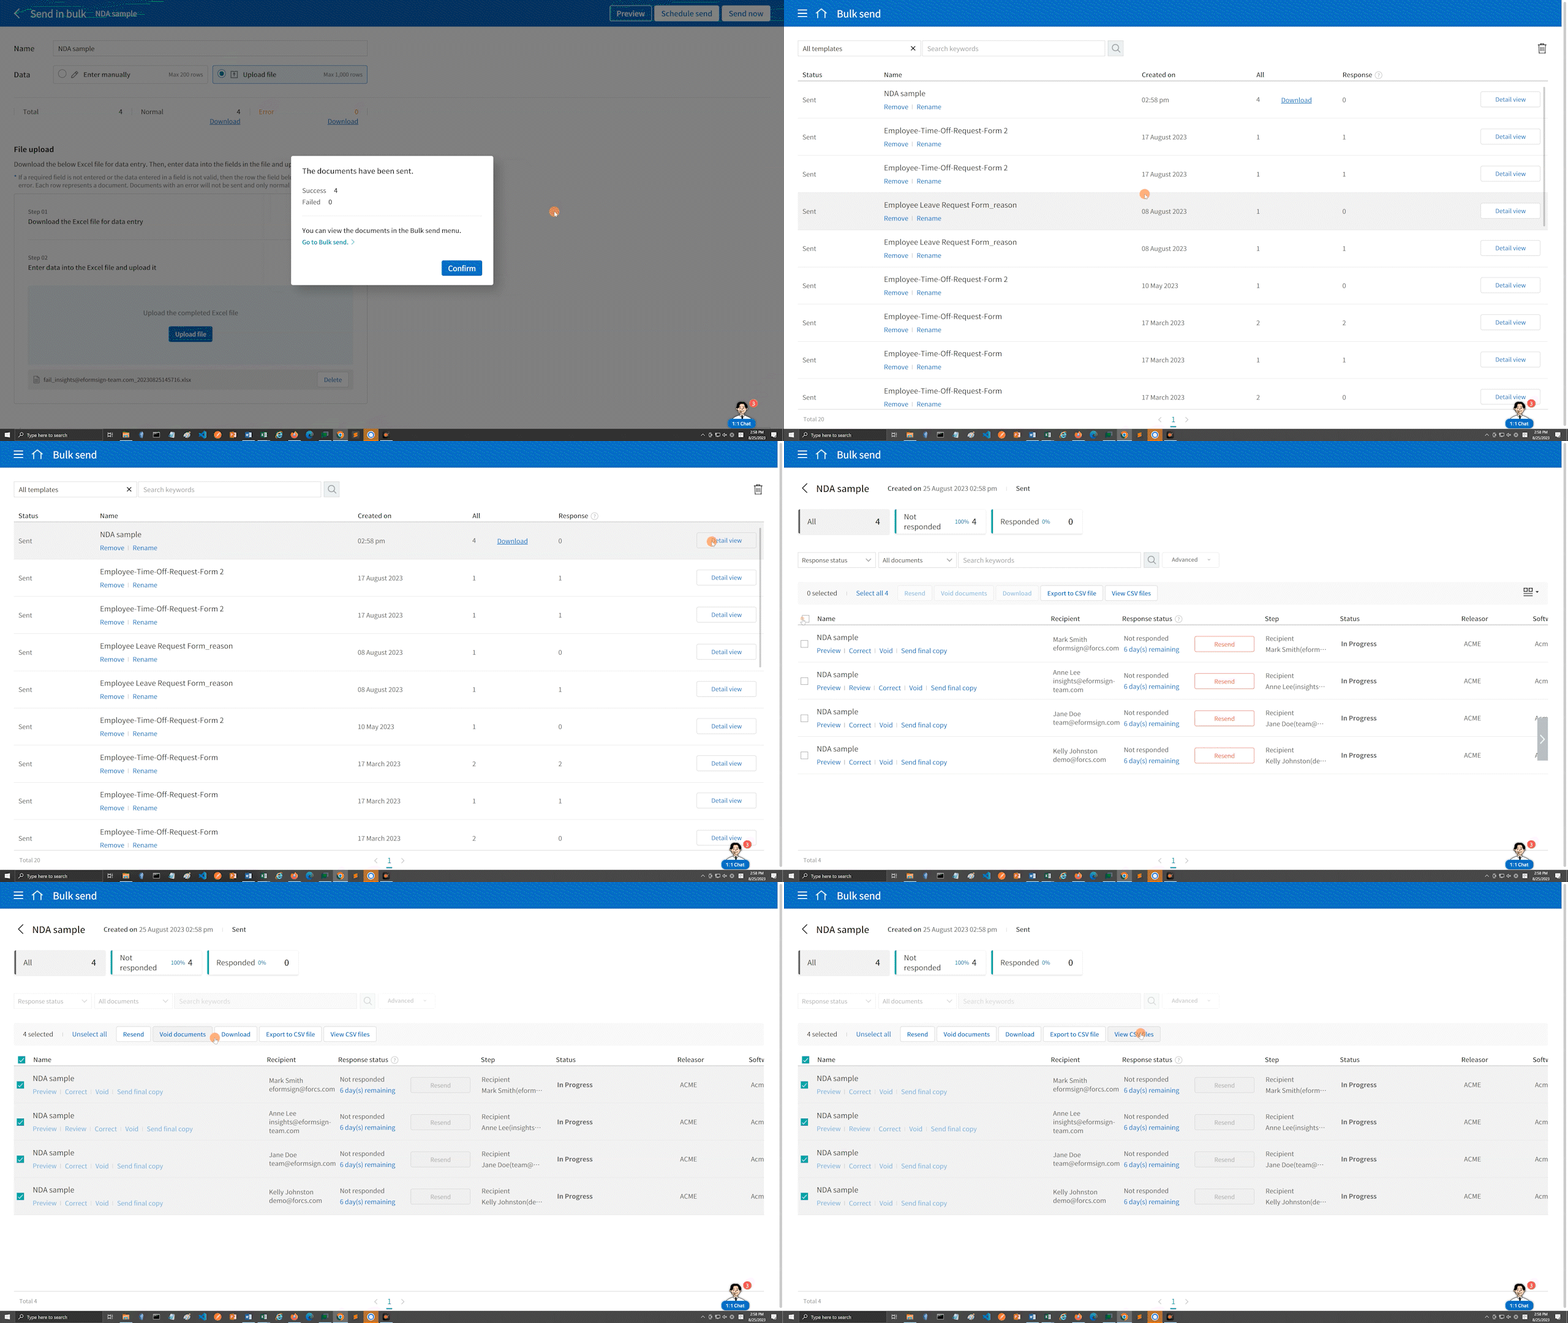
Once you have bulk sent documents, you can go to the Bulk send inbox by clicking Go to Bulk send in the pop-up displayed or clicking the Bulk send menu in the sidebar.
You can view the progress of each document in the Response column, and click the Detail view button to view to details of each document as well as re-sending, voiding, downloading, and exporting each one.

Tips
Tip 1: There are some fields that cannot be used for bulk send including camera, voice, and grouped radio fields.
Tip 2: If the template you selected was created by using the OZ in Office Microsoft Office add-in, make sure that the fields in the template are allowed access. You can check/uncheck each field by going to Manage templates > Template settings (⚙) > Workflow and clicking the workflow step you want and clicking Manage items next to Properties on the right side of the workflow.


