eformsign has multiple features for utilizing electronic company/personal stamps. In addition to uploading an image of a company stamp, and scanning a life-sized company stamp, eformsign also provides a feature for automatically generating a company/personal stamp. In this blog, we will guide you through the process of creating electronic company stamps by using eformsign’s e-stamp generator.
How to create an electronic company stamp
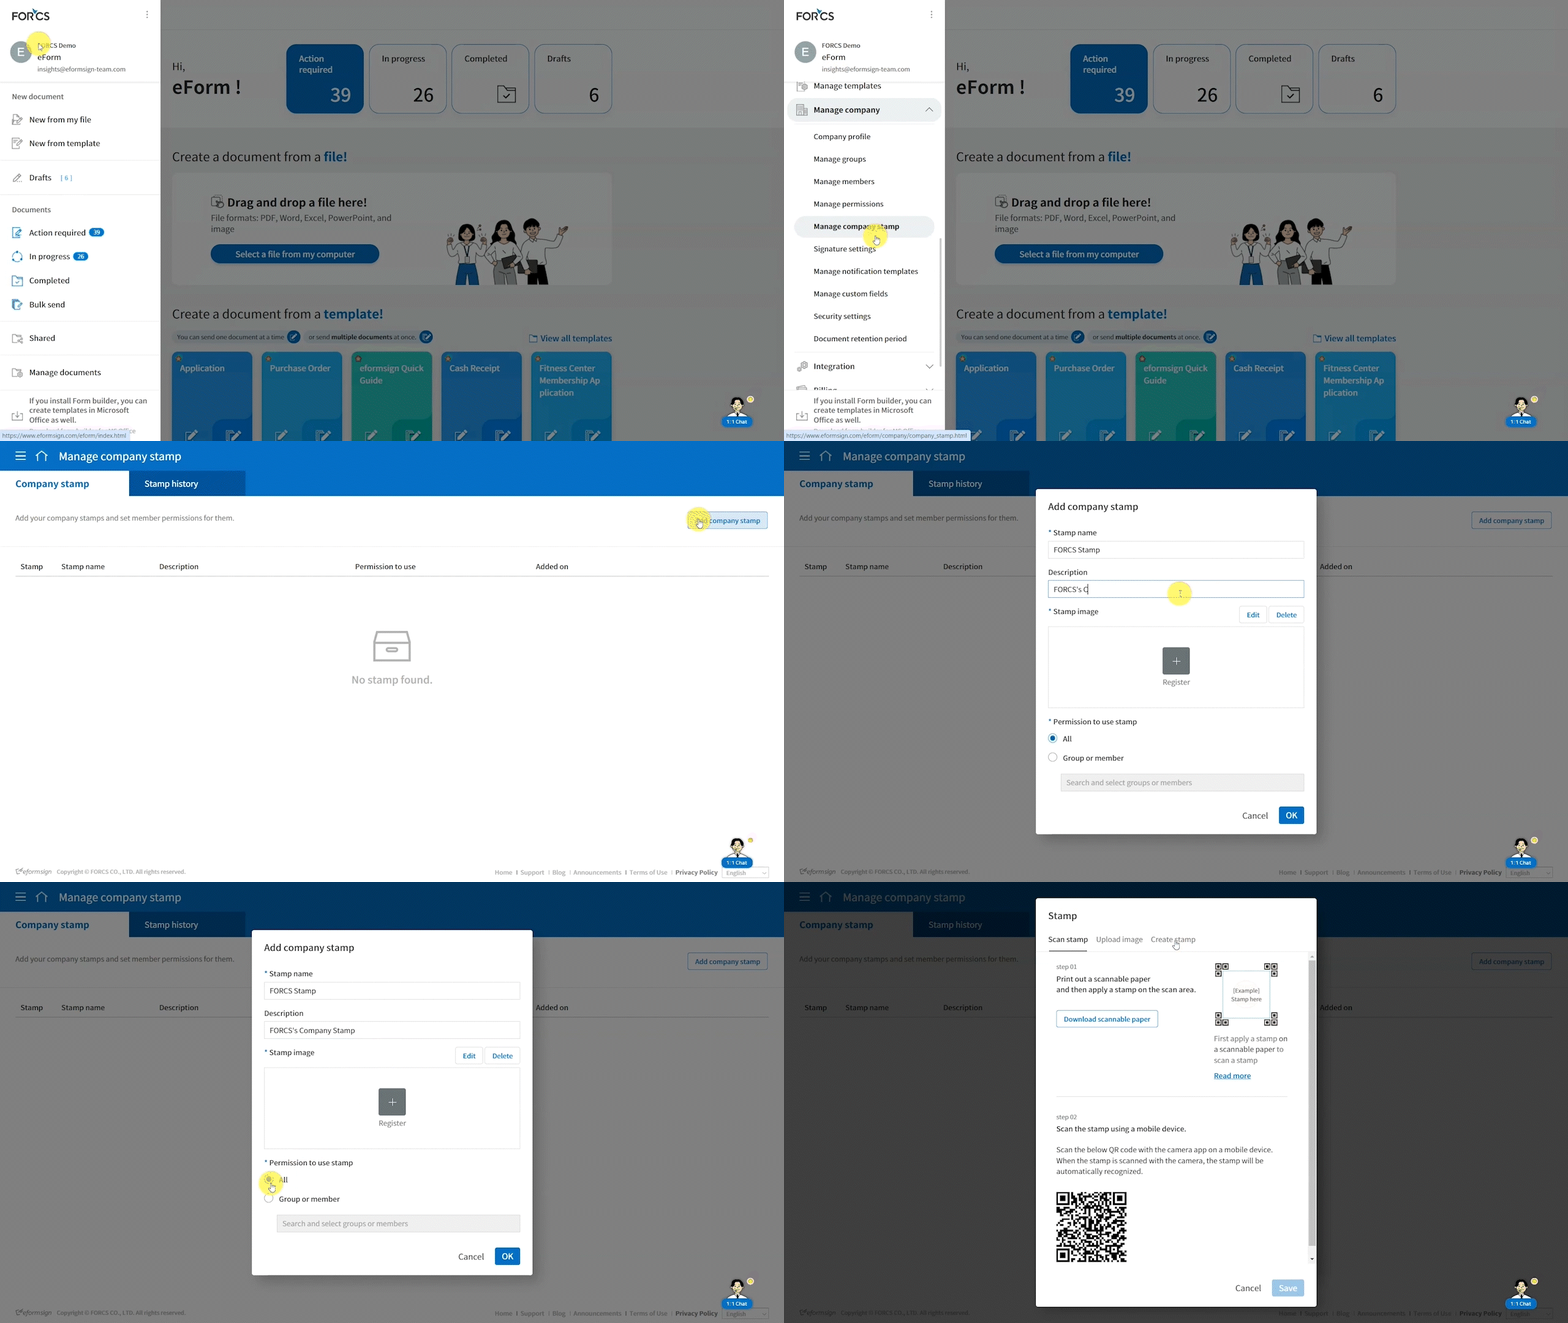
Step 1: Navigate to the Create stamp tab
- Open the sidebar menu and go to Manage company > Manage company stamp.
- Click the Add company stamp button on the top right corner of the screen. The Add company stamp pop-up will be displayed.
- Name the stamp, enter a description of the stamp, and set permissions on who can use this stamp.
- At the center of the pop-up, click the Register button. The Stamp pop-up will be displayed.
- Click the Create stamp tab.
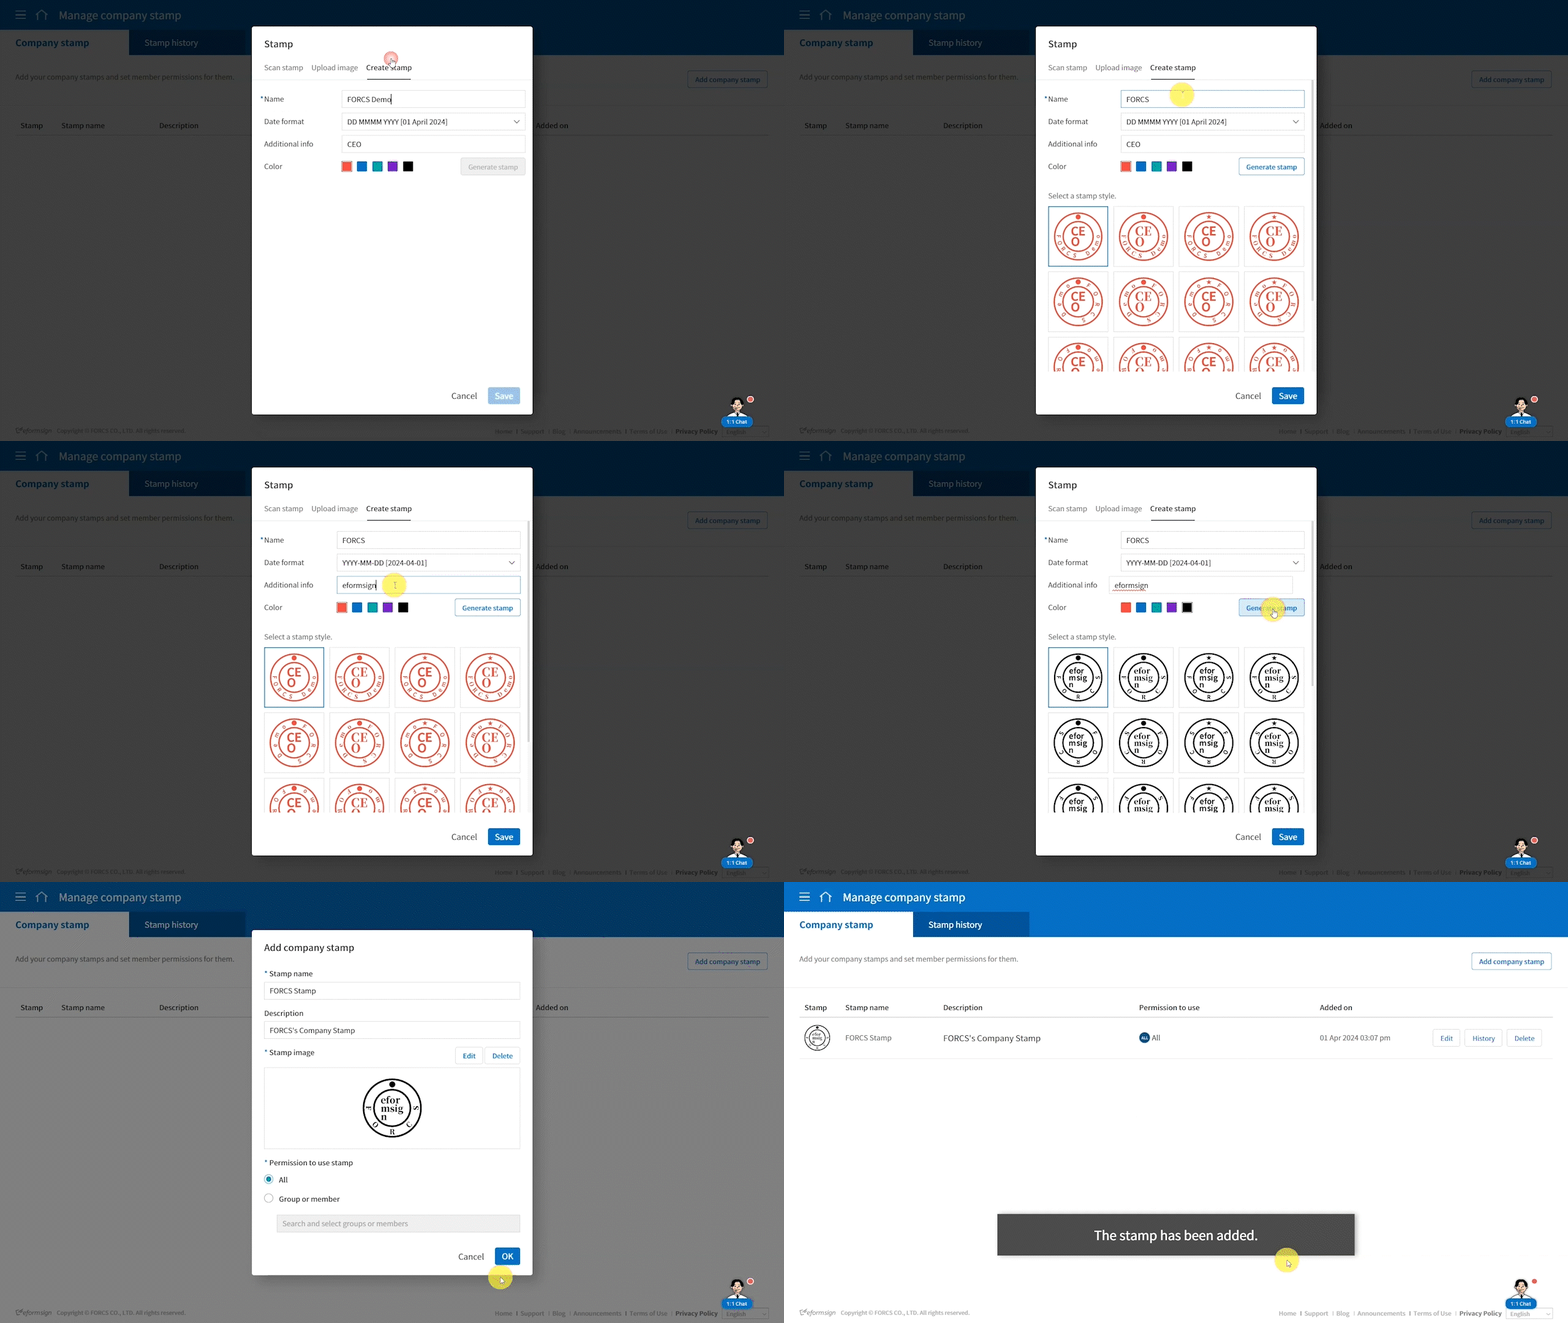
Step 2: Create a company stamp
- Enter the name of the company stamp, select the date format, and enter any additional info you want to include in the company stamp.
- Choose the color of the stamp and click the Generate stamp button.
- Multiple stamp styles are generated based on the name given to the stamp, the date format selected, additional info entered, and the color chosen.
- Select the stamp style you want and click the Save button.
- Review the stamp information and permissions and click the OK button to create and add the company stamp to the list of the company stamps your company has.
How to create a personal electronic stamp
In addition to electronic company stamps, you can also create electronic personal stamps using eformsign.
Step 1: Navigate to the Create stamp tab
- Open the sidebar menu and go to the My signature.
- Click the Register button inthe Stamp section. The Stamp pop-up will be displayed.
- Select the Create stamp tab.
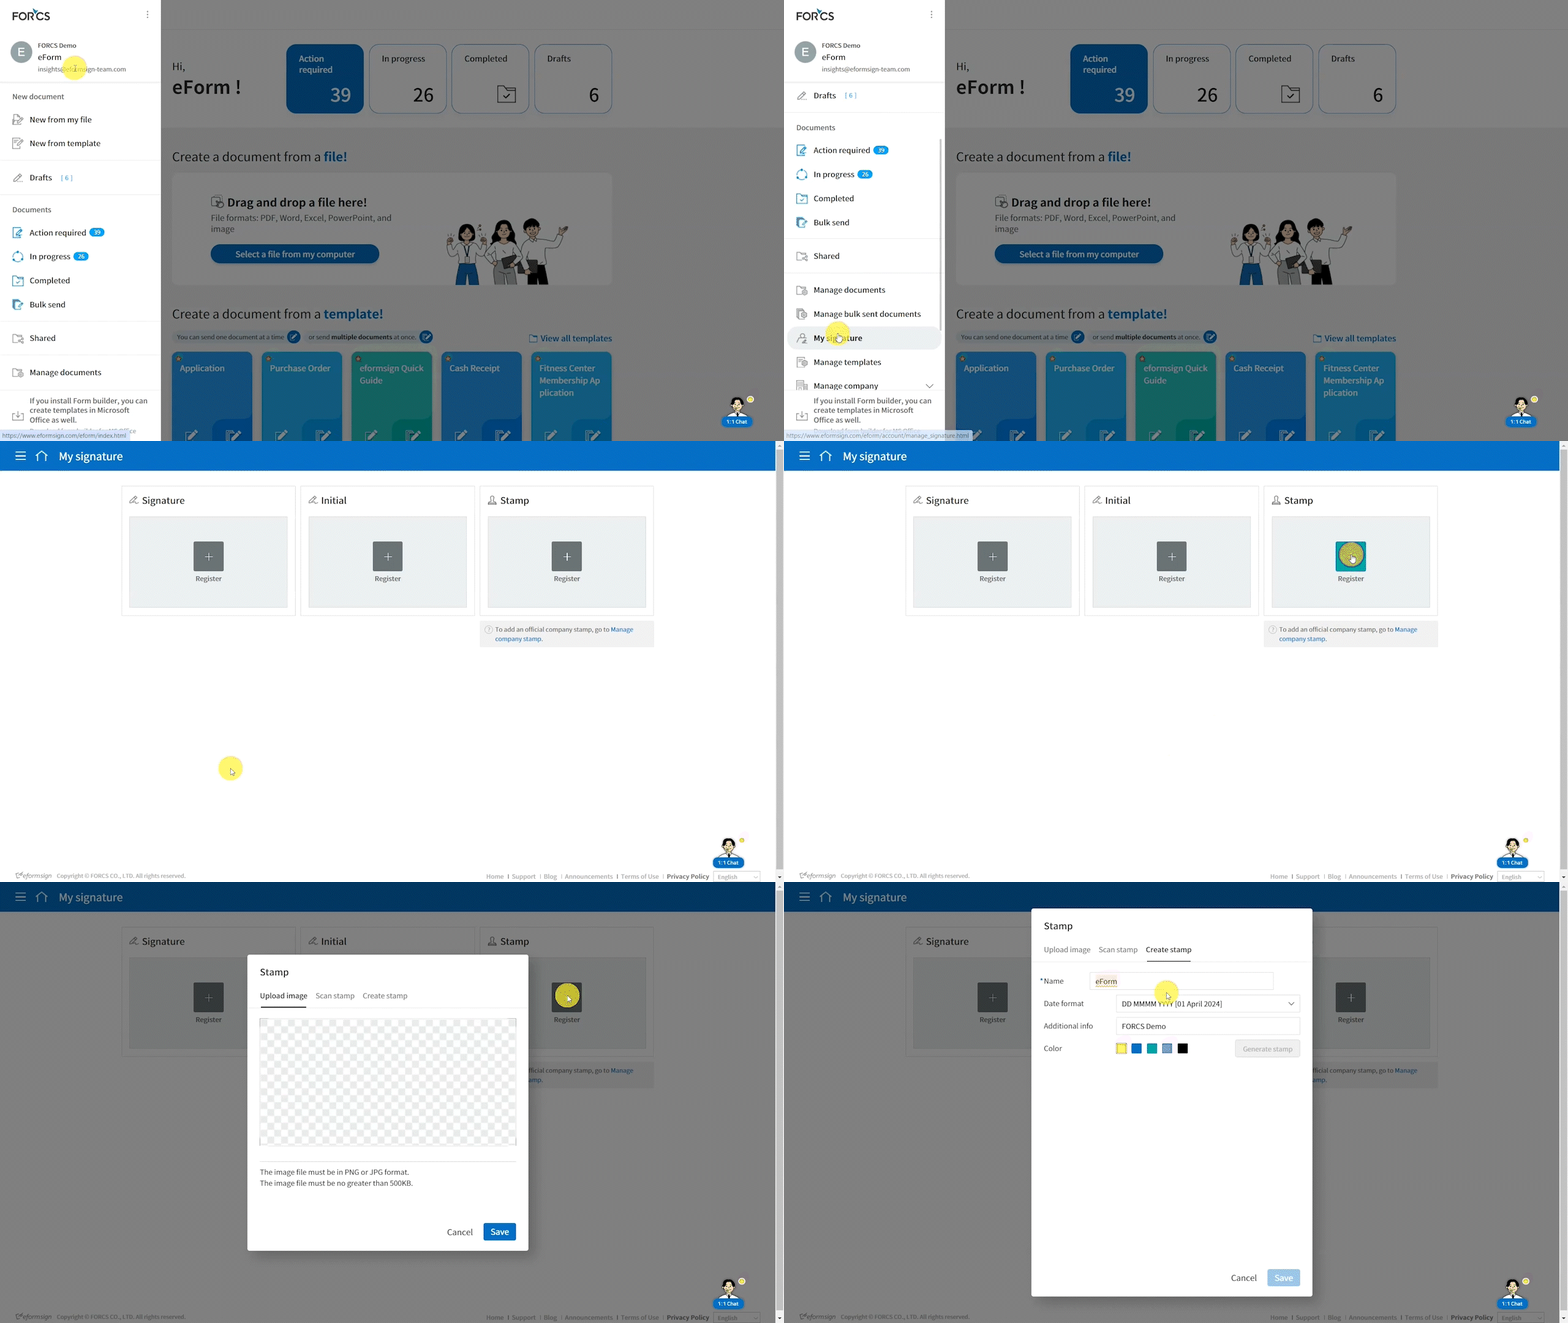
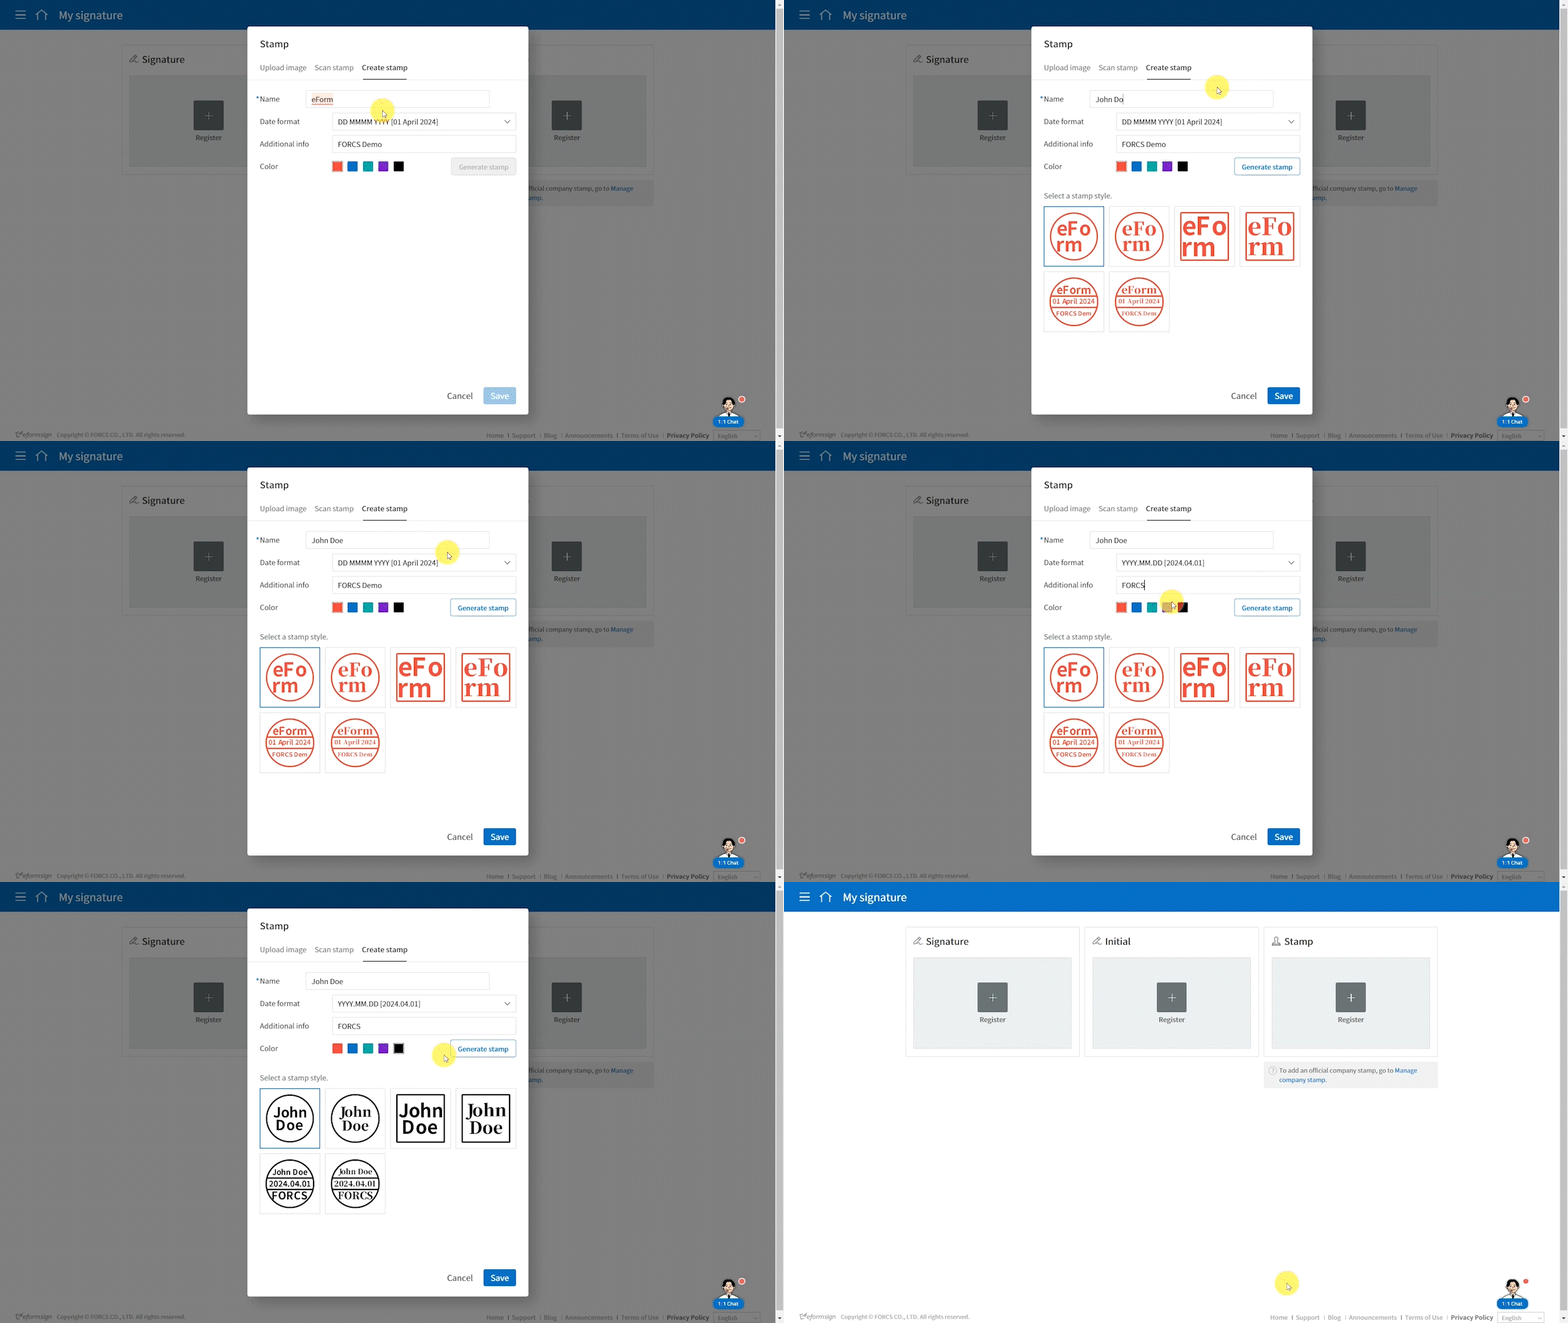
Step 2: Create a personal stamp
- Enter your name, select the date format, and any additional info you want to include in your personal stamp.
- Choose the color of the stamp and click the Generate stamp button.
- Multiple stamp styles are generated based on the name given to the stamp, the date format selected, additional info entered, and the color chosen.
- Select the stamp style you want and click the Save button to create the stamp.
*Note that each member can have only one personal stamp at a time.
*If you choose a stamp style with a date, today’s date is applied to the personal stamp.

