

Thanks for visiting our March product updates blog. Take a look at what eformsign has been up to this month.
[New] Features for Company Stamp Categories, Keyword Search, and Permission Settings
To enhance your experience in managing company stamps, we’ve introduced the following new features on the Manage company stamp page.
Category Creation and Registration
- When adding a company stamp, you can select an existing category or enter a new category name to create a new category automatically.
Category Filtering and Search
- A new search bar has been added at the top of the Manage company stamp page, allowing you to filter stamps by category.
- You can also quickly search for specific stamps by entering keywords such as category name, stamp name, and permissions.
Advanced Usage Permission Settings
- Permissions for using company stamps can be further refined so that only users meeting certain criteria (department, ID, name, etc.) are allowed to use them.
✅ How to Create and Add Categories
- Navigate to the Manage company > Manage company stamps page.
- Click the Add company stamp button or click the Edit button of the desired stamp.
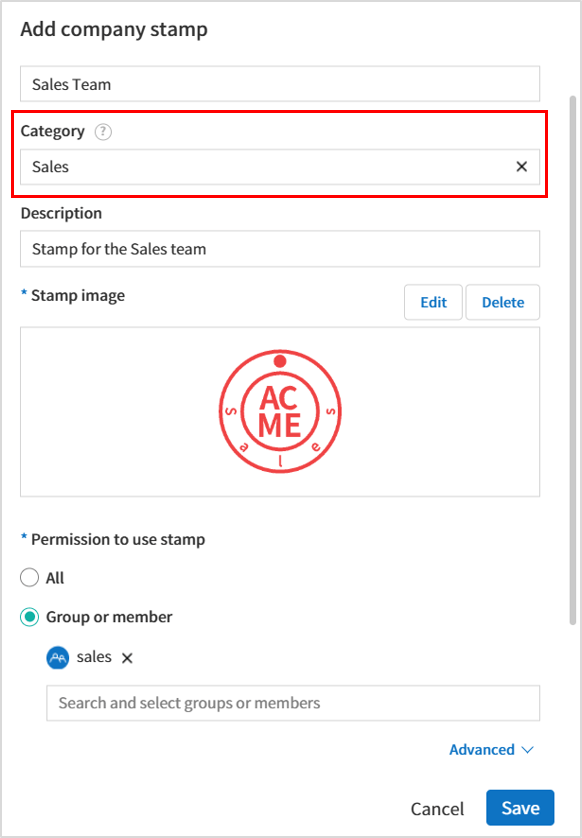
- In the Add/Edit company stamp pop-up, you can create a new category or select an existing one.
- If you want to use an existing category, click the input field under Category, select one from the displayed categories, and then click the Save button.
- If you want to create a new category, type in a new category name in the input field. A new category will be created automatically once you save.
- Once you have clicked the Save button after selecting a category or creating one, the stamp will be saved under that category.
- You can create multiple categories by using a slash (/) as a separator (e.g. ACME Inc/Finance Team).
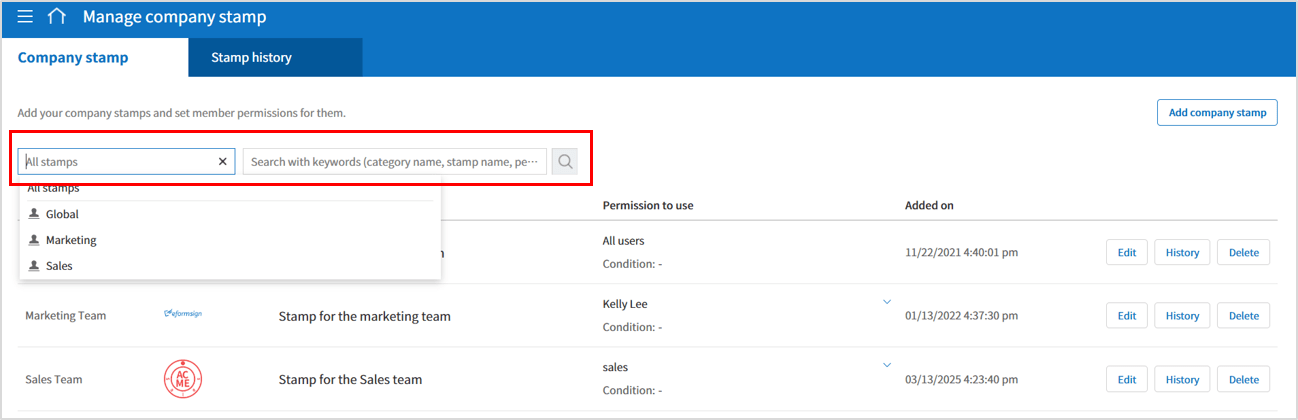
✅ How to Filter and Search by Category
- Category Filtering: Click the search bar with the placeholder“ All Stamps” on the top-left of the Manage company stamps page. A list of existing company stamp categories will be displayed. Select your preferred category to filter stamps belonging to that category.
- Keyword Search: Enter keywords such as the category name, stamp name, or permissions into the search field to quickly find the stamp you need.
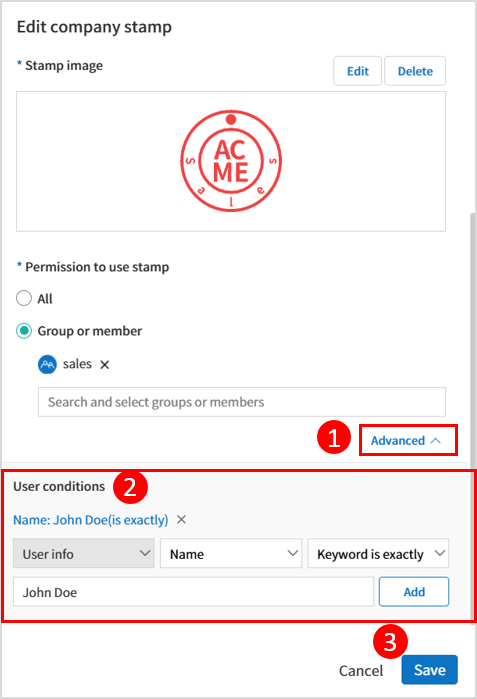
✅ How to Set Advanced Usage Permissions
- Click the Add company stamp button or the Edit button of the desired stamp.
- In the Add/Edit company stamp pop-up, click Advanced under Permission to use stamp.to display the User conditions section.
- Configure the detailed user conditions:
- Select a specific condition (ID, Department, Name, etc.) and choose either the Keyword is exactly or Keyword contains options for your keyword.
- Enter a keyword in the field below and click the Add button to add it to your conditions.
- For example, if you choose “Name” + “Keyword is exactly” and enter “John Doe”, only a member whose name is exactly “John Doe” will have permission to use that stamp.
- Once you have finished setting your conditions, click the Save button.
[New] Template Version Rollback Feature Added
We have introduced a rollback feature that makes it easy to revert a published template to a previous version. If the most recently saved template version is higher than the deployed version, you can restore it to the previous version. Once restored, any versions higher than the restored version will be deleted.
Example
- Published version: v.2
- A saved version that has not yet been published: v.3
- If you roll back, v.3 is deleted, and the template is restored to v.2.
❗ Rollback Conditions
- The most recently saved version must be v.2 or later.
- The most recently published version must be lower than the current saved version.
- Rollback is only available when the template is in the Need to publish status.
- Rollback permissions: Template owner, members with template edit permission, adminstrator, and the most recent publisher.
When you successfully roll back, all editable values on the template settings page name, version, status, category, template publisher, etc.) revert to the previous version’s values. However, items not connected to the template version remain in their most recent status.
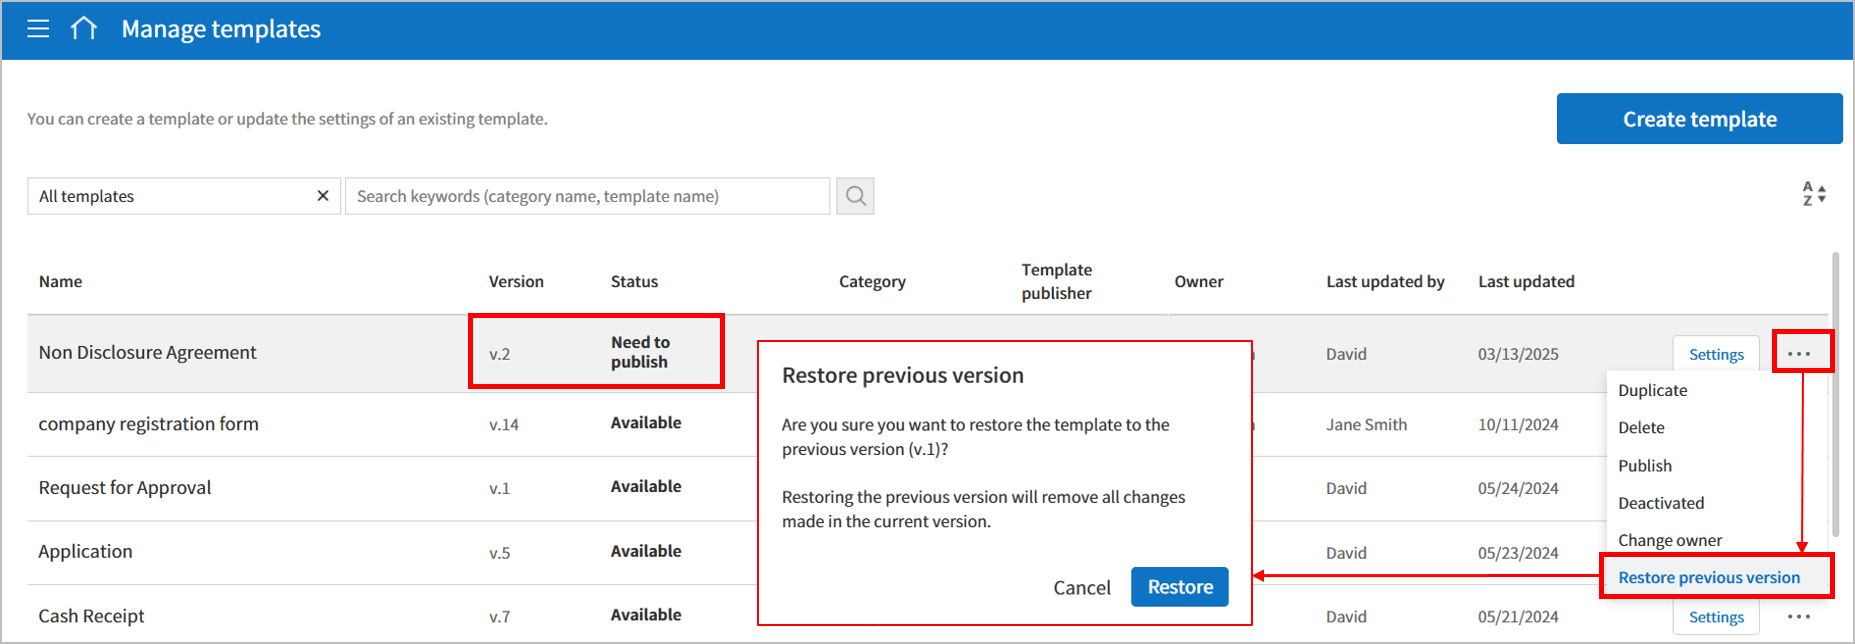
✅ How to Roll Back a Template Version
- Go to the Manage templates page.
- Click the see more icon on the template you wish to roll back, then select the Restore previous version option (this option is only activated for templates whose most recent saved version is v.2 or above and is in the Need to publish status).
- In the Restore previous version pop-up, review the instructions and click the Restore button. The template will revert to the previous version.
[New] Addition of a Data Entry Saving Feature When Declining Documents
We have added a feature where when a recipient declines a document, any data they entered will remain saved.
- If you have entered any content: annotations, notes, etc. are saved when the document is declined. Note that company stamps and signatures are not saved.
- If there is no entered content: the document is declined without saving anything, same as before.
[Enhancement] Addition of a Reason Entry Feature When Downloading Uploaded Excel Files
To enhance security, we have added a feature that will require users to enter a reason when downloading files uploaded via Excel in the Bulk send inbox and the Manage bulk sent documents page.
The entered download reason is recorded in Manage company > Manage activity history > Download history.
*Only the admin and company managers can access the Manage activity history page.
[Enhancement] Enhancement of the Signature/Stamp UI/UX in Bulk Creation
We have added a feature so that when creating documents in bulk, clicking the signature icon will allow you to select your preferred method among signature/initial/stamp types.
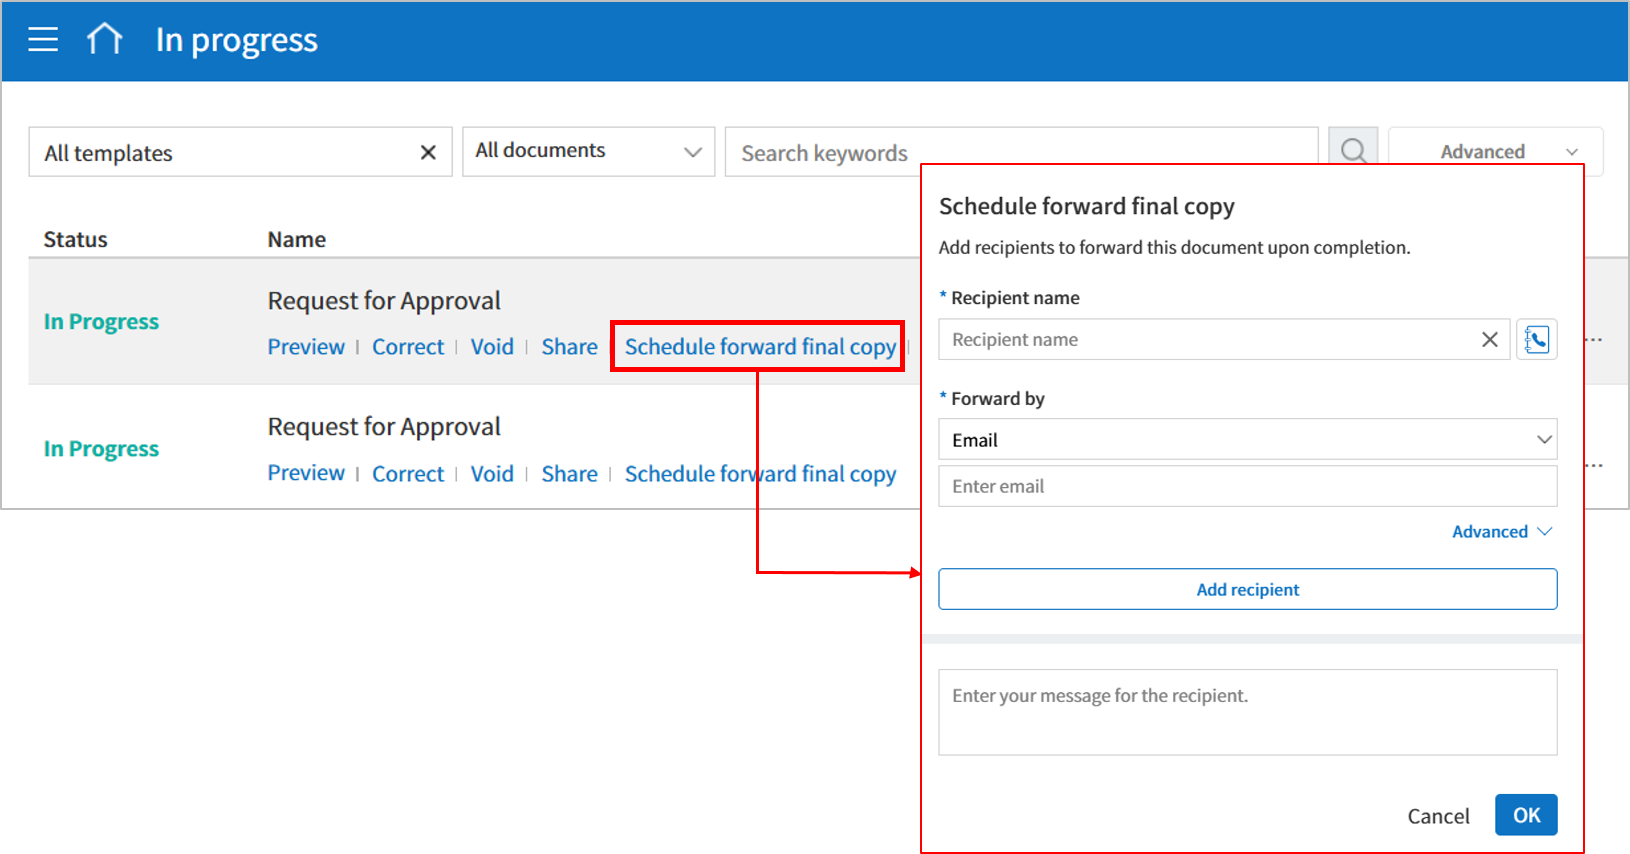
[Enhancement] Change of the Terminology for sending Completed Documents from “Send” to “Forward”
To more clearly reflect the concept of forwarding completed documents, we have added the term “Send” to “Forward”.
- Schedule send final copy → Schedule forward final copy
- Send final copy → Forward
[Other] Usability Improvements
We have also added other improvements to enhance usability.
1.Improvement of the handwriting input pop-up’s UI/UX for increased usability
2. Showing draft documents in the “Manage documents”. Previously, they were only displayed in the “In-progress” inbox.
3. Improvement of the method for adding the contact information of the member in charge of payments
- Previously, you had to enter both email and contact number in the Manage company > Company profile > Member in charge of payments, but now you only need to enter the email.
4. Limitation of the daily maximum document usage to 3,000 for monthly subscription customers to prevent service abuse.
We will continue to enhance eformsign with ongoing feature updates to provide a more secure and efficient electronic signature service. Stay tuned for more updates!