

Thanks for visiting our July product updates blog. Take a look at what eformsign has been up to this month.
When creating documents such as reservation or appointment forms, you may need to restrict users from selecting certain dates.
With this update, you can now configure the Datetime field to prevent recipients from selecting specific days of the week or specific dates.
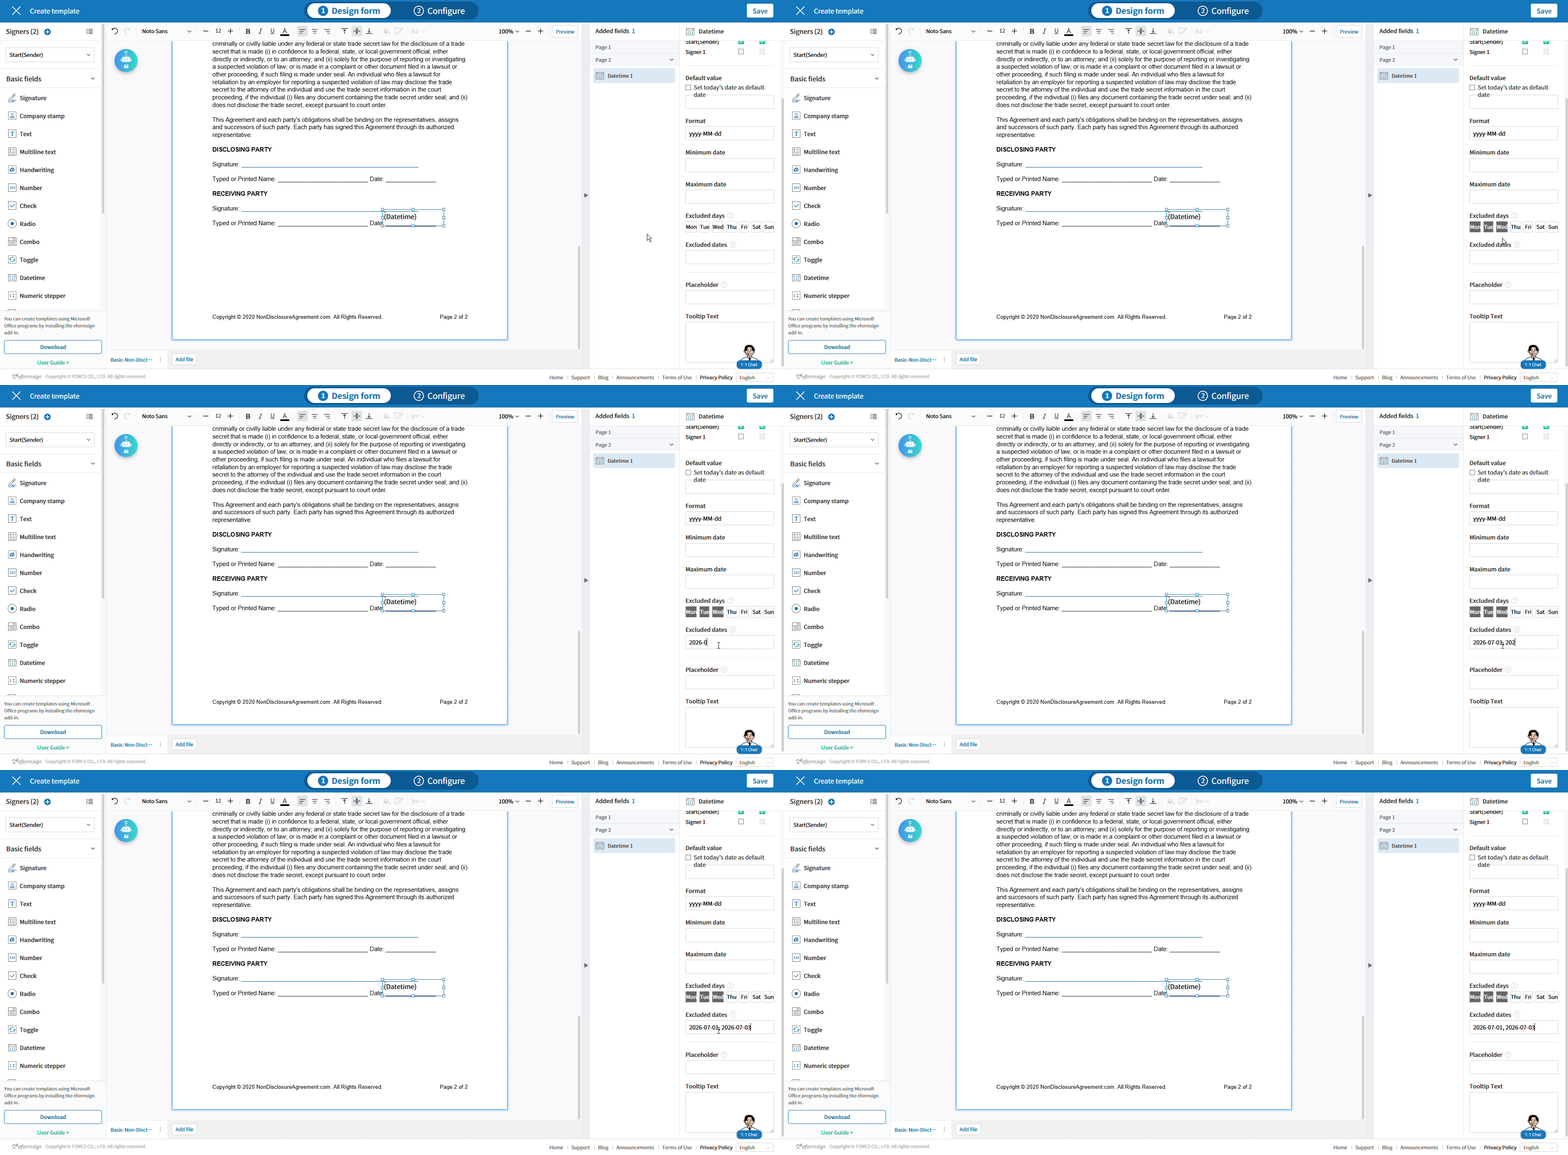
In Design form, when you configure the excluded days of the week or dates in the properties of a Datetime field, document recipients will be unable to select those days or dates.
This feature is useful for excluding weekends or public holidays, or for preventing reservations on specific dates.
✅ How to exclude days of the week
- Add a Datetime field in Design form.
- In the Datetime field properties, select the days to exclude under Excluded days.
※ You can exclude up to 6 days of the week.
✅ How to exclude specific dates
- In the Datetime field properties, enter the dates to exclude in the Excluded dates field.
- Enter the dates in the yyyy-MM-DD format, and separate multiple dates with commas (,).
💡Note
- There is no limit to the number of excluded dates you can specify.
- Dates that do not match the required format are automatically removed.
- The excluded dates feature is currently supported only on PC and mobile web, with app support coming soon.
- This feature is currently available in Design form and will be added to eformsign for Microsoft Office in a future update.
[Enhancement] Save and reuse recent rejection reasons
Previously, you had to enter the rejection reason every time you rejected a document.
With this update, your recently entered rejection reasons are automatically saved, allowing you to quickly select and reuse them the next time you reject a document.
This makes it easier to reuse frequently used rejection reasons and improves efficiency when reviewing documents.
✅ How to save a rejection reason
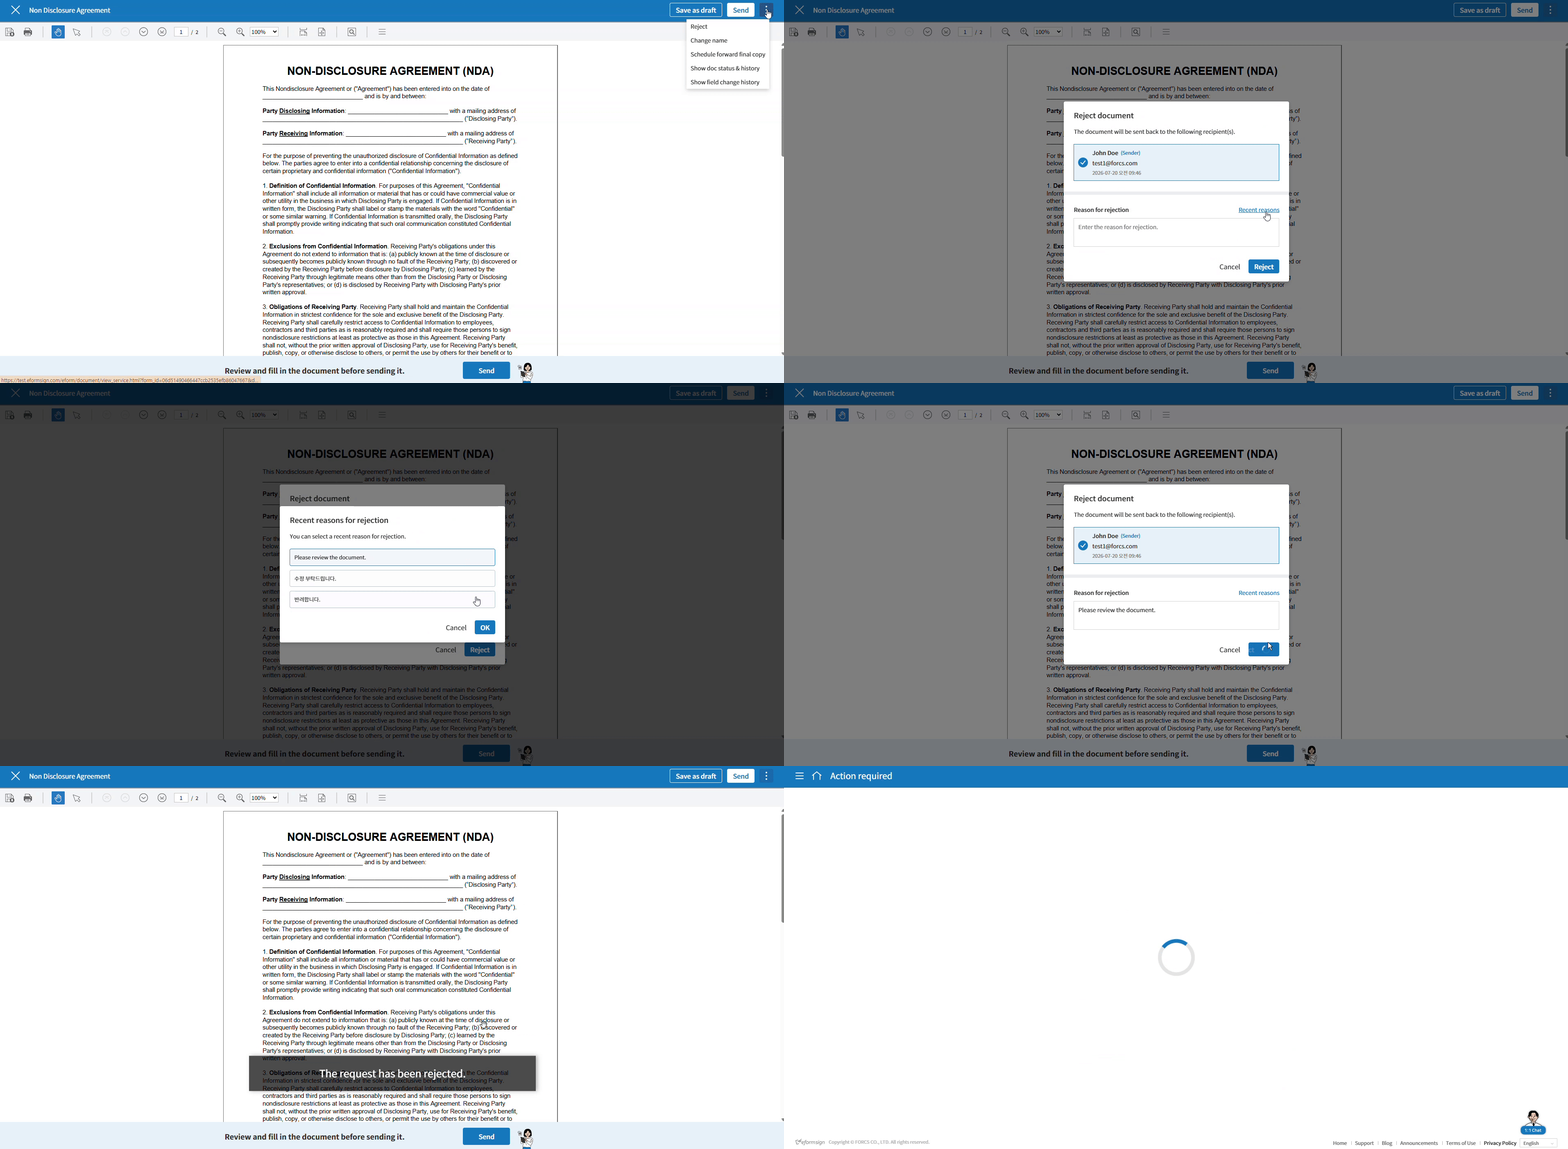
- Click Reject.
- Enter a rejection reason in the Reject document popup.
- The rejection reason is automatically saved when you click the Reject button.
✅ How to reuse a recent rejection reason
- In the Reject document popup, click Recent reasons.
- Select a rejection reason from the saved list.
- Click OK. The selected reason is automatically entered into the Reason for rejection field.
- If needed, edit the rejection reason before rejecting the document.
💡Note
- Saved rejection reasons can only be reused when the browser, account, and company are all the same.
- Up to 10 recent rejection reasons are saved.
- A rejection reason can contain up to 255 characters. Empty or whitespace-only entries are not saved.
- If the rejection field already contains text, selecting a rejection reason replaces the existing content.
- This feature is available to members only.
- If there are no saved rejection reasons, the Recent reasons button is not displayed.
[Others] Enhancements for Usability Improvements
In addition, several features have been improved and added to enhance overall usability.
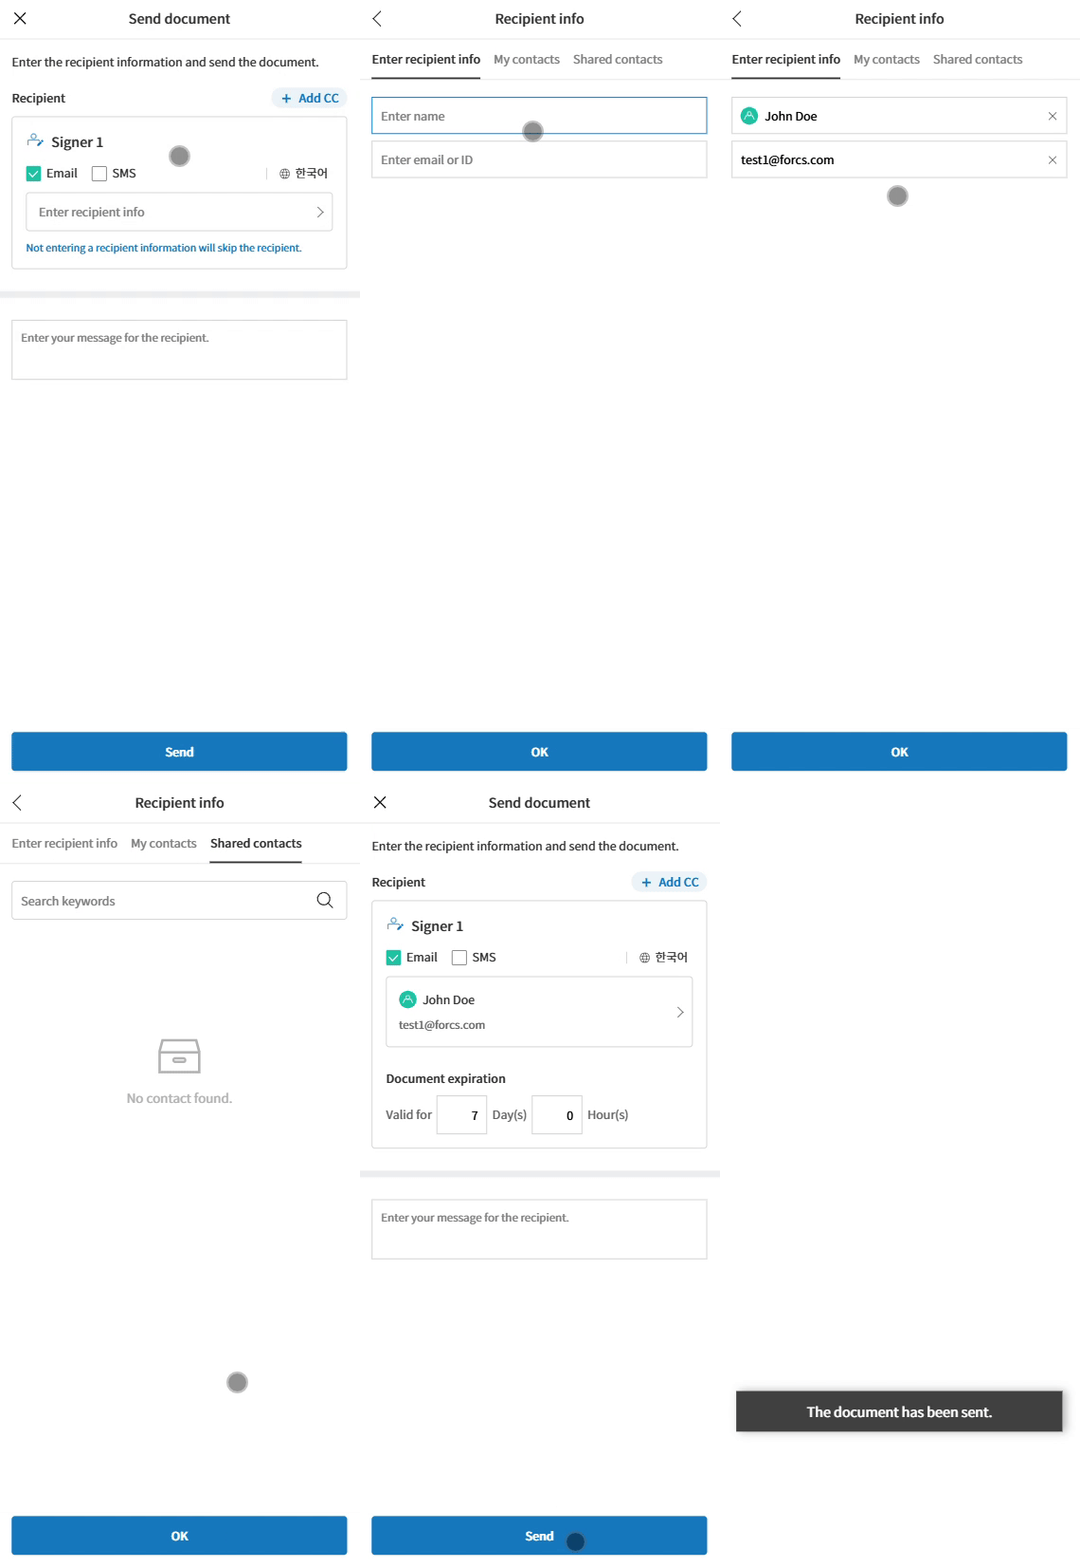
- Improved recipient selection in the document send popup when sending documents on mobile
We have made entering and searching for recipient information more intuitive when sending documents on mobile.
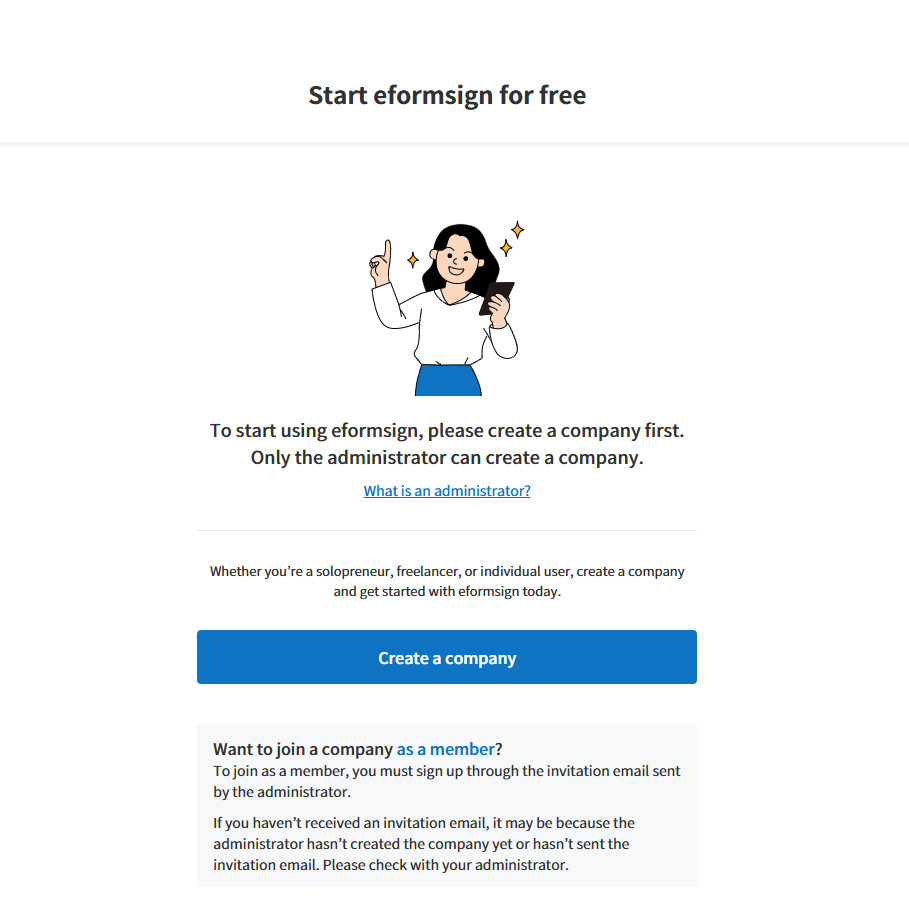
- Enhanced sign-up page and overall UI/UX
The sign-up page and overall UI/UX has been improved, making it easier and more convenient to sign up.
We will continue to enhance eformsign with ongoing feature updates to provide a more secure and efficient electronic signature service. Stay tuned for more updates!